TRee Topper
This fifteen point star looks great at the top of a tree. Easy to make. Try it and see.

Project Info
Paper required: Four sheets 8.5 x 11 inch (or A4)
Finished Project size: 8 inches (20 cm)
Difficulty Level: Beginner
INSTRUCTIONS
STEP 1
Print the pattern onto the paper of your choice.
Read the pattern key included in the General Instructions.
Step 2
Cut out the seventeen pattern pieces by cutting on the black lines around the edge of each pattern piece, including the two black lines between the two Glue Flap A’s and two Glue Flap E’s on Part 1. You should have one of Part 1, one of Part 2, seven of Part 3, and eight of Part 4.

Photo 1. Inside of Each Pattern Part After Step 2

Photo 2. Outside of Each Pattern Part After Step 2
STEP 3
On all seventeen pattern pieces, fold the green lines as valley folds.

Photo 3. Inside of Each Pattern Piece After Step 3

Photo 4. Outside of Each Pattern Piece After Step 3
Step 4
Complete Pattern Part 1. Start by gluing Flap A to the other Flap A, Flap E to the other Flap E, Flap C to the other Flap C, and Flap D to the other Flap D. Next glue Flap H to the other Flap H, Flap J to the other Flap J, and Flap F to the other Flap F. Finally, glue Flap K to the other Flap K, Flap G to the other Flap G, and Flap L to the other Flap L. Part 1 is a rhombic dodecahedron with one missing face (so the tree top can extend into Part 1). Look into the open face and mark the four diamonds on the outside which have the dashed line on the inside. I marked the example with two black dots on each of these diamond faces. For those that are interested, the rhombic dodecahedron is one of the thirteen Catalan Solids.

Photo 5. Completed Part 1

Photo 6. Completed Part 1, Another View
Step 5
Complete the Part 2 by gluing Flap 1 to the other Flap 1. Next attach Part 2 to Part 1 by gluing the four Flap B’s on Part 2 to the four Flap B’s on Part 1.

Photo 7. Completed Part 2
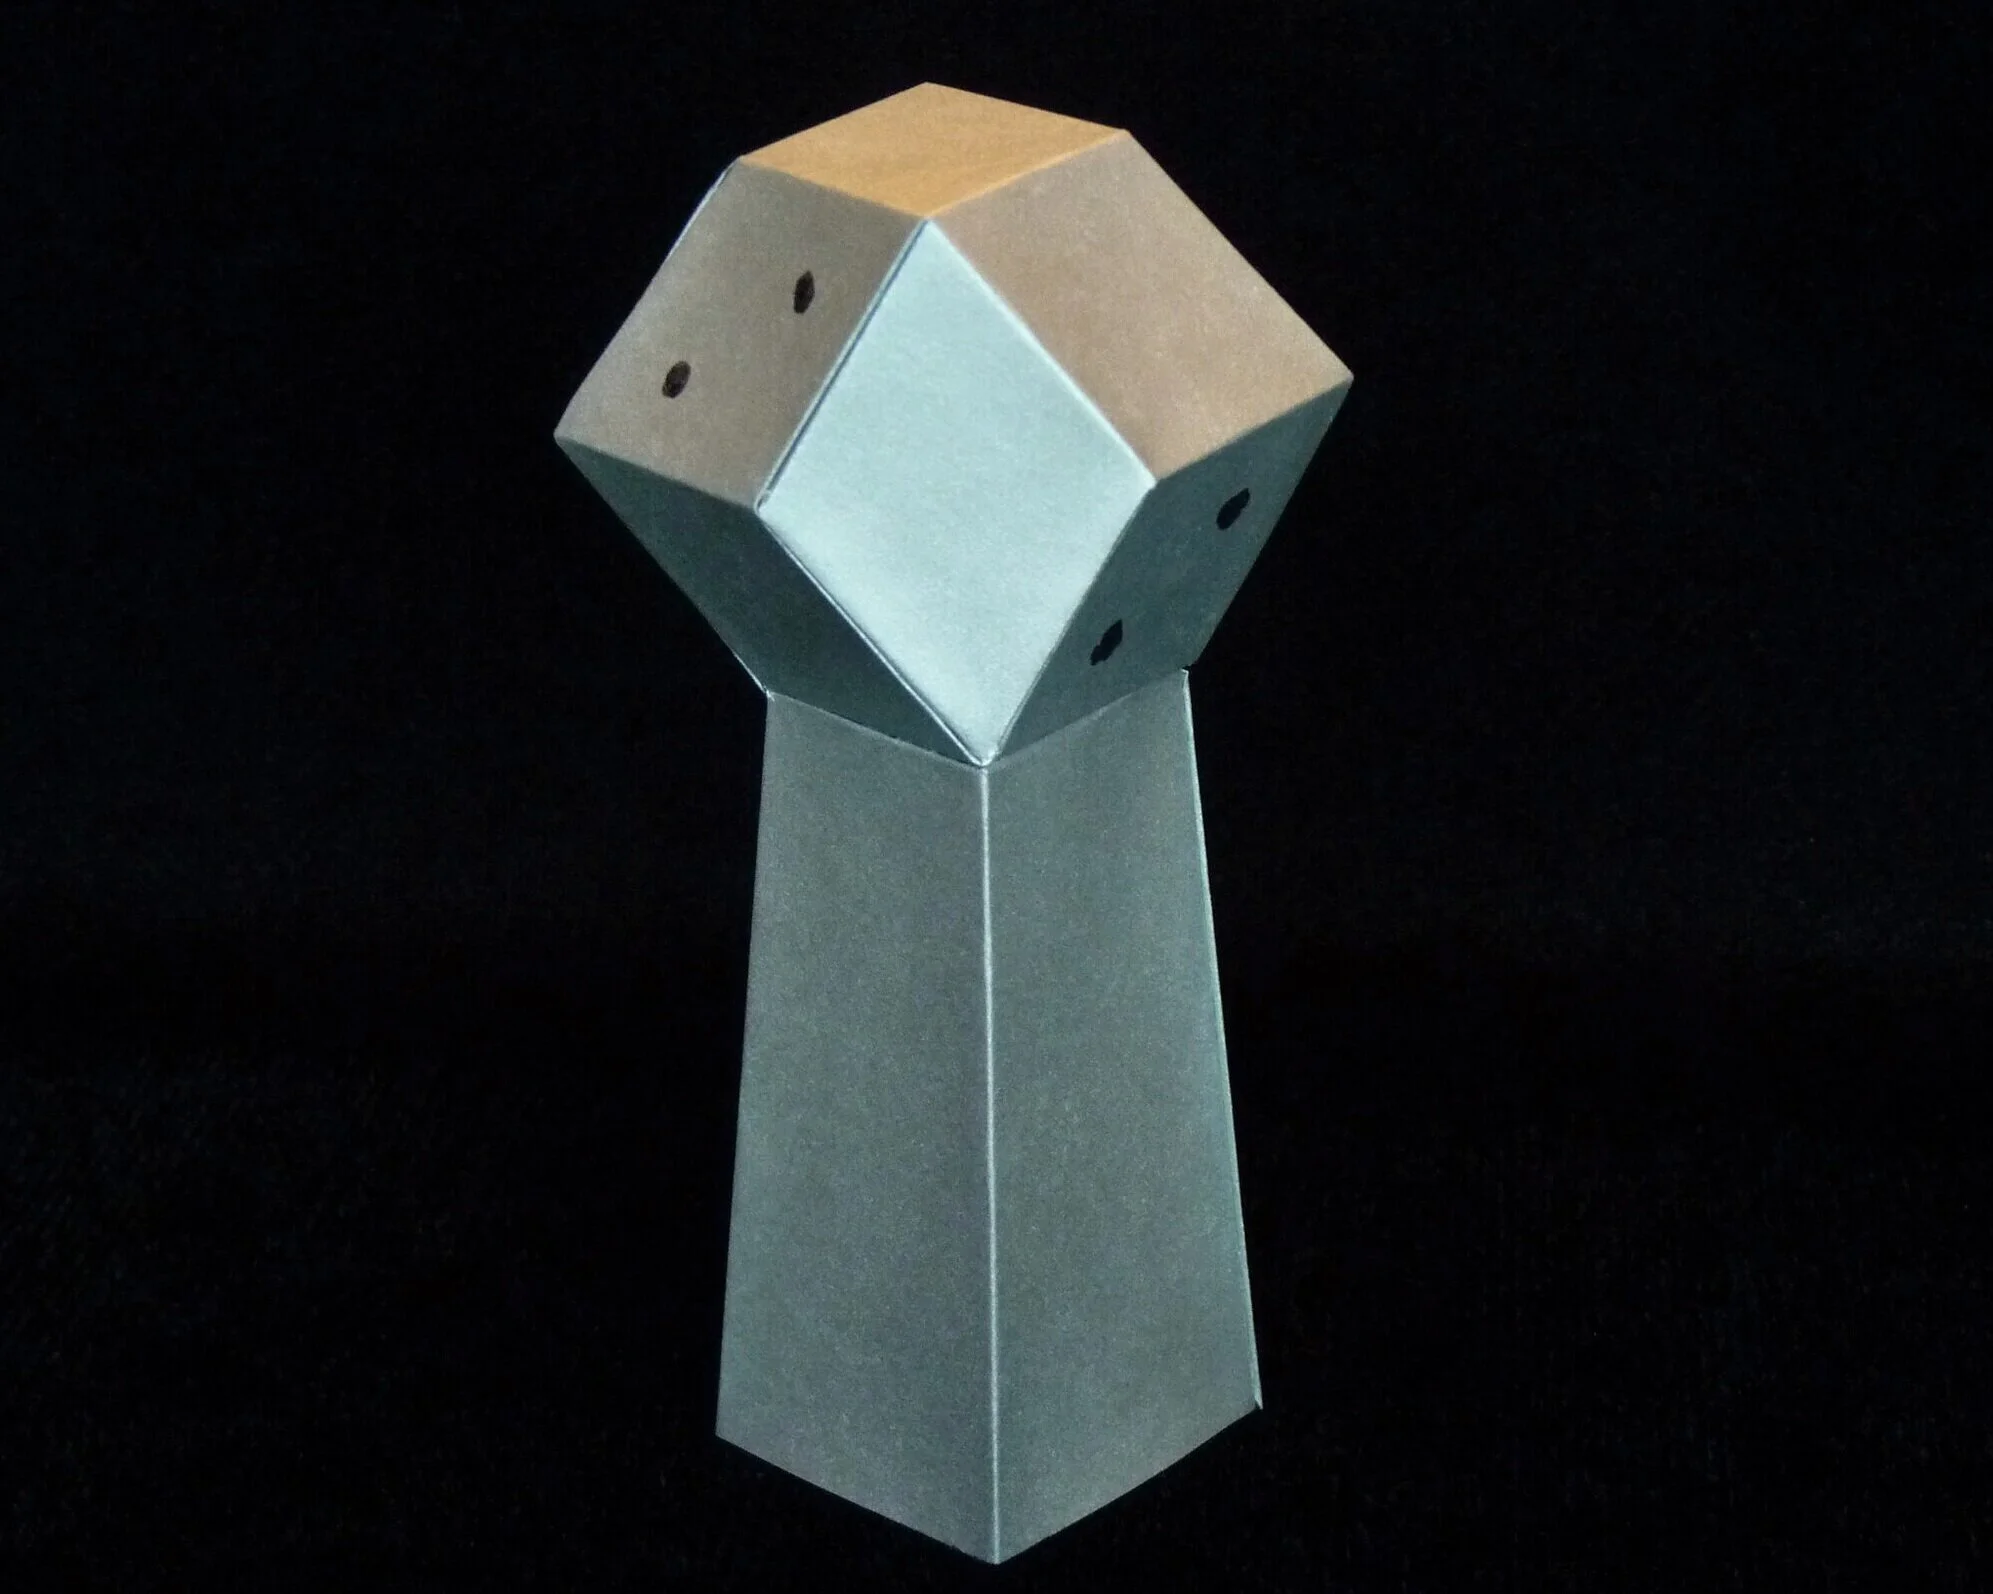
Photo 8. Part 1 and Part 2 Assembled
Step 6
Next complete the seven Part 3’s and the eight Part 4’s. On each of the fifteen parts, glue Flap 1 to the other Flap 1.

Photo 9. Two Completed Part 3’s

Photo 10. Two Completed Part 4’s
Step 7
Attach the seven Part 3’s to Part 1. Each Part 3 attaches to one of the diamond faces on Part 1 that has not been marked with black dots. Use the four Flap 2’s on each Part 3 to glue it to Part 1. Align so that the seam on each Part 3 is on the long side of the diamond face.

Photo 11. Project Side View After Step 7

Photo 12. Project Top View After Step 7
Step 8
Complete the project by attaching the eight Part 4’s to Part 1. Two Part 4’s attach to each diamond face on Part 1 which has been marked with black dots. Use the three glue flaps on each Part 4 to attach it to Part 1. Align so that the Glue Flap 3 crosses the center of the diamond face.
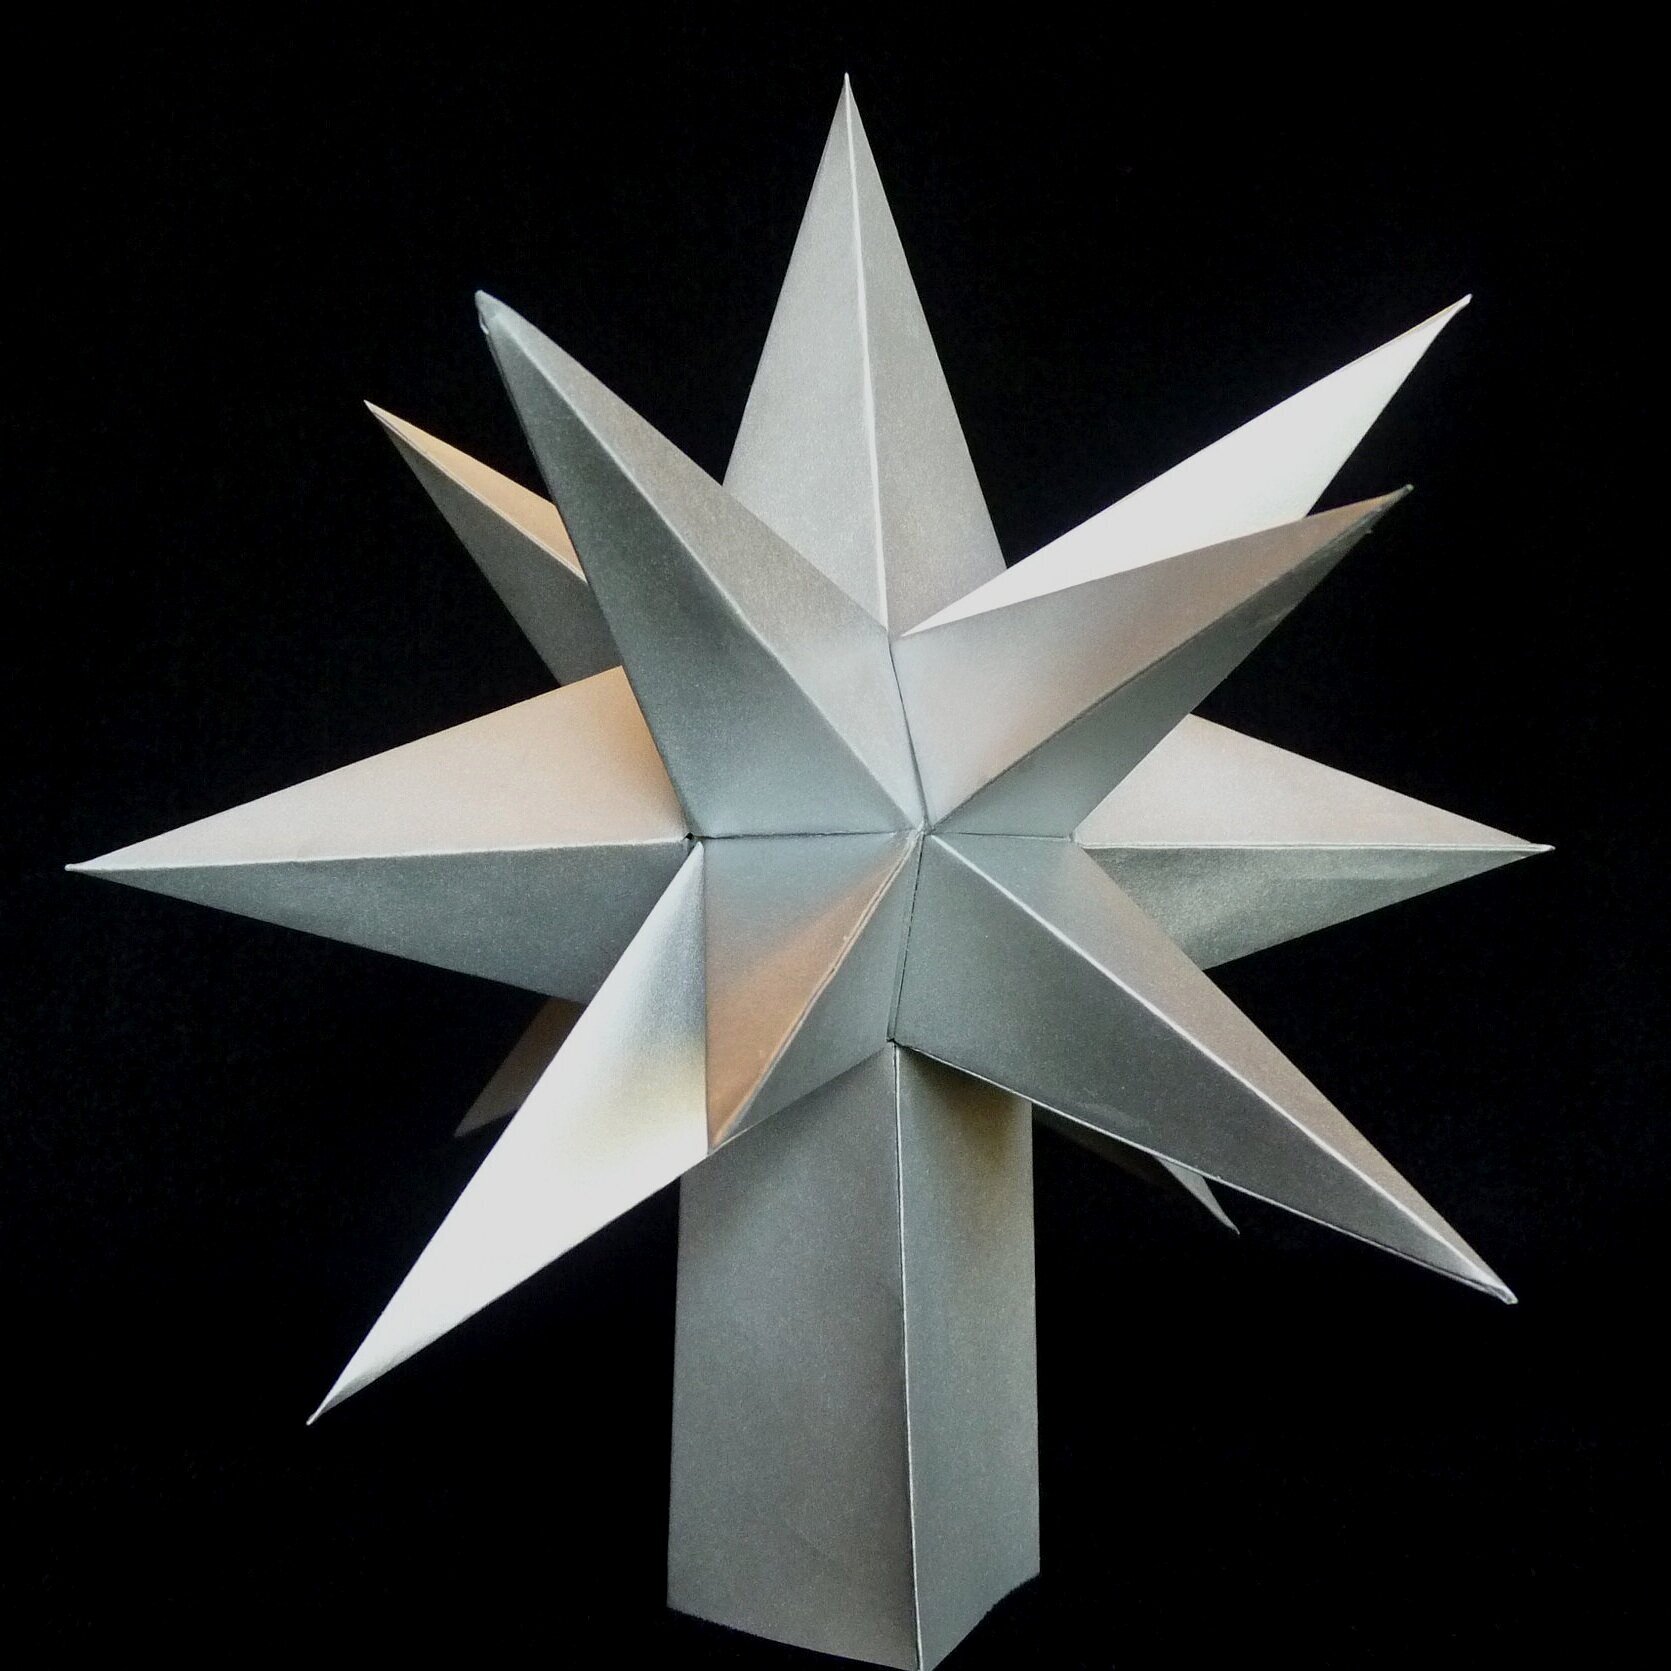
Photo 13 . Completed Tree Topper Project, View 1

Photo 14. Completed Tree Topper Project, View 2
Matching Tree Ornament

Photo 15. Tree Topper with Matching Tree Ornament
See the Dodecahedron Star project to make the matching tree ornament.
Two More Examples

Photo 16. Another Tree Topper Example. Blue wrapping paper glued to office paper before pattern printing (to make it stiff enough).

Photo 17. Another Tree Topper Example. Gold shiny paper sanded slightly and over-painted with red ink.