Worm Hole
Create your Worm Hole today and make your escape to another galaxy !

Project Info
Paper required: three sheets 8.5 x 11 inch (or A4)
Finished Project size: 4.5 inches (11cm)
Difficulty Level: Intermediate
Click button below to get your free printable pattern !
Click button below to get your free printable pattern !
INSTRUCTIONS
STEP 1
Print the Worm Hole pattern onto the three matching paper sheets of your choice.
Read the pattern key included in the General Instructions.
Step 2
Cut out the thirteen parts by cutting on all black lines. There is one base part, eight Type 1 bands, and four Type 2 bands.
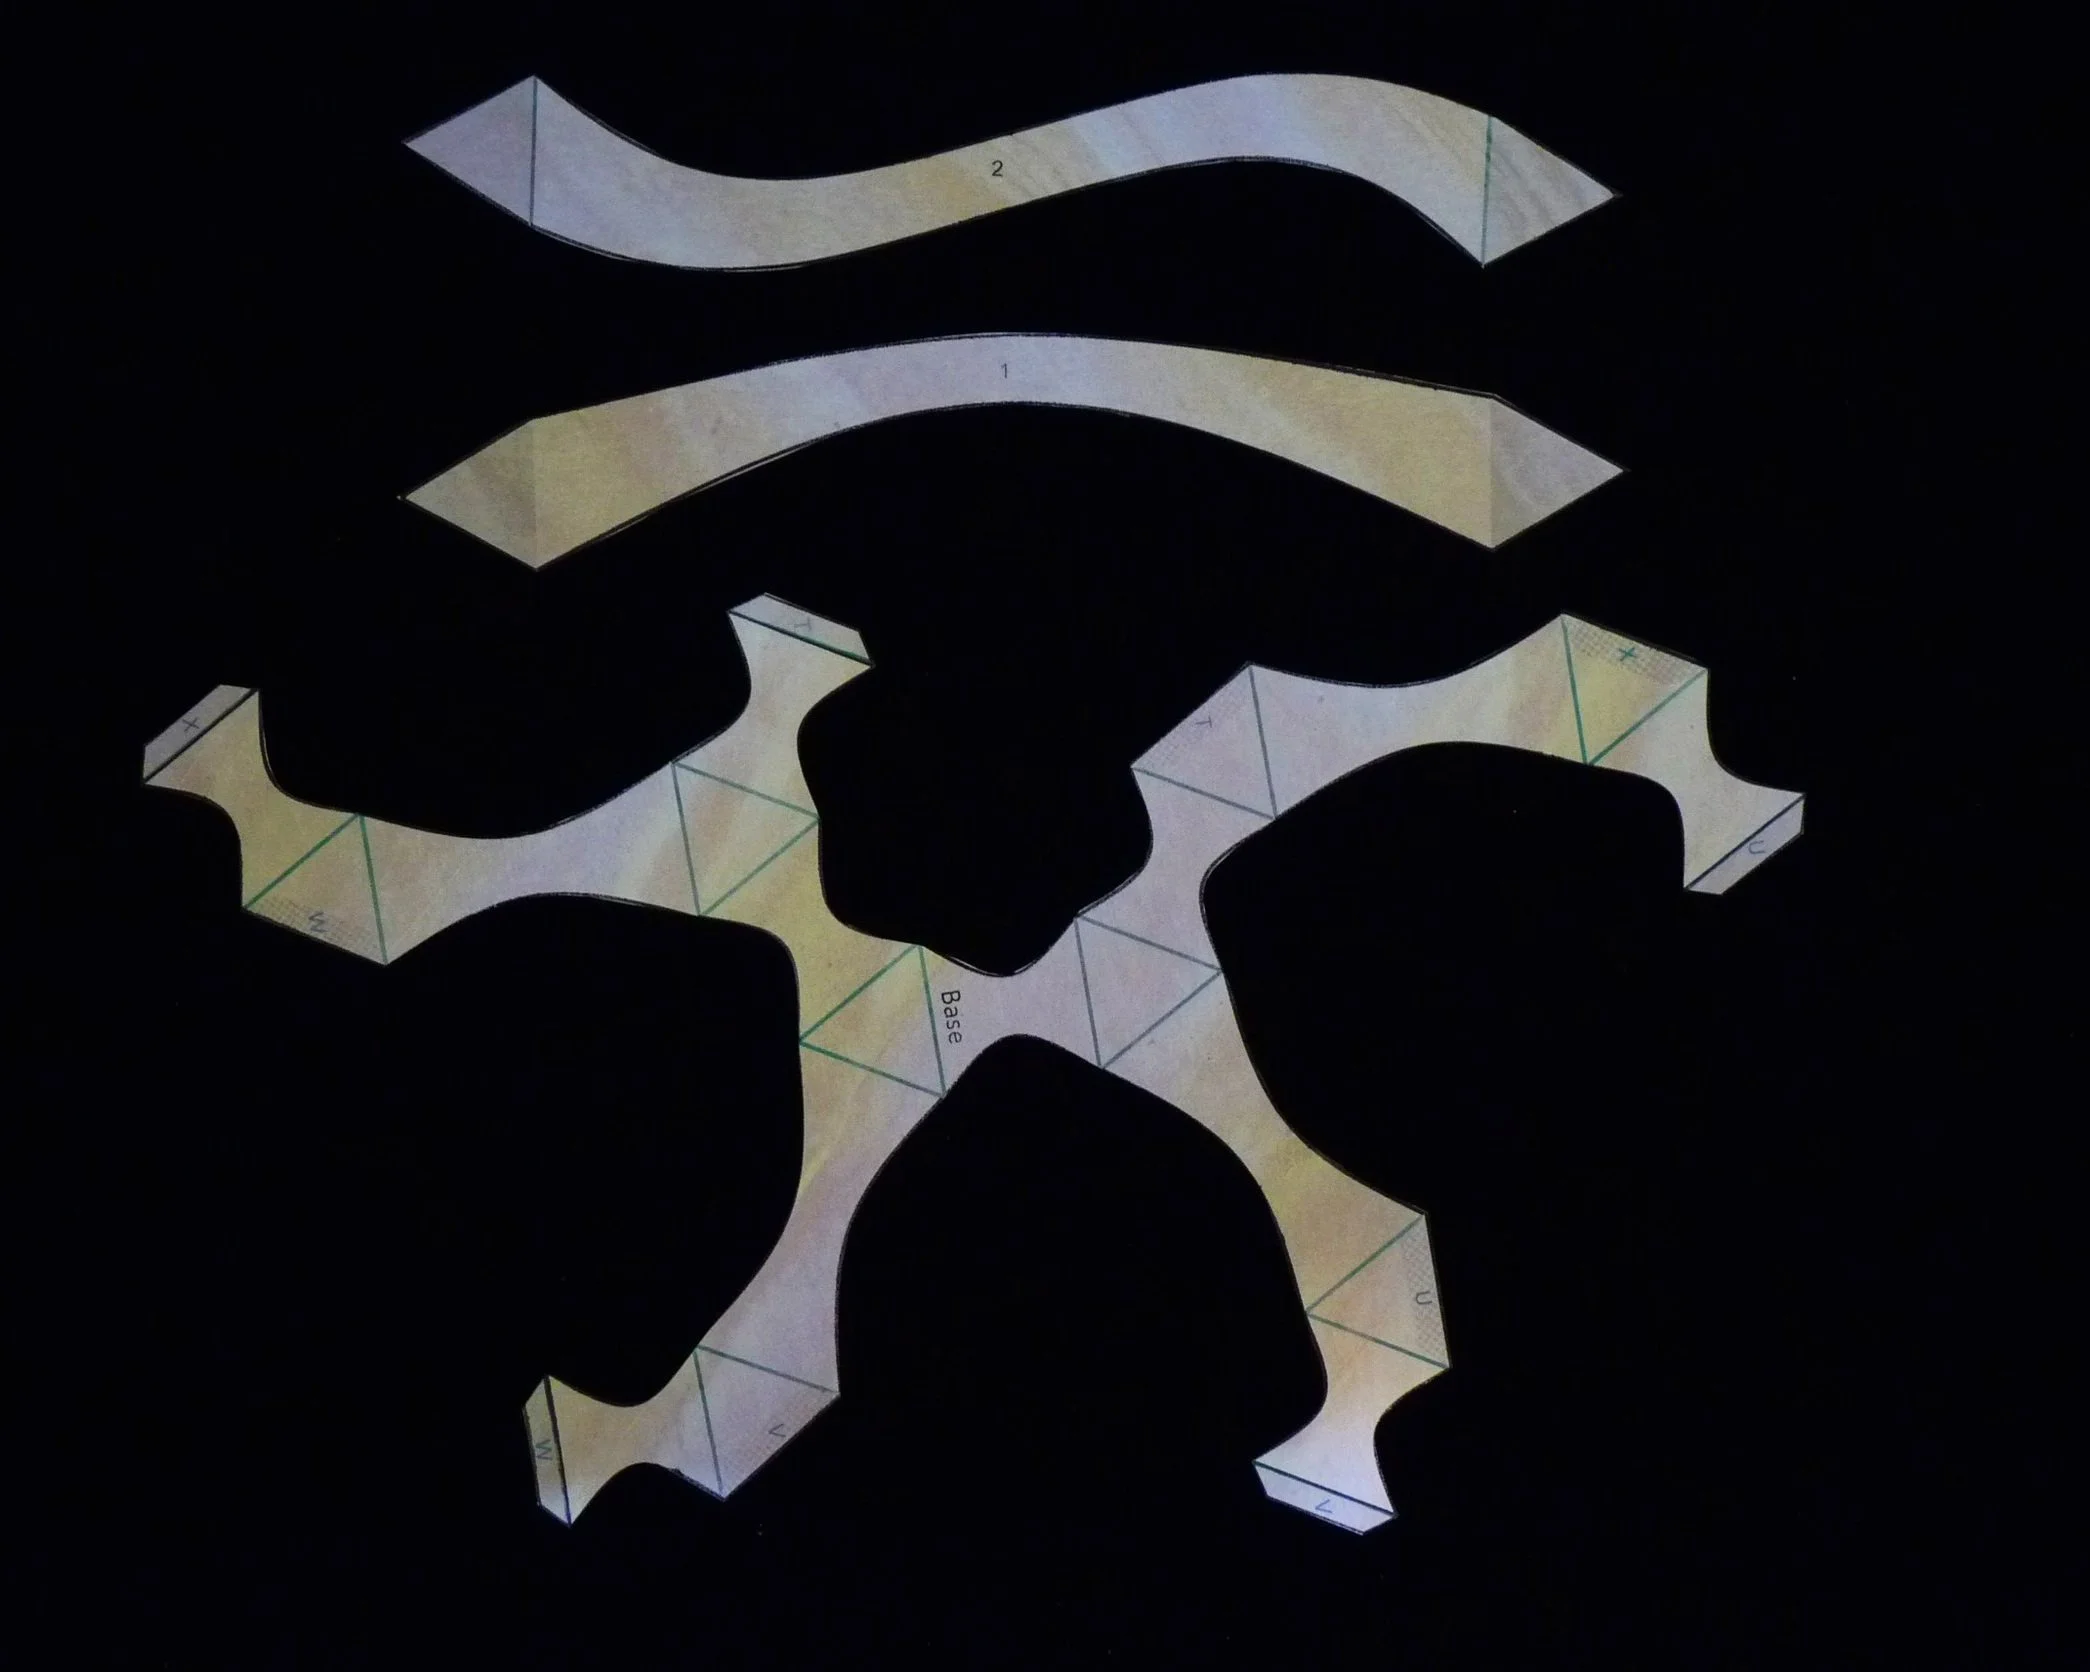
Photo 1. Back of Three Parts after Step 2
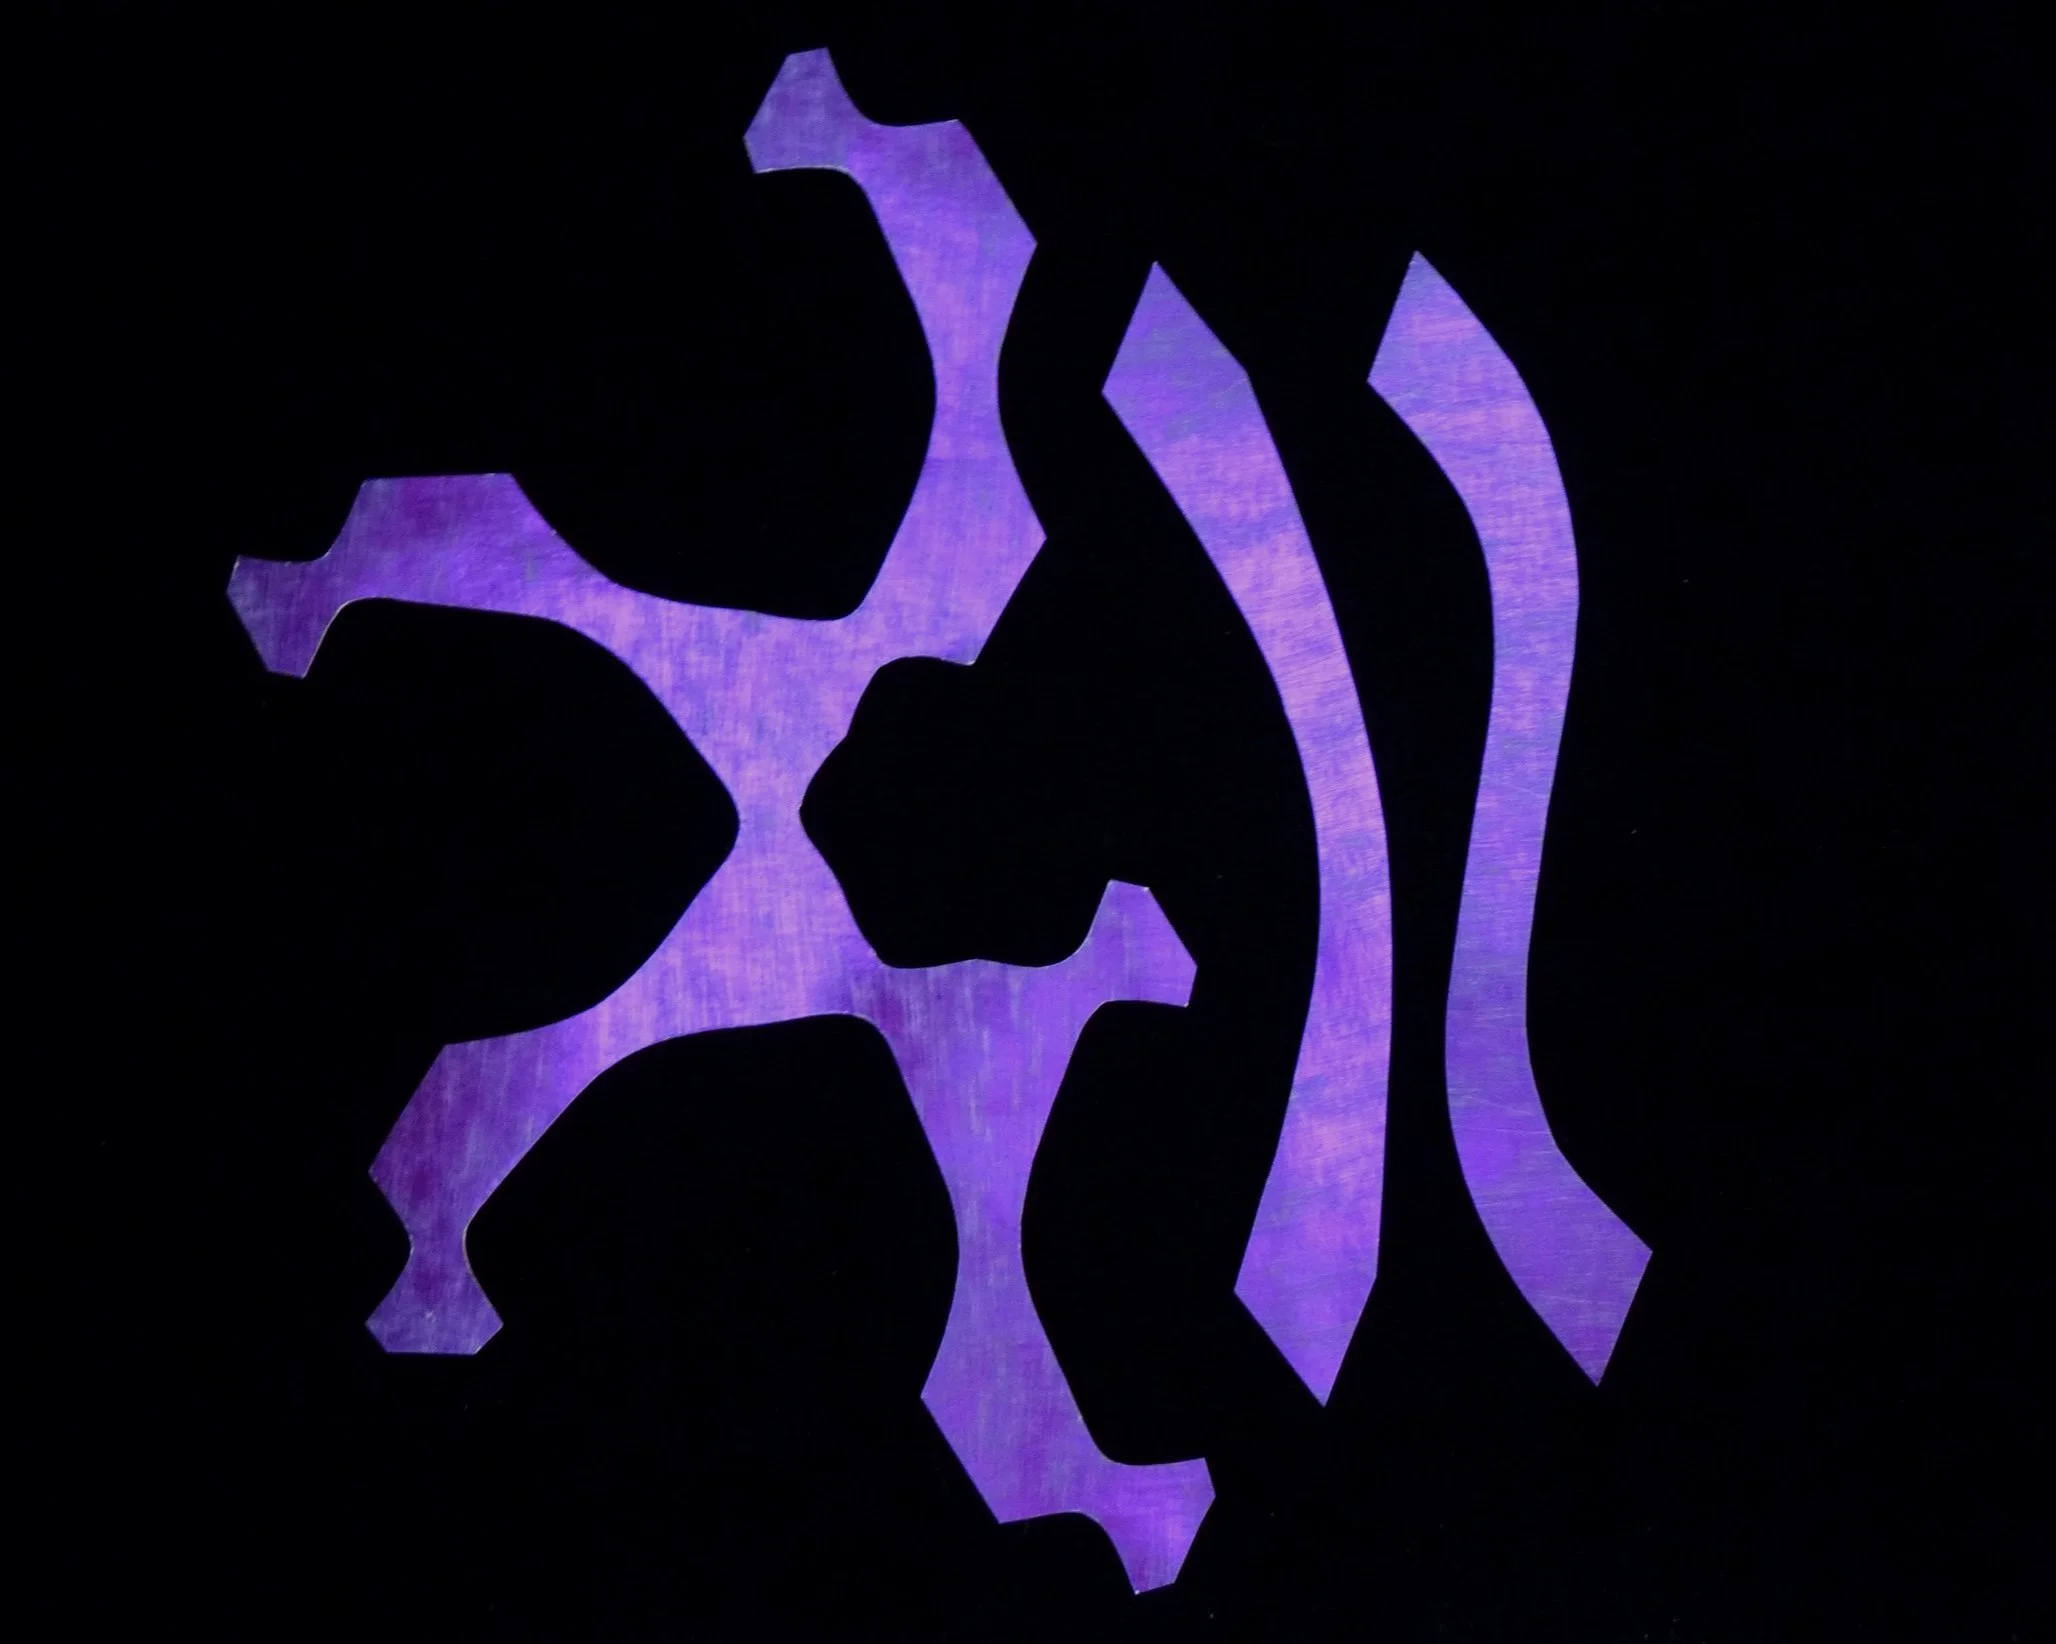
Photo 2. Front of Three Parts after Step 2.
STEP 3
On the Base part and on the four Type 2 bands, fold the green lines as valley folds.
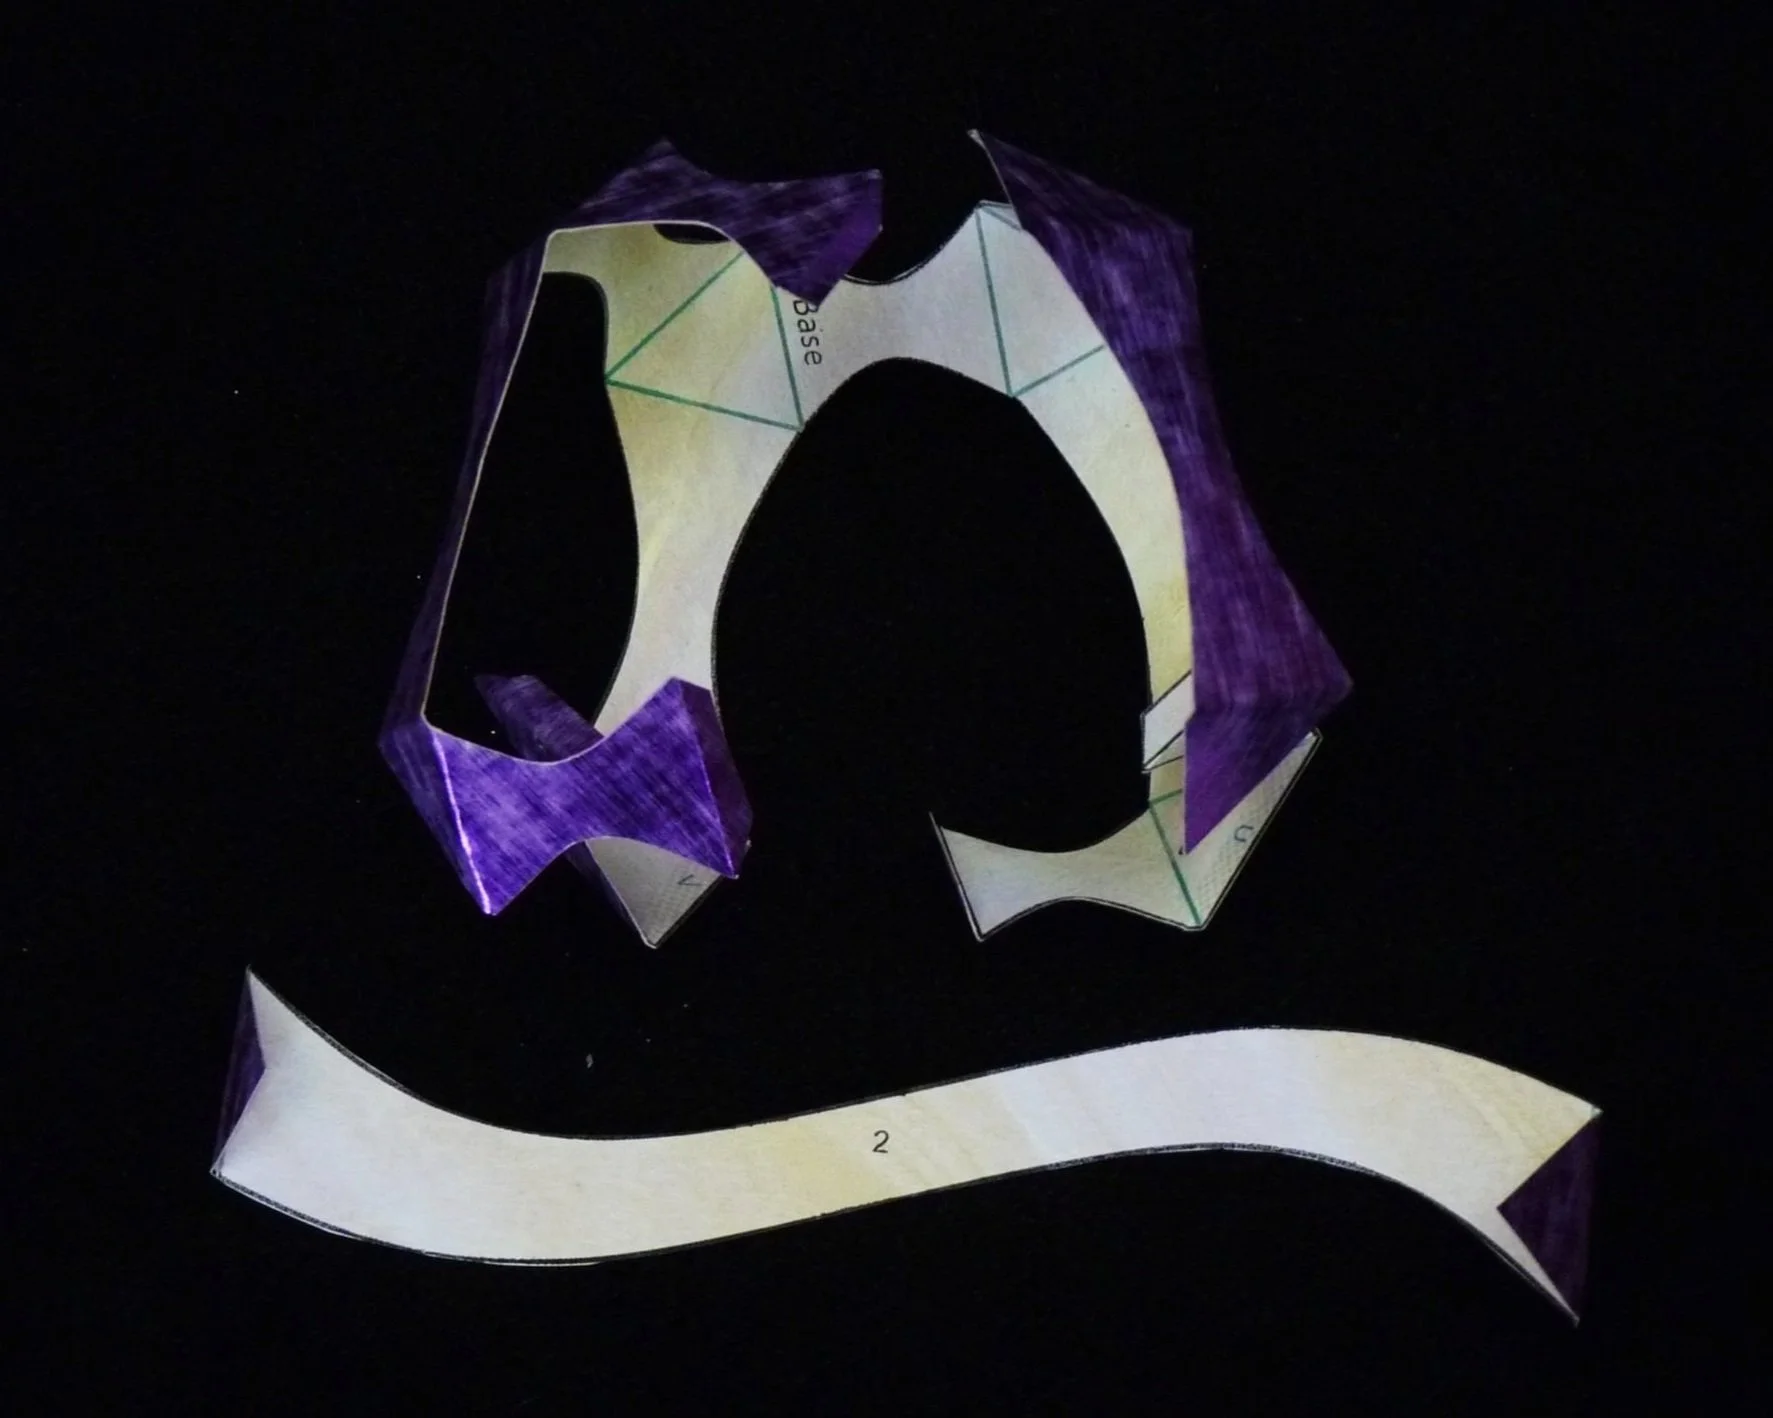
Photo 3. Back of Parts after Step 3

Photo 4. Front of Parts after Step 3
Step 4
On the Base part and on the four Type 2 bands, fold the green lines as valley folds.

Photo 5. Base Part after Step 4
Step 5
Attach four Type 1 bands to the base. With base set vertically (that is with circle opening at the top/bottom, and oval openings on the sides), glue a triangle on a Type 1 band to each of the upper triangles on the base with the tip pointed upward and curve in the band outward to the left (see Photo 6). Attach other end of each Type 1 band diagonally across the oval to the right to one of the lower triangles on the base with the tip oriented horizontally to the right (See photo 7).

Photo 6. Step 5 - Bands Connected at Top

Photo 7. Step 5 - Bands Connected at Top and Bottom
Step 6
Turn the base over, and attach four more Type 1 bands to the base in the same way. With base set vertically (that is with circle opening at the top/bottom, and oval openings on the sides), glue a triangle on a Type 1 band to each of the upper triangles on the base, on top of the band triangle placed in Step 5, with the tip pointed upward and curve in the band outward to the left (see Photo 8). Attach other end of each Type 1 band diagonally across the oval to the right to one of the lower triangles on the base, again on top of the band triangle placed in Step 5, with the tip oriented horizontally to the right (See photo 9).
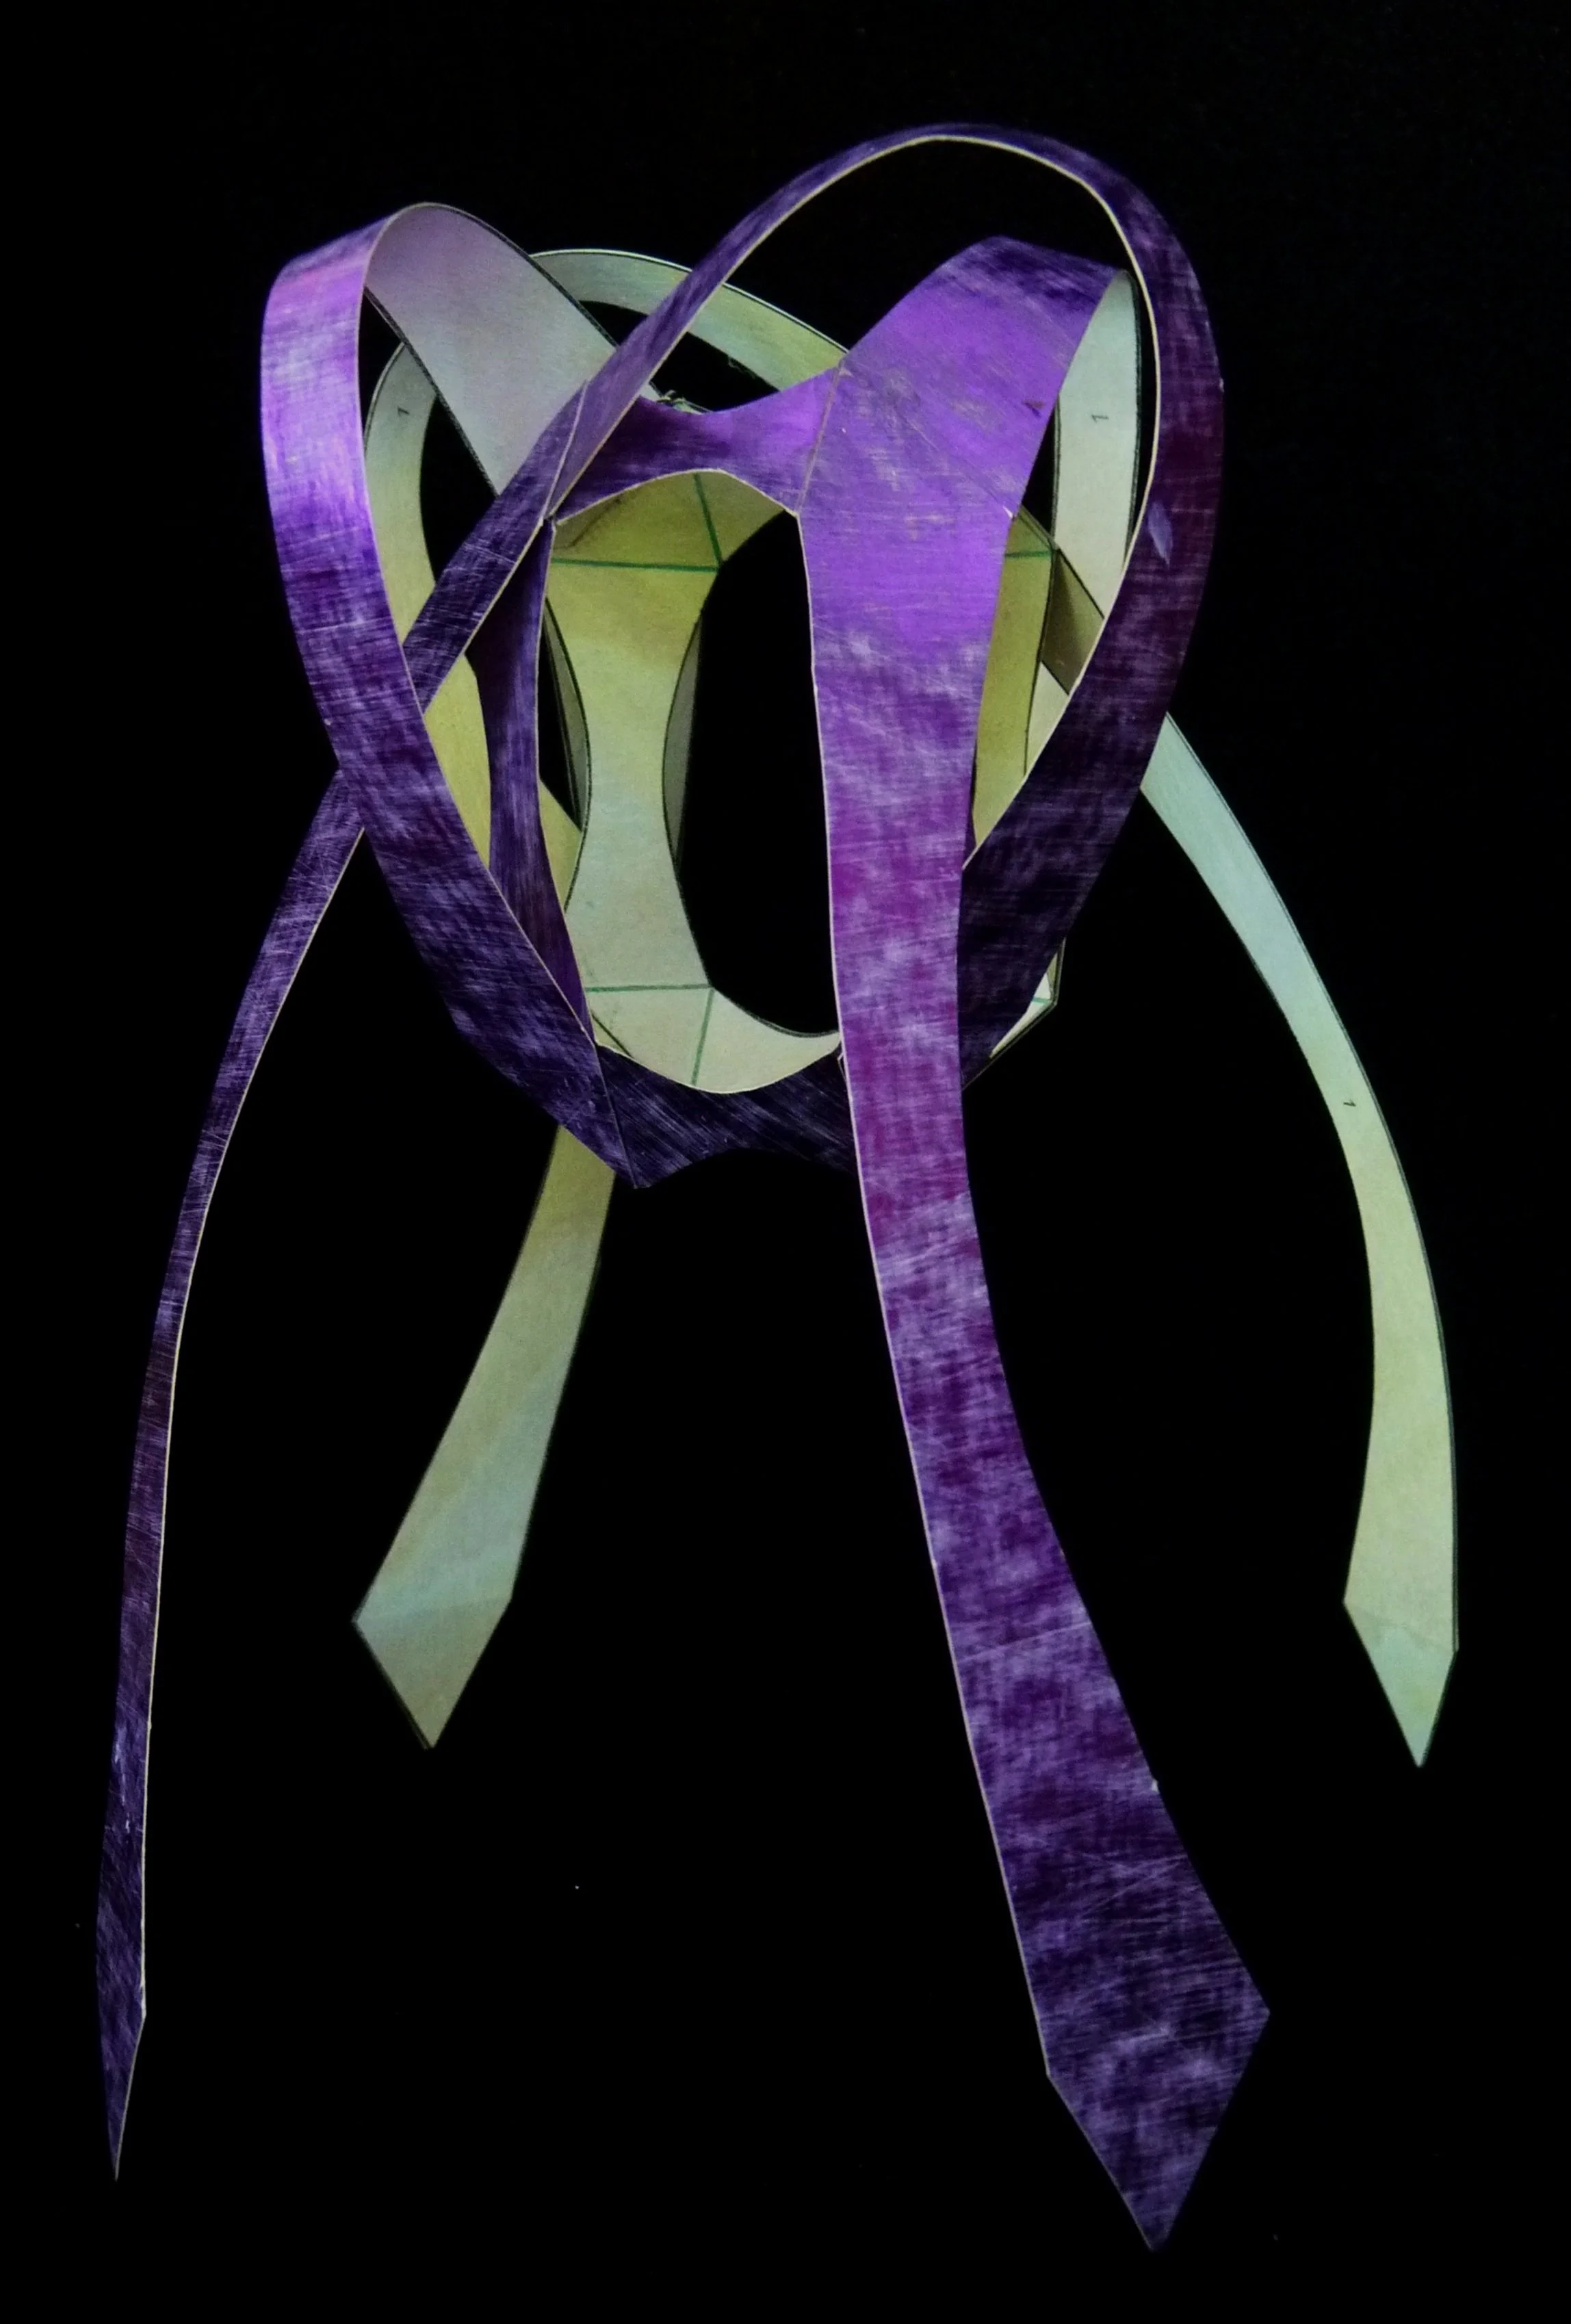
Photo 8. Step 6 - Bands Connected at Top
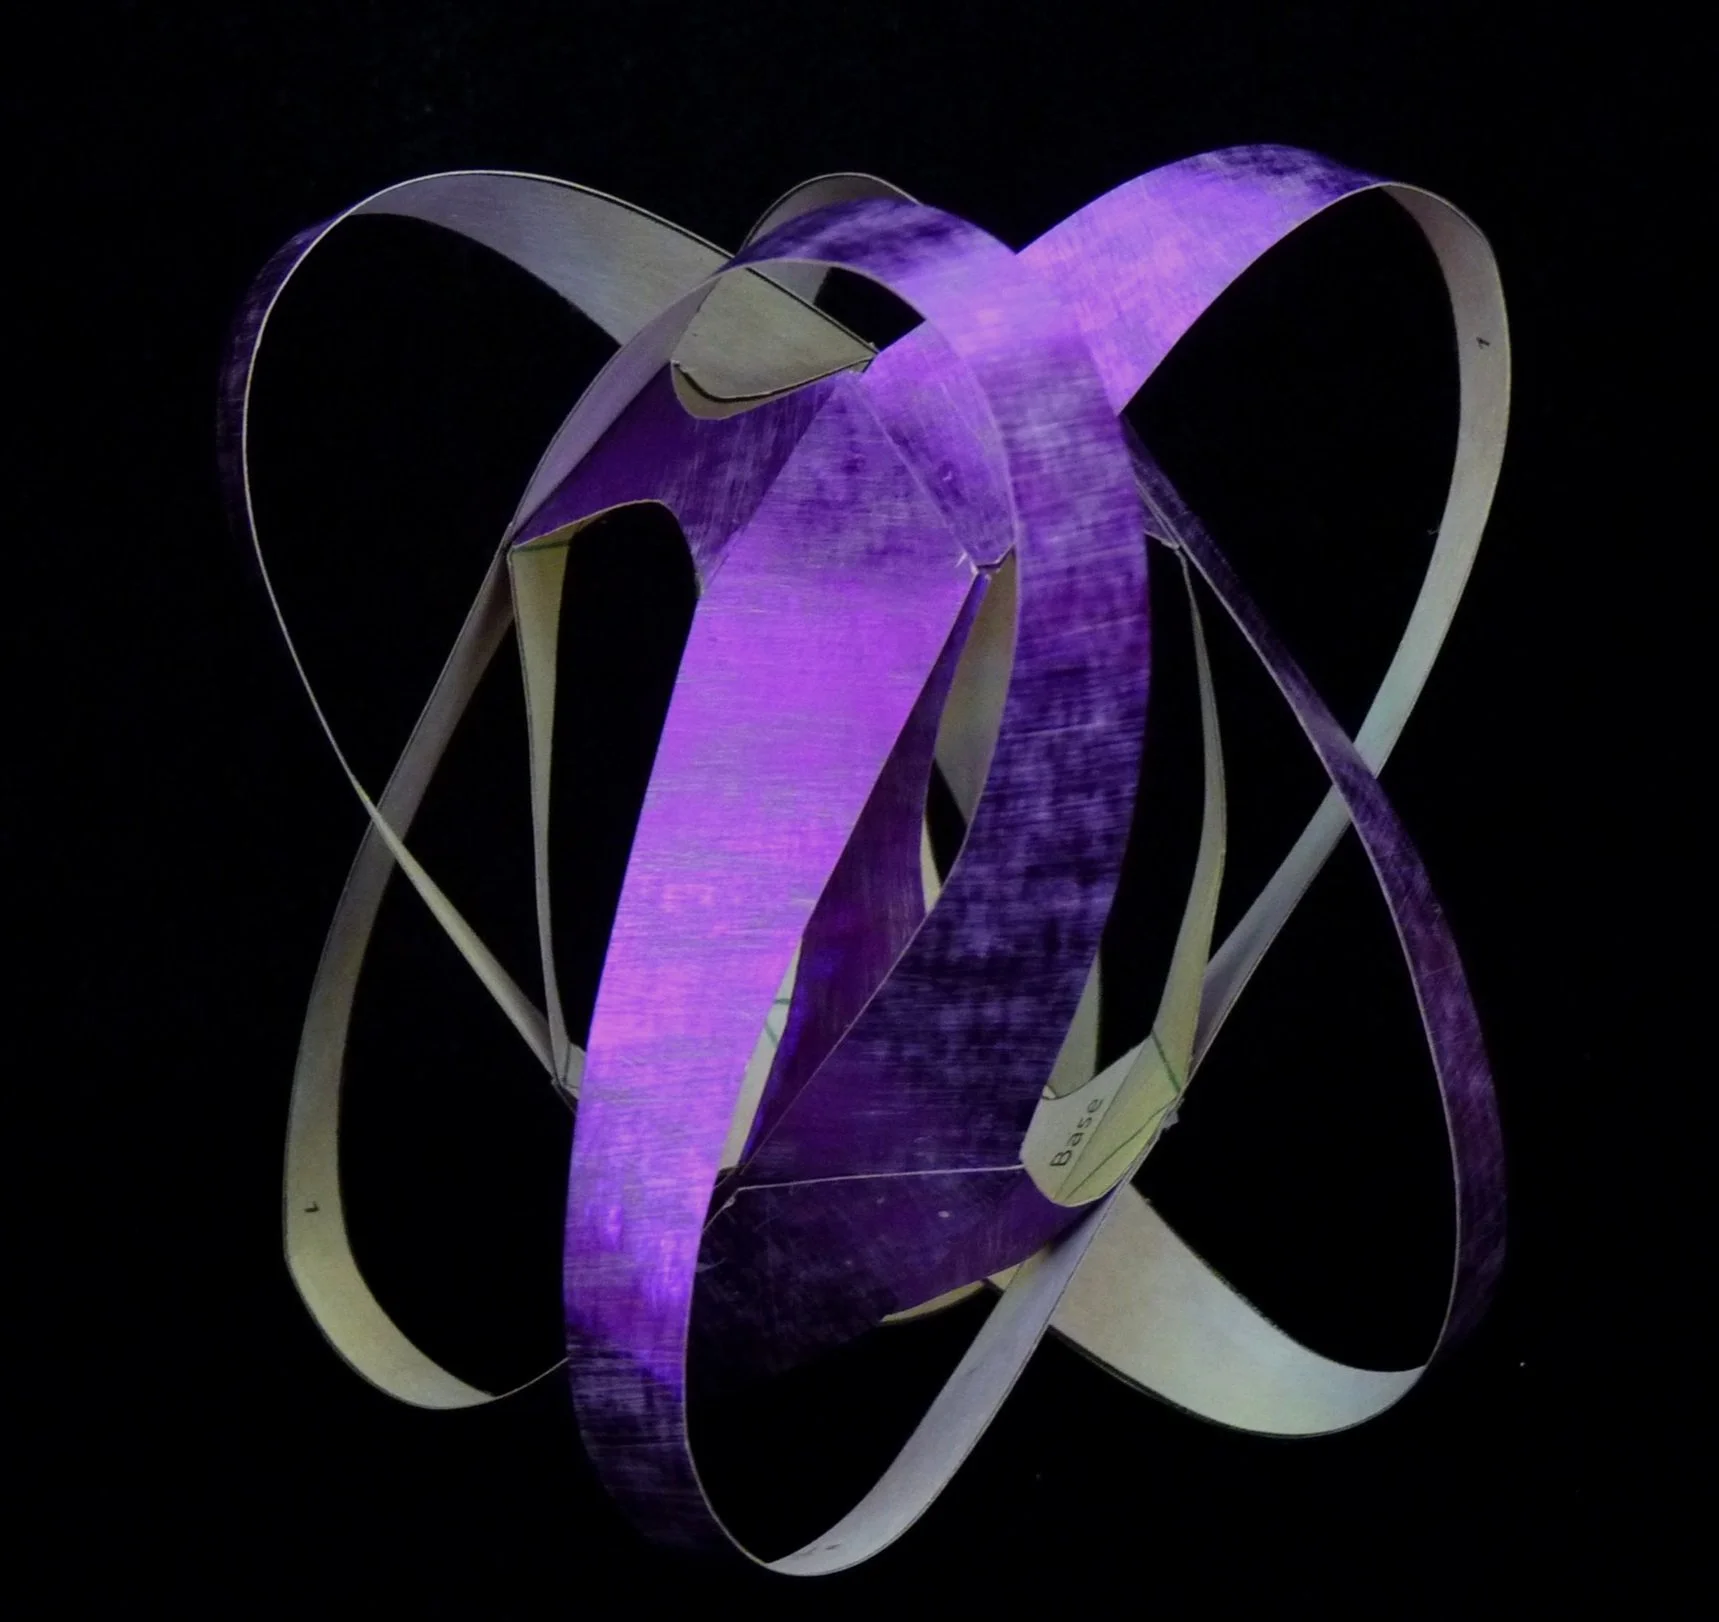
Photo 9. Step 6 - Bands Connected at Top and Bottom
Step 7
Complete the Worm Hole by attaching the four Type 2 bands. Glue a triangle on each end of each Type 2 Band to a triangle on diagonally opposite sides of each oval of the base (on top of other band triangles), with the triangles at each end folded under the band.

Photo 10. Completed Worm Hole - Side View 1

Photo 11. Completed Worm Hole - Side View 2

Photo 12 . Completed Worm Hole - End View
Yes, I am a Murderbot fan. Are you?