Twister
Try the twister. It’s twisting and turning in every dimension.

Project Info
Paper required: two sheets 8.5 x 11 inch (or A4)
Finished Project size: 6 inches (15 cm)
Difficulty level: Beginner
INSTRUCTIONS
STEP 1
Print the Twister pattern onto the two matching paper sheets of your choice.
Read the pattern key included in the General Instructions.
Step 2
Cut out the one base part and twelve point parts by cutting on all black lines.
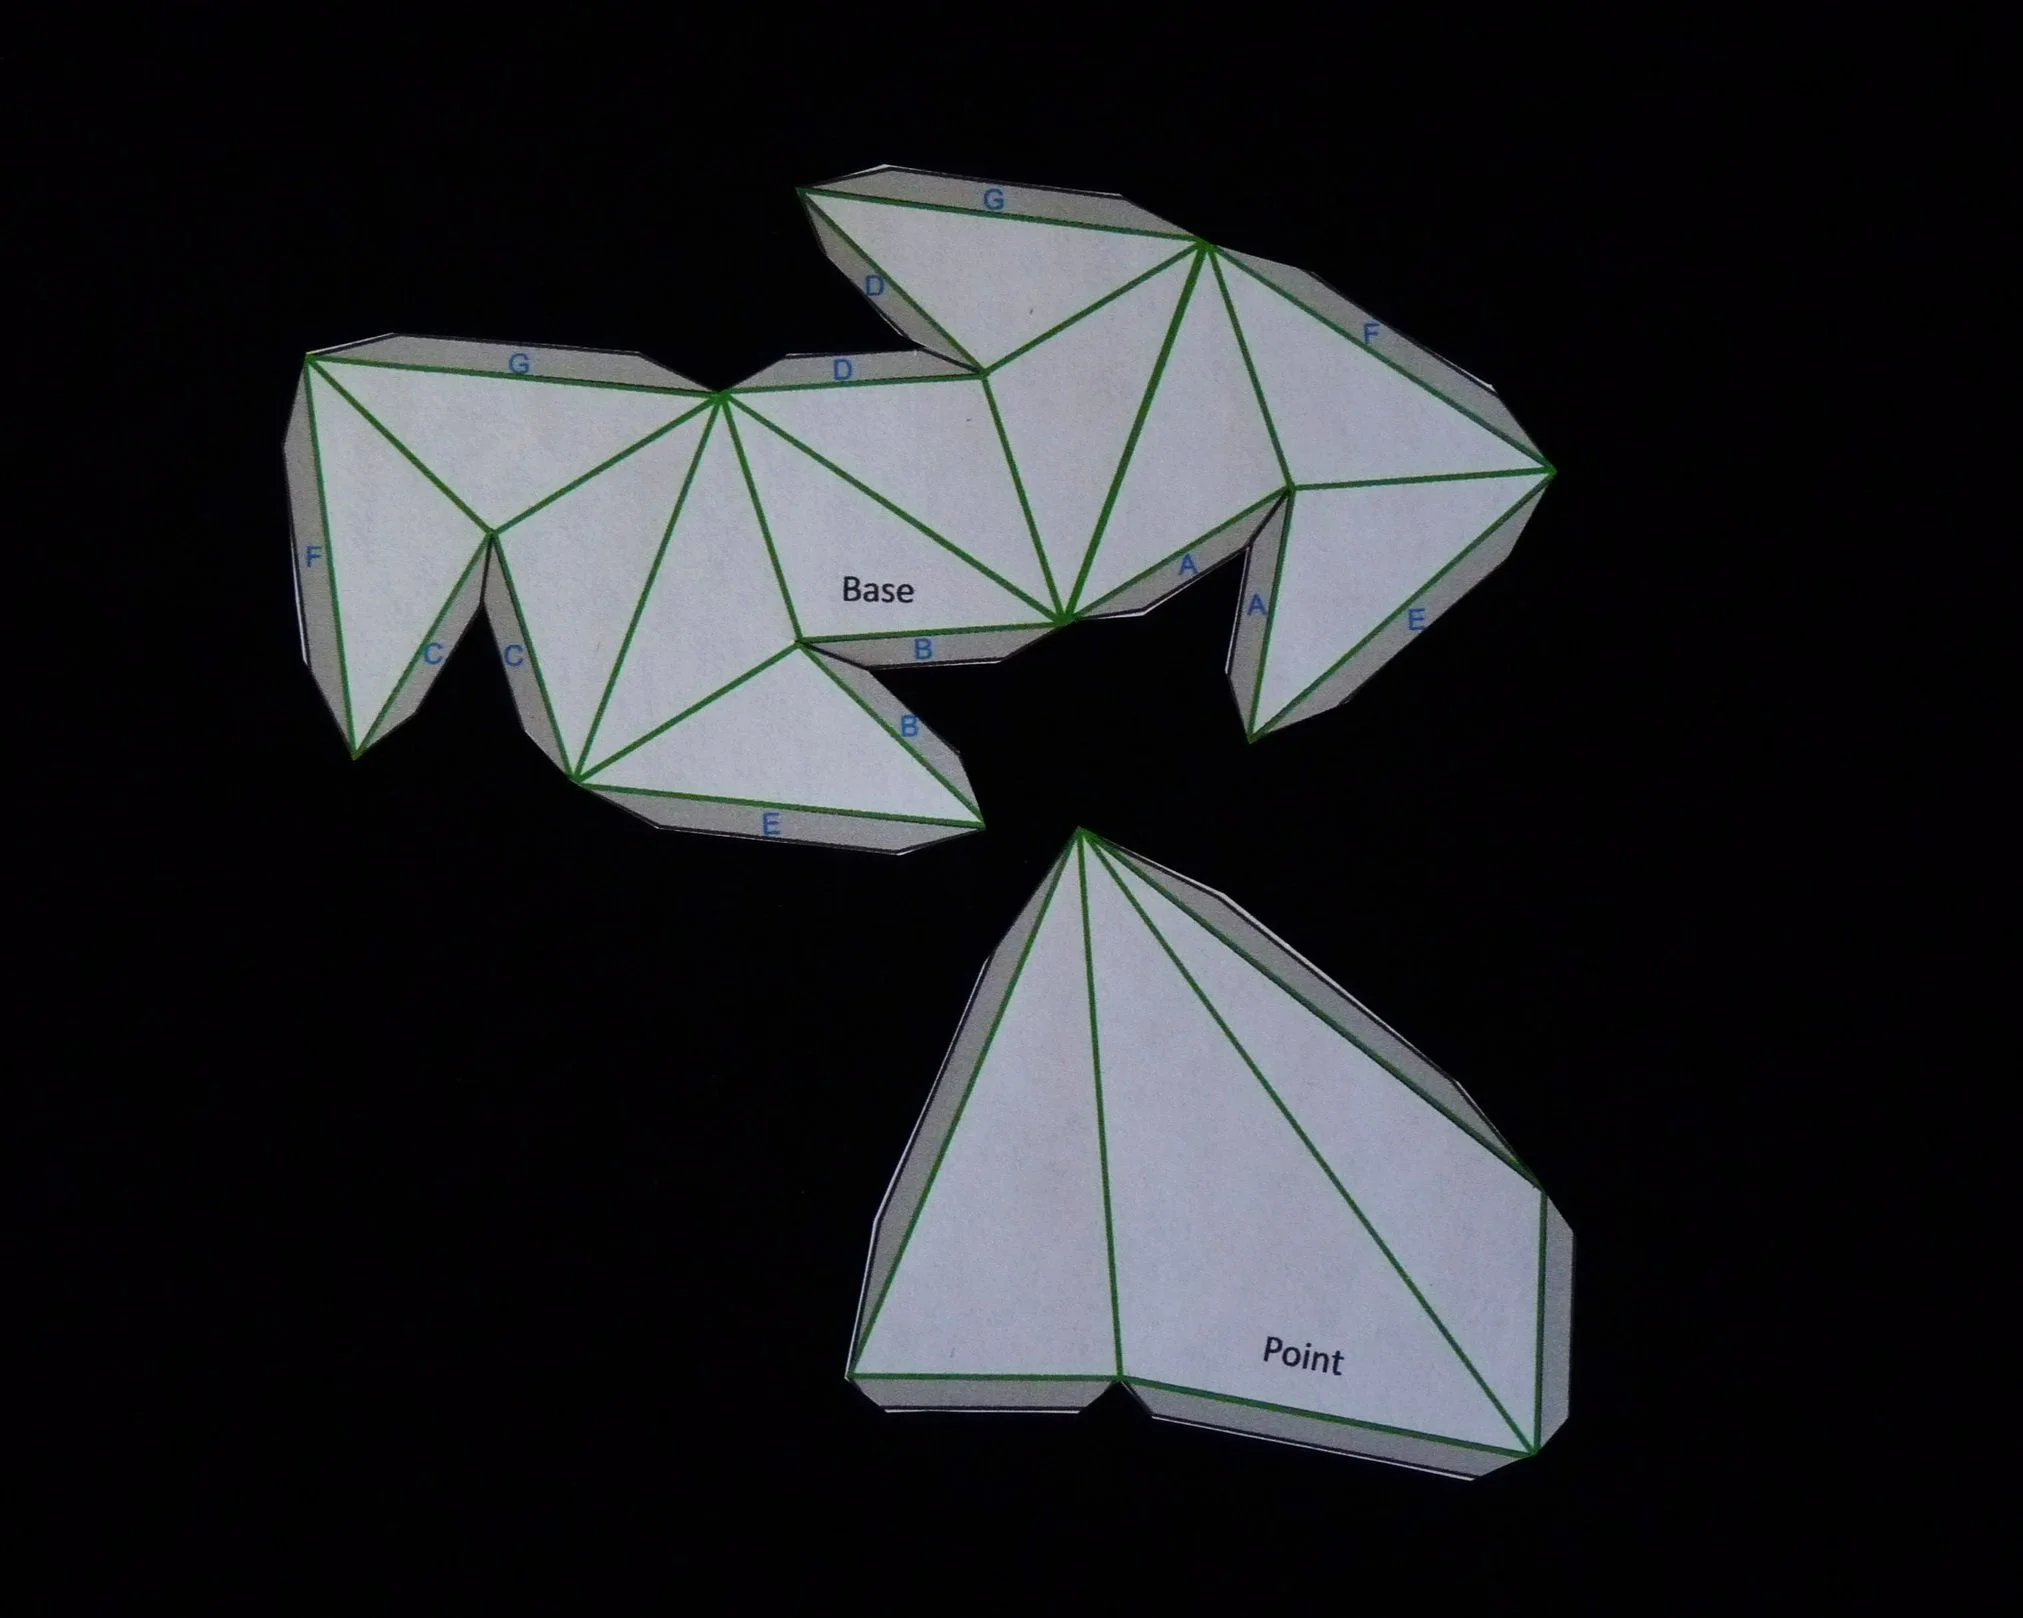
Photo 1. Inside of Two Parts after Step 2

Photo 2. Outside of Two Parts after Step 2
STEP 3
Make the Base part. Fold all green lines as valley folds. Then glue each of the flaps labelled A, B, C, D, E, F, and G, to its like labelled partner.

Photo 3. Base Part Folded
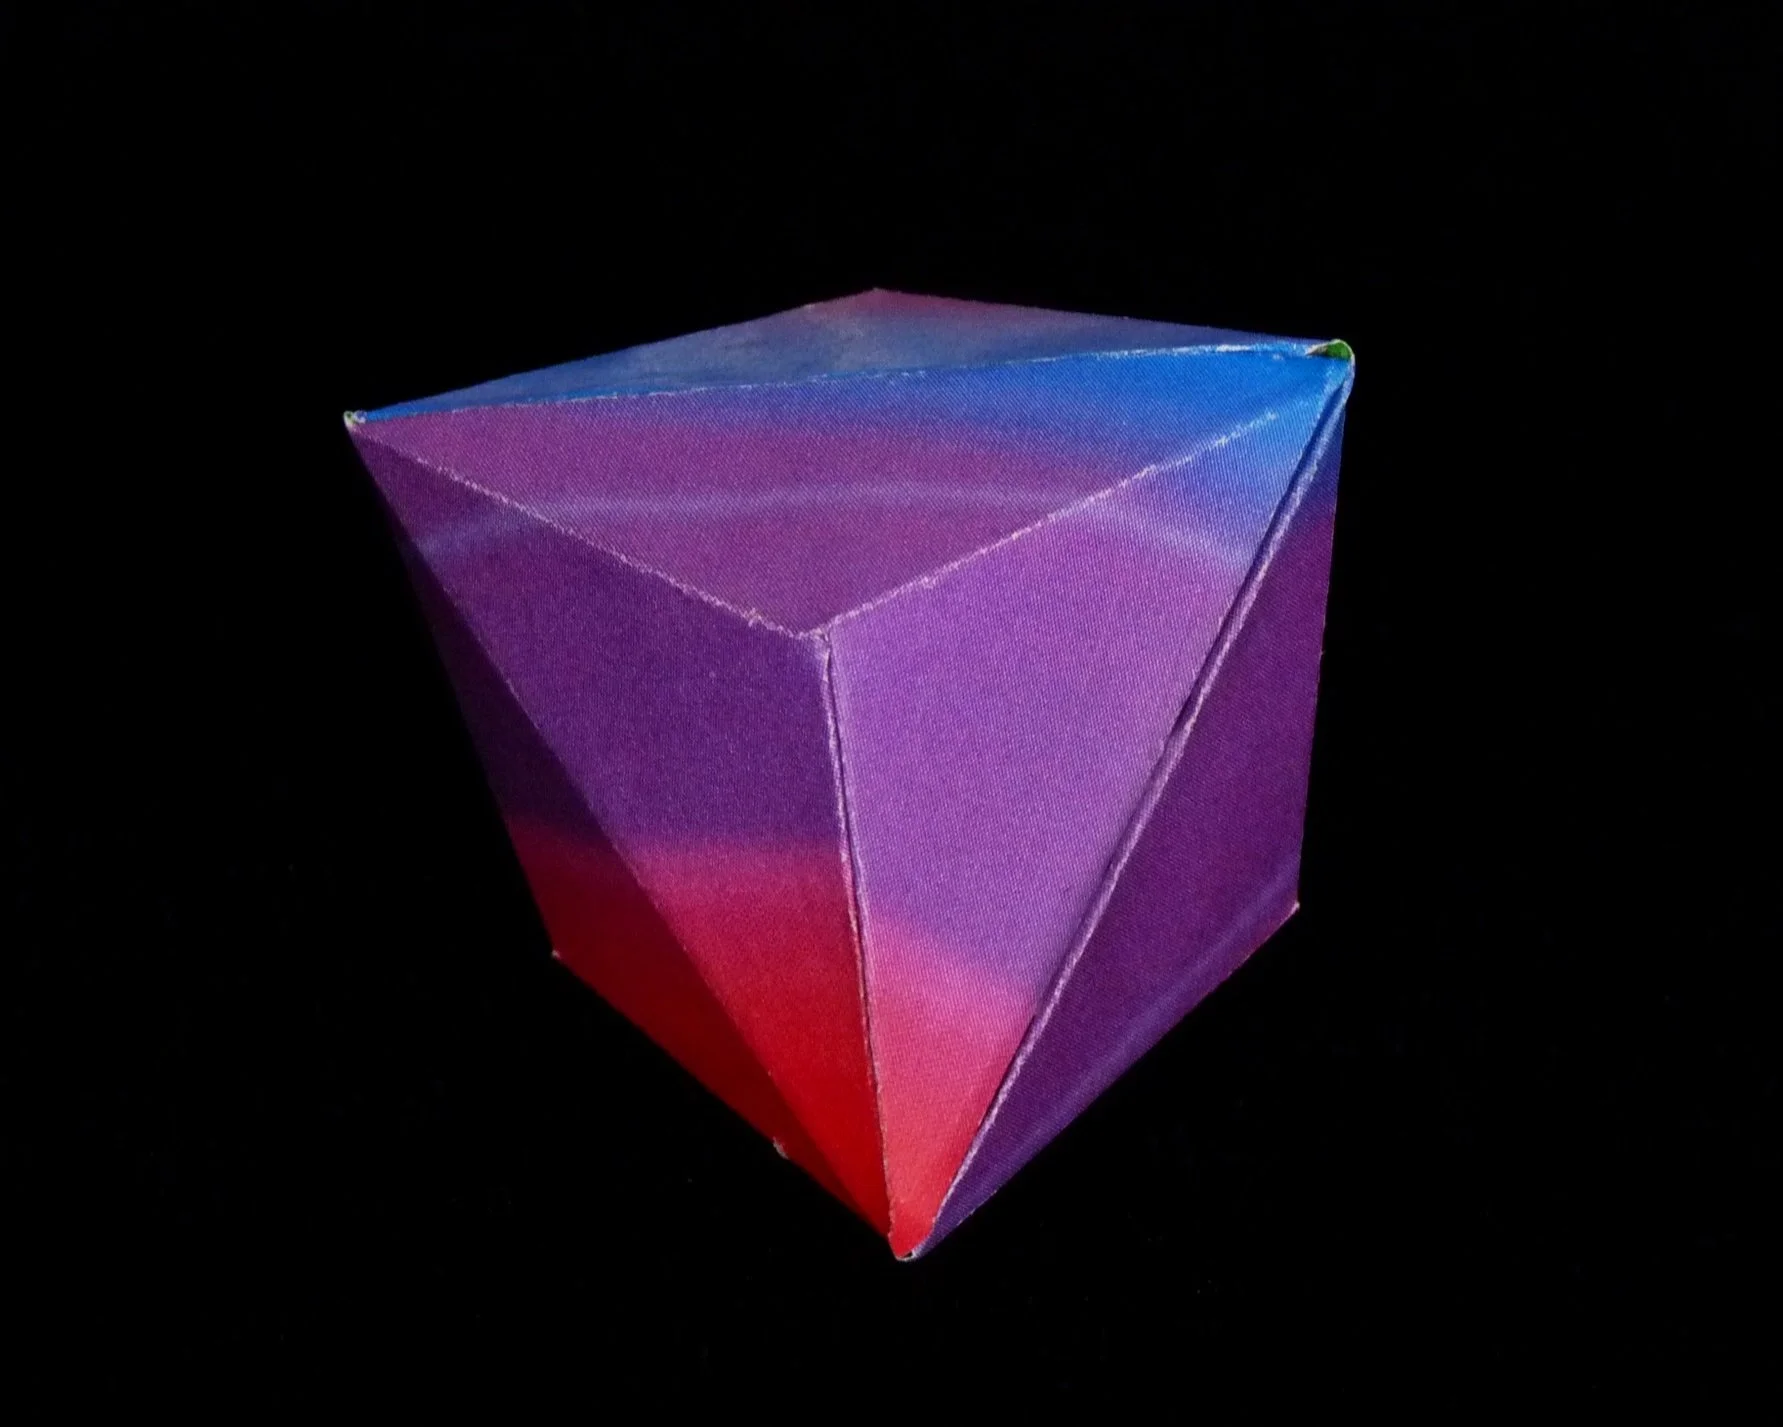
Photo 4. Base Part after Step 3, Folded and Glued
Step 4
Make the twelve points. Fold all green lines as valley folds. Then glue the two long glue flaps to each other.
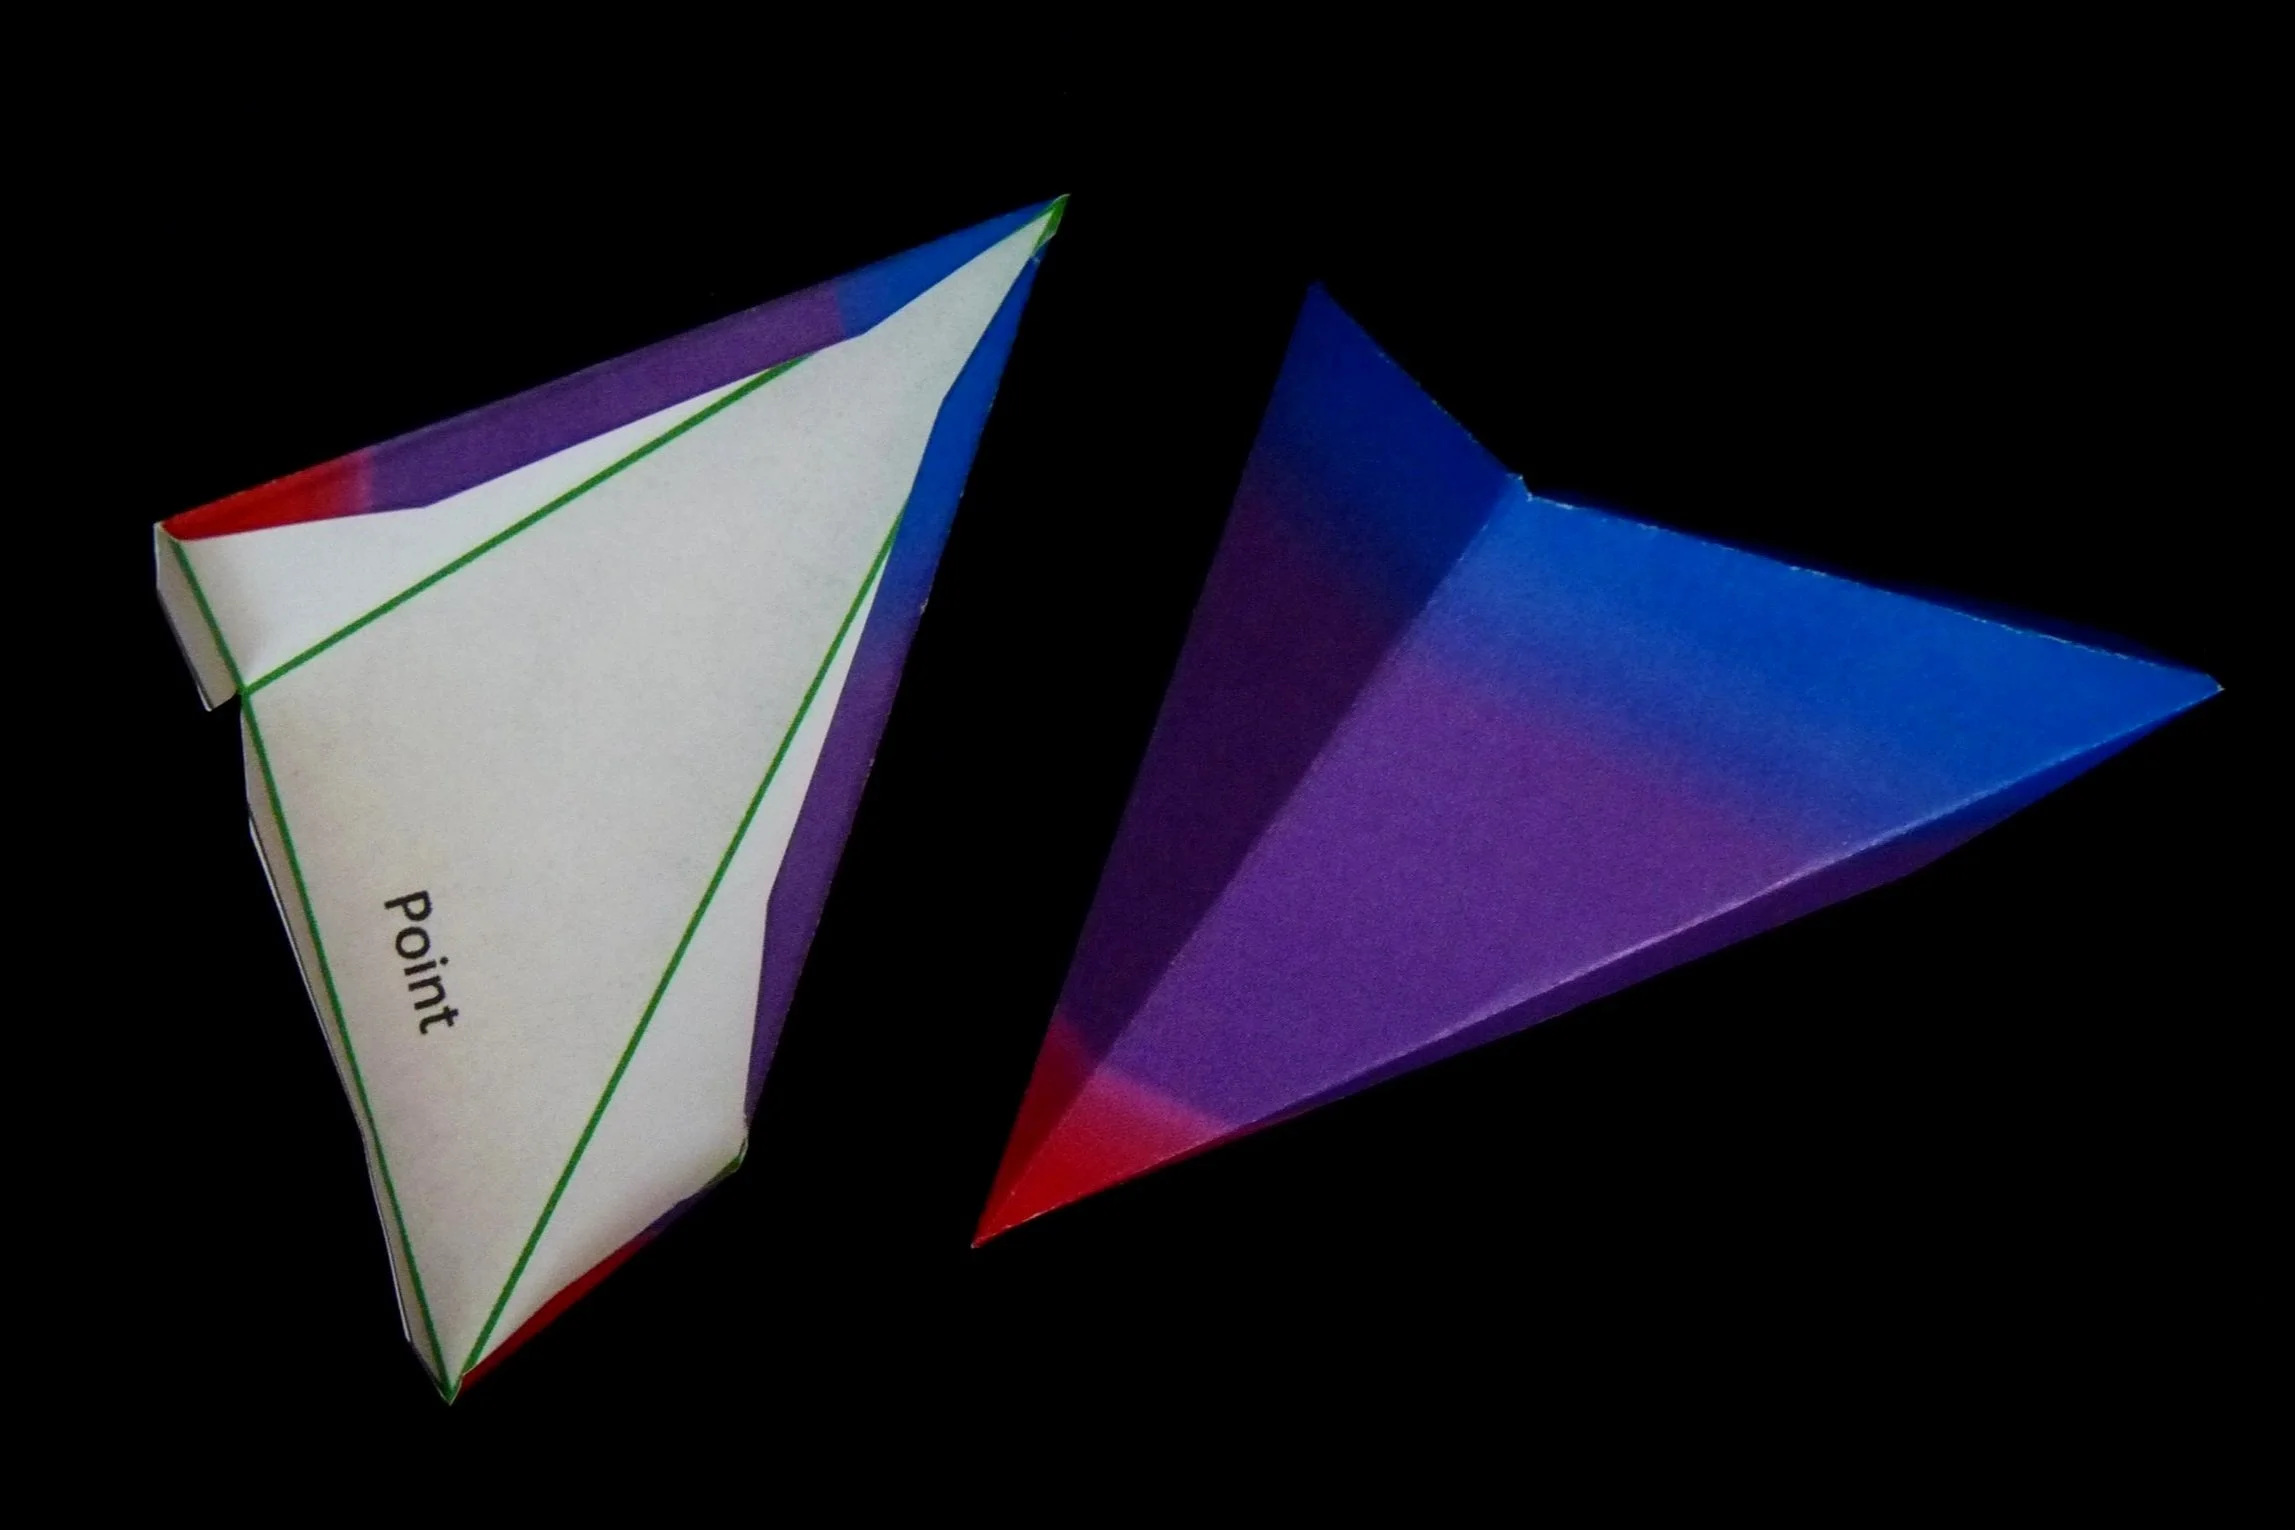
Photo 5. Two Point Parts Folded
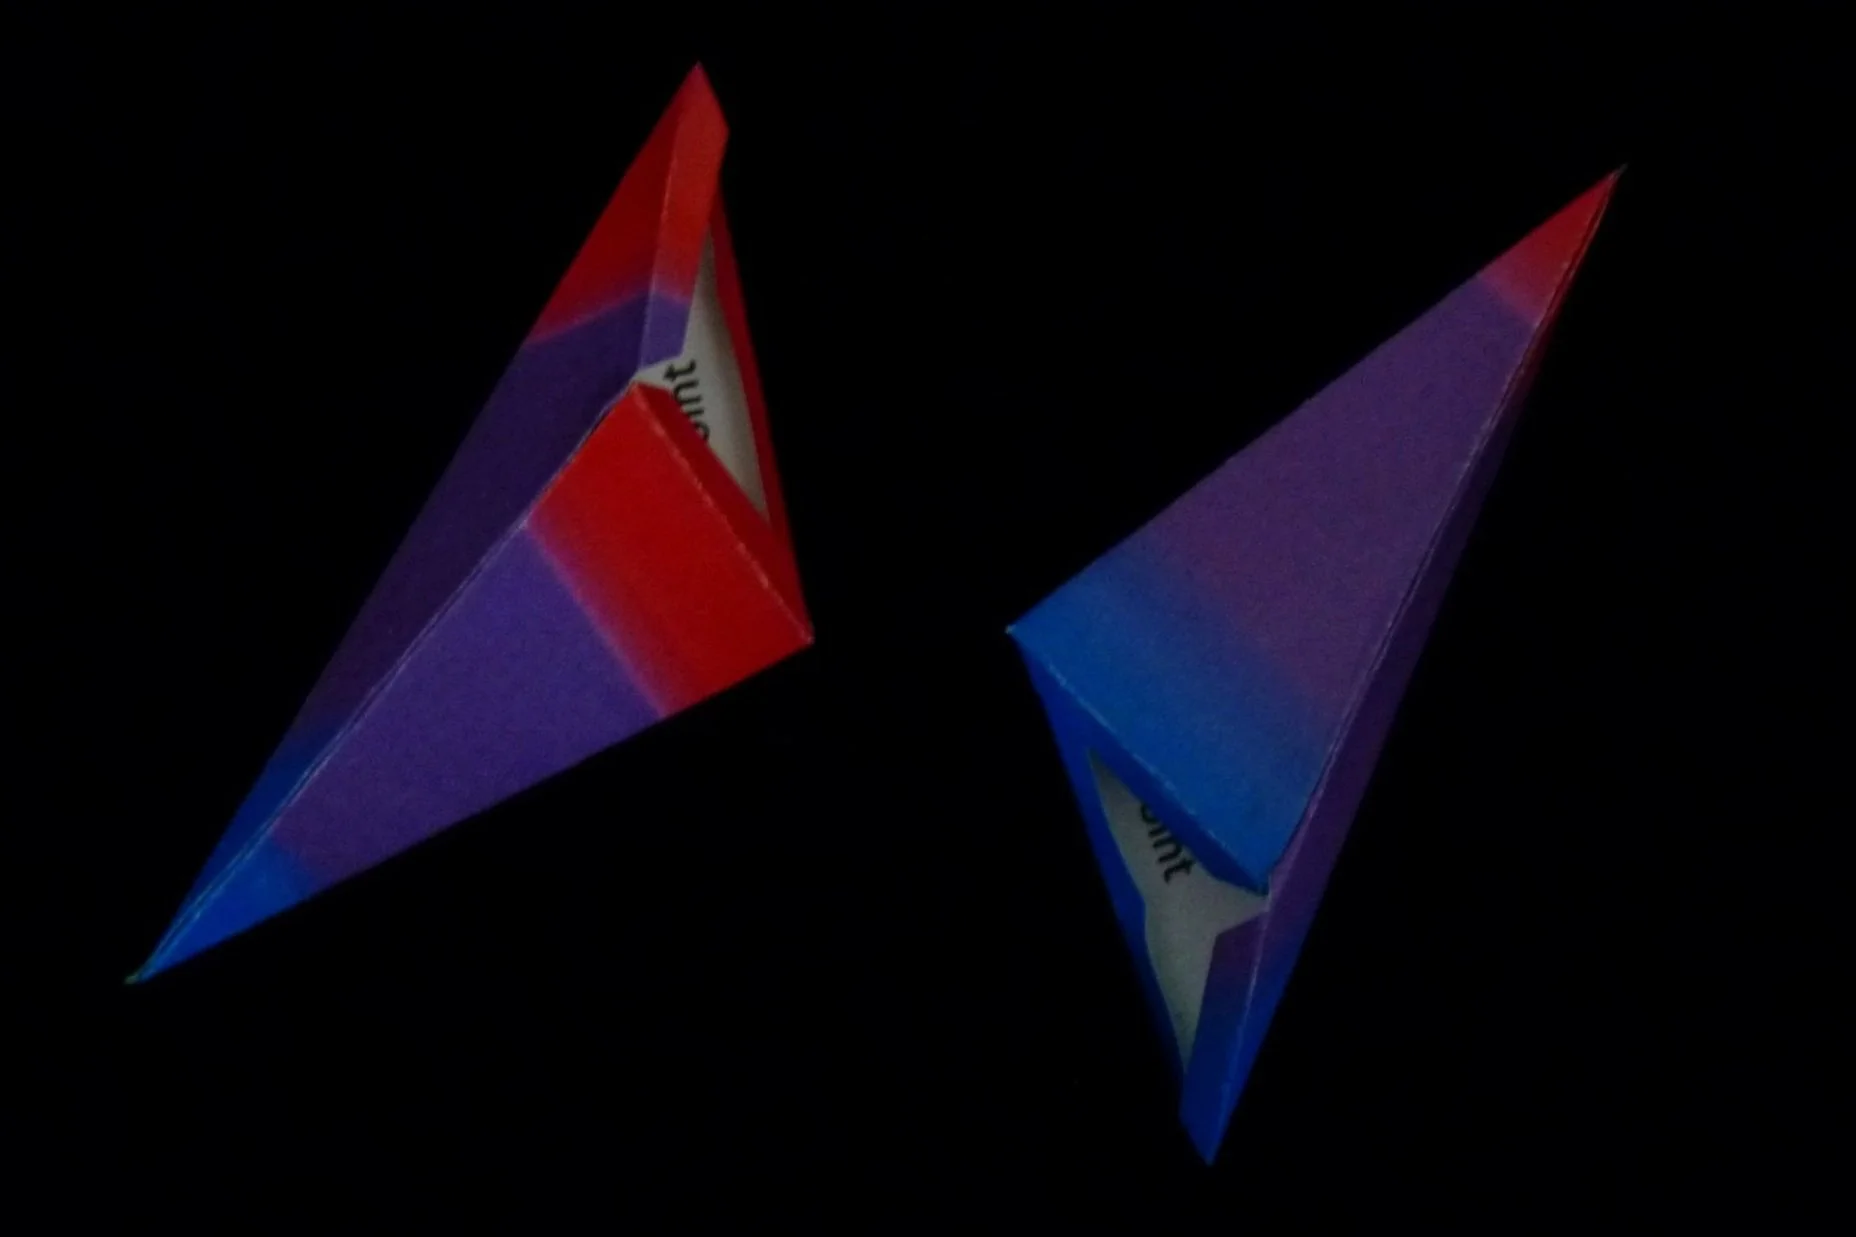
Photo 6. Two Point Parts after Step 4, Folded and Glued
Step 5
Finally, add a point to each of the twelve triangle face of the base using the three glue flaps on each point.

Photo 7. Step 5 after Adding Three Points to Base

Photo 8. Step 5 After Adding Six Points to Base

Photo 9. Completed Twister - View 1

Photo 10. Completed Twister - View 2