Octahedral WIndow
Try this 3d window, built around an octahedron that is not really there. Do you see the window or the octahedron?

Project Info
Paper required: Two sheets 8 1/2 x 11 inch (or A4)
Finished Project size: 4 inches (10 cm)
Difficulty Level: Intermediate
INSTRUCTIONS
STEP 1
Print the pattern Octahedral Window pattern onto the two matching paper sheets of your choice. The inside of the pattern (back side of the paper with the pattern printing) is visible in the finished project as well as the outside. I chose a paper that is purple on the outside and blue on the inside.
Read the pattern key included in the General Instructions.
Step 2
Cut out the eight pattern pieces by cutting on all black lines.

Photo 1. Inside and Outside of Pattern after Step 2.
STEP 3
Fold patterns on all red and green lines. Green lines are valley folds and red lines are mountain folds.

Photo 2. After Step 3, Two of the Pattern Pieces.
Step 4
On each of the eight pattern pieces, glue Flap A to the other Flap A.

Photo 3. Pattern Piece after Step 4.
Step 5
Glue the two Glue Flaps labelled 1 on the first pattern piece to the two Glue Flaps labelled 1 on the second pattern piece.

Photo 4. After Step 5, View 1.
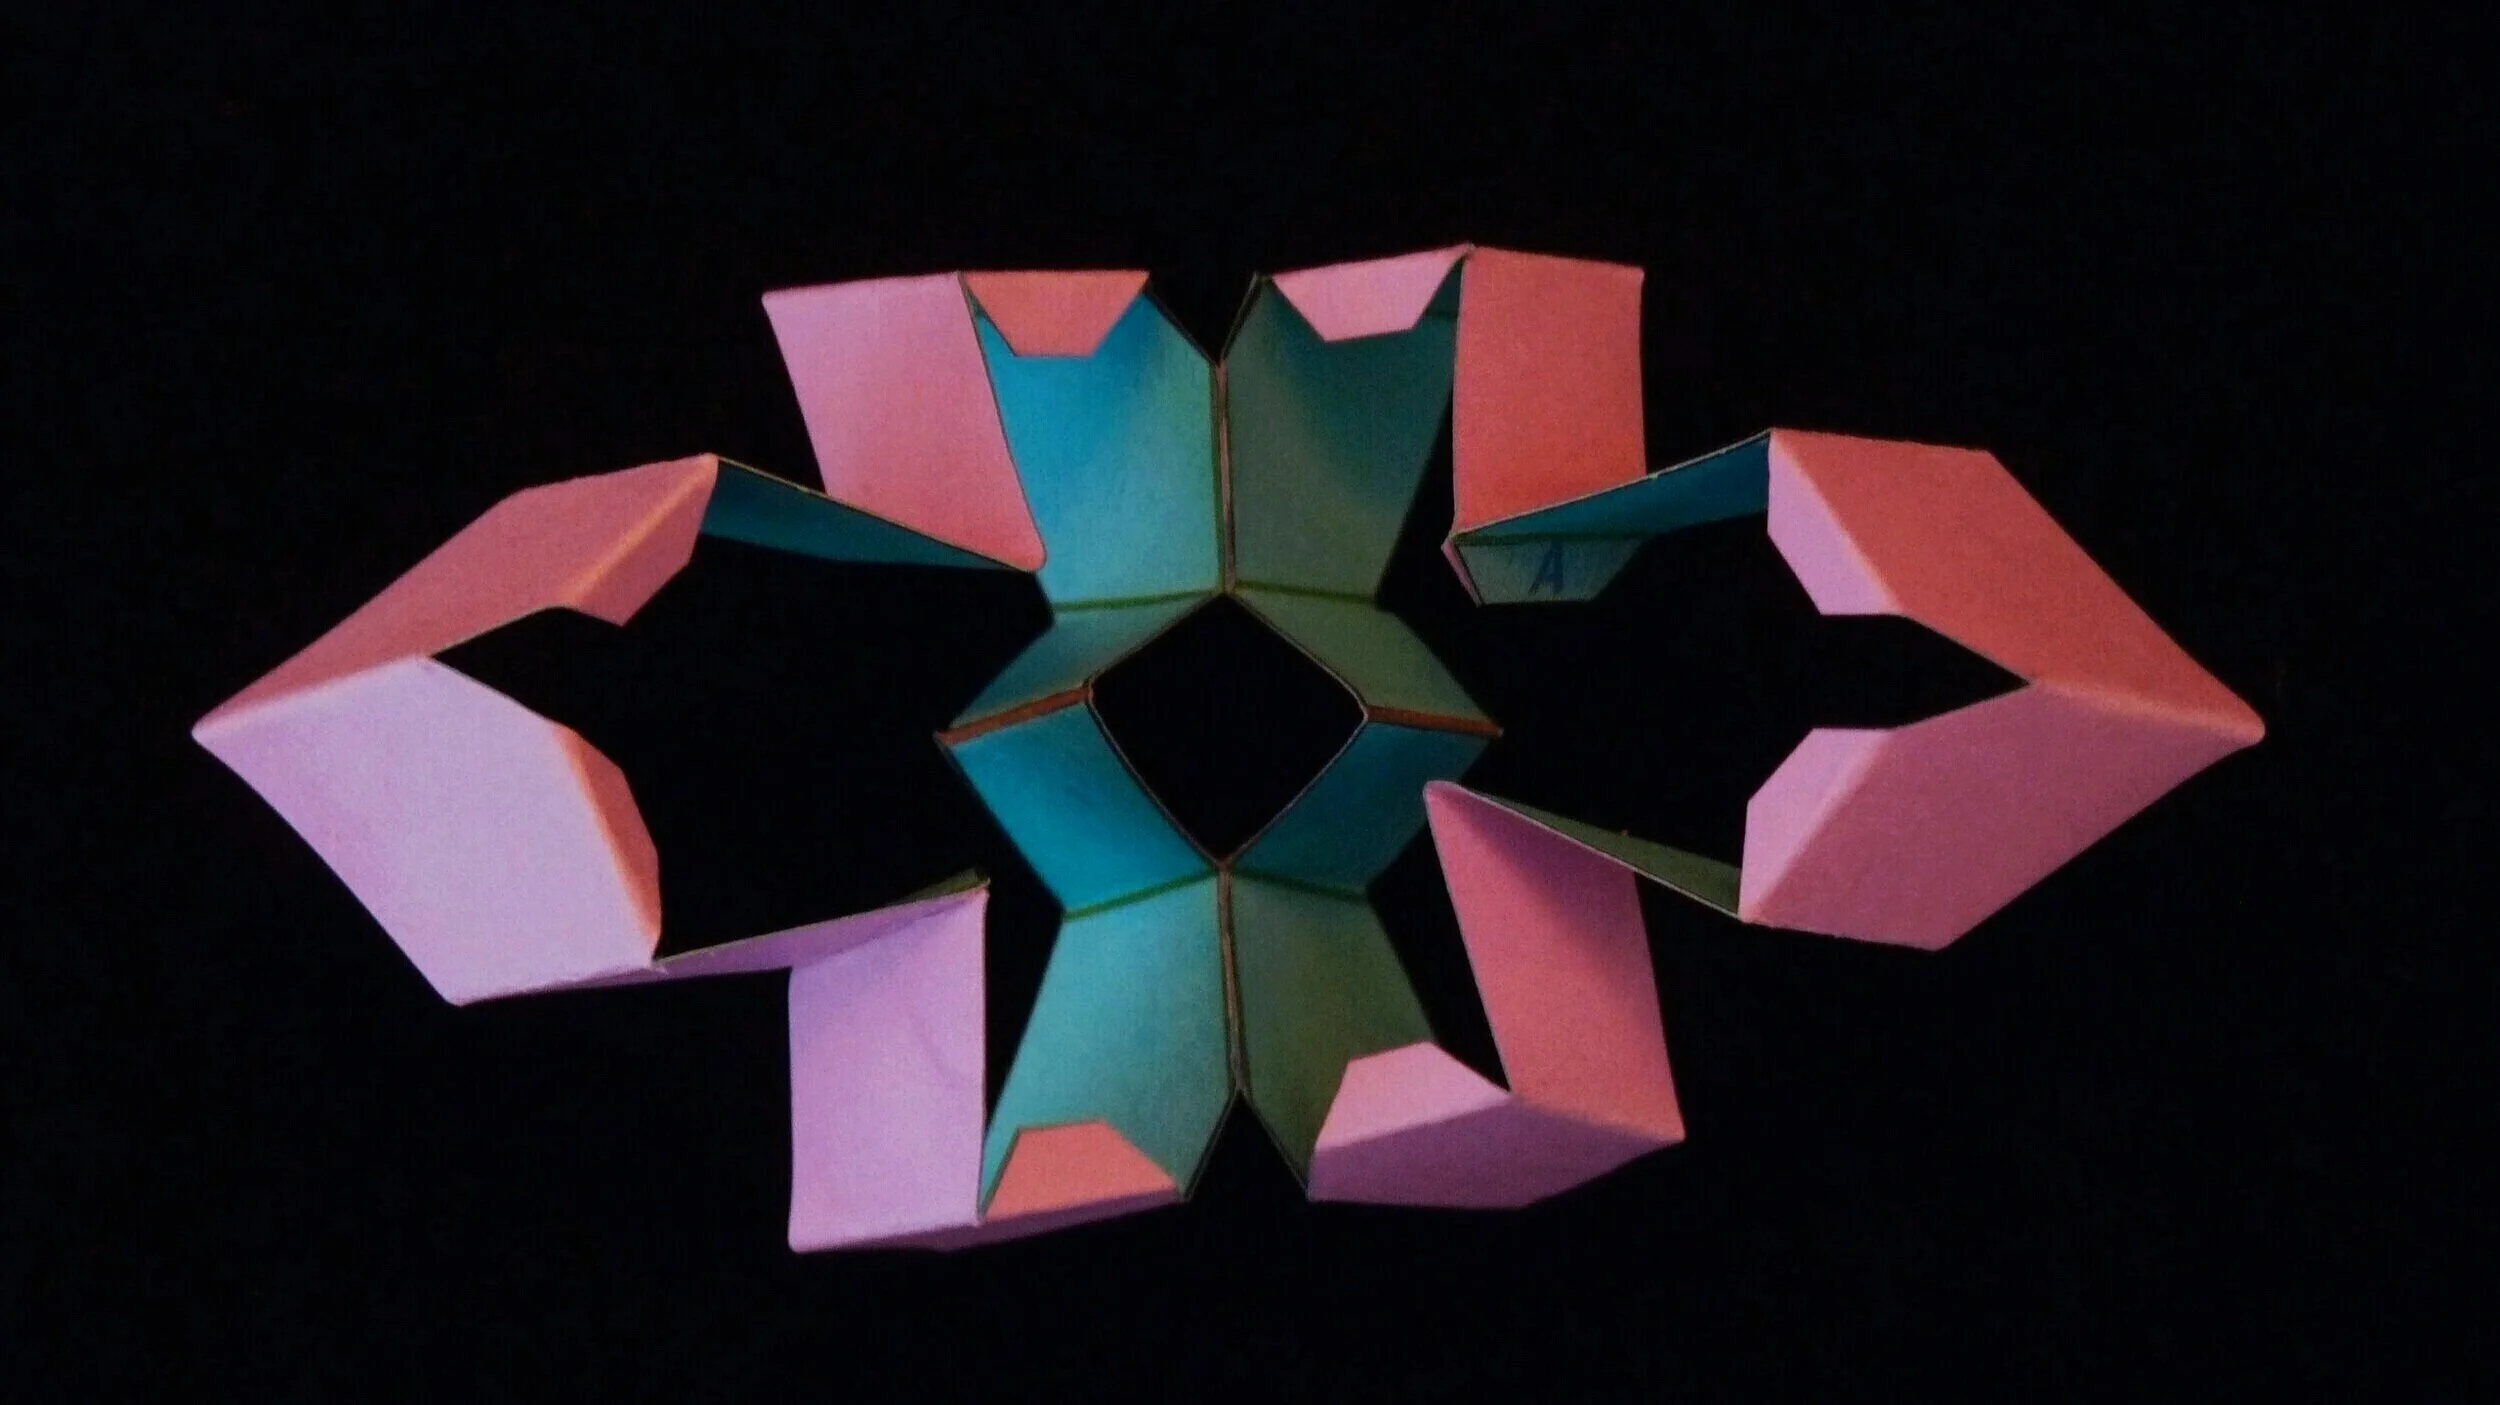
Photo 5. After Step 5, View 2.
Step 6
Attach the third pattern piece by gluing any two like labelled glue flaps on the third piece (two glue flaps labelled 3 for instance) to any two like labelled glue flaps on the second piece. Add the fourth pattern piece between the first and third pattern pieces to make a ring of four pieces as shown on Photos 6 and 7. Do this by gluing two like labelled glue flaps on the fourth pattern piece to the adjacent like labelled glue flaps on the third piece, and by gluing another two like labelled glue flaps on the fourth piece to the adjacent like labelled glue flaps on the first piece.
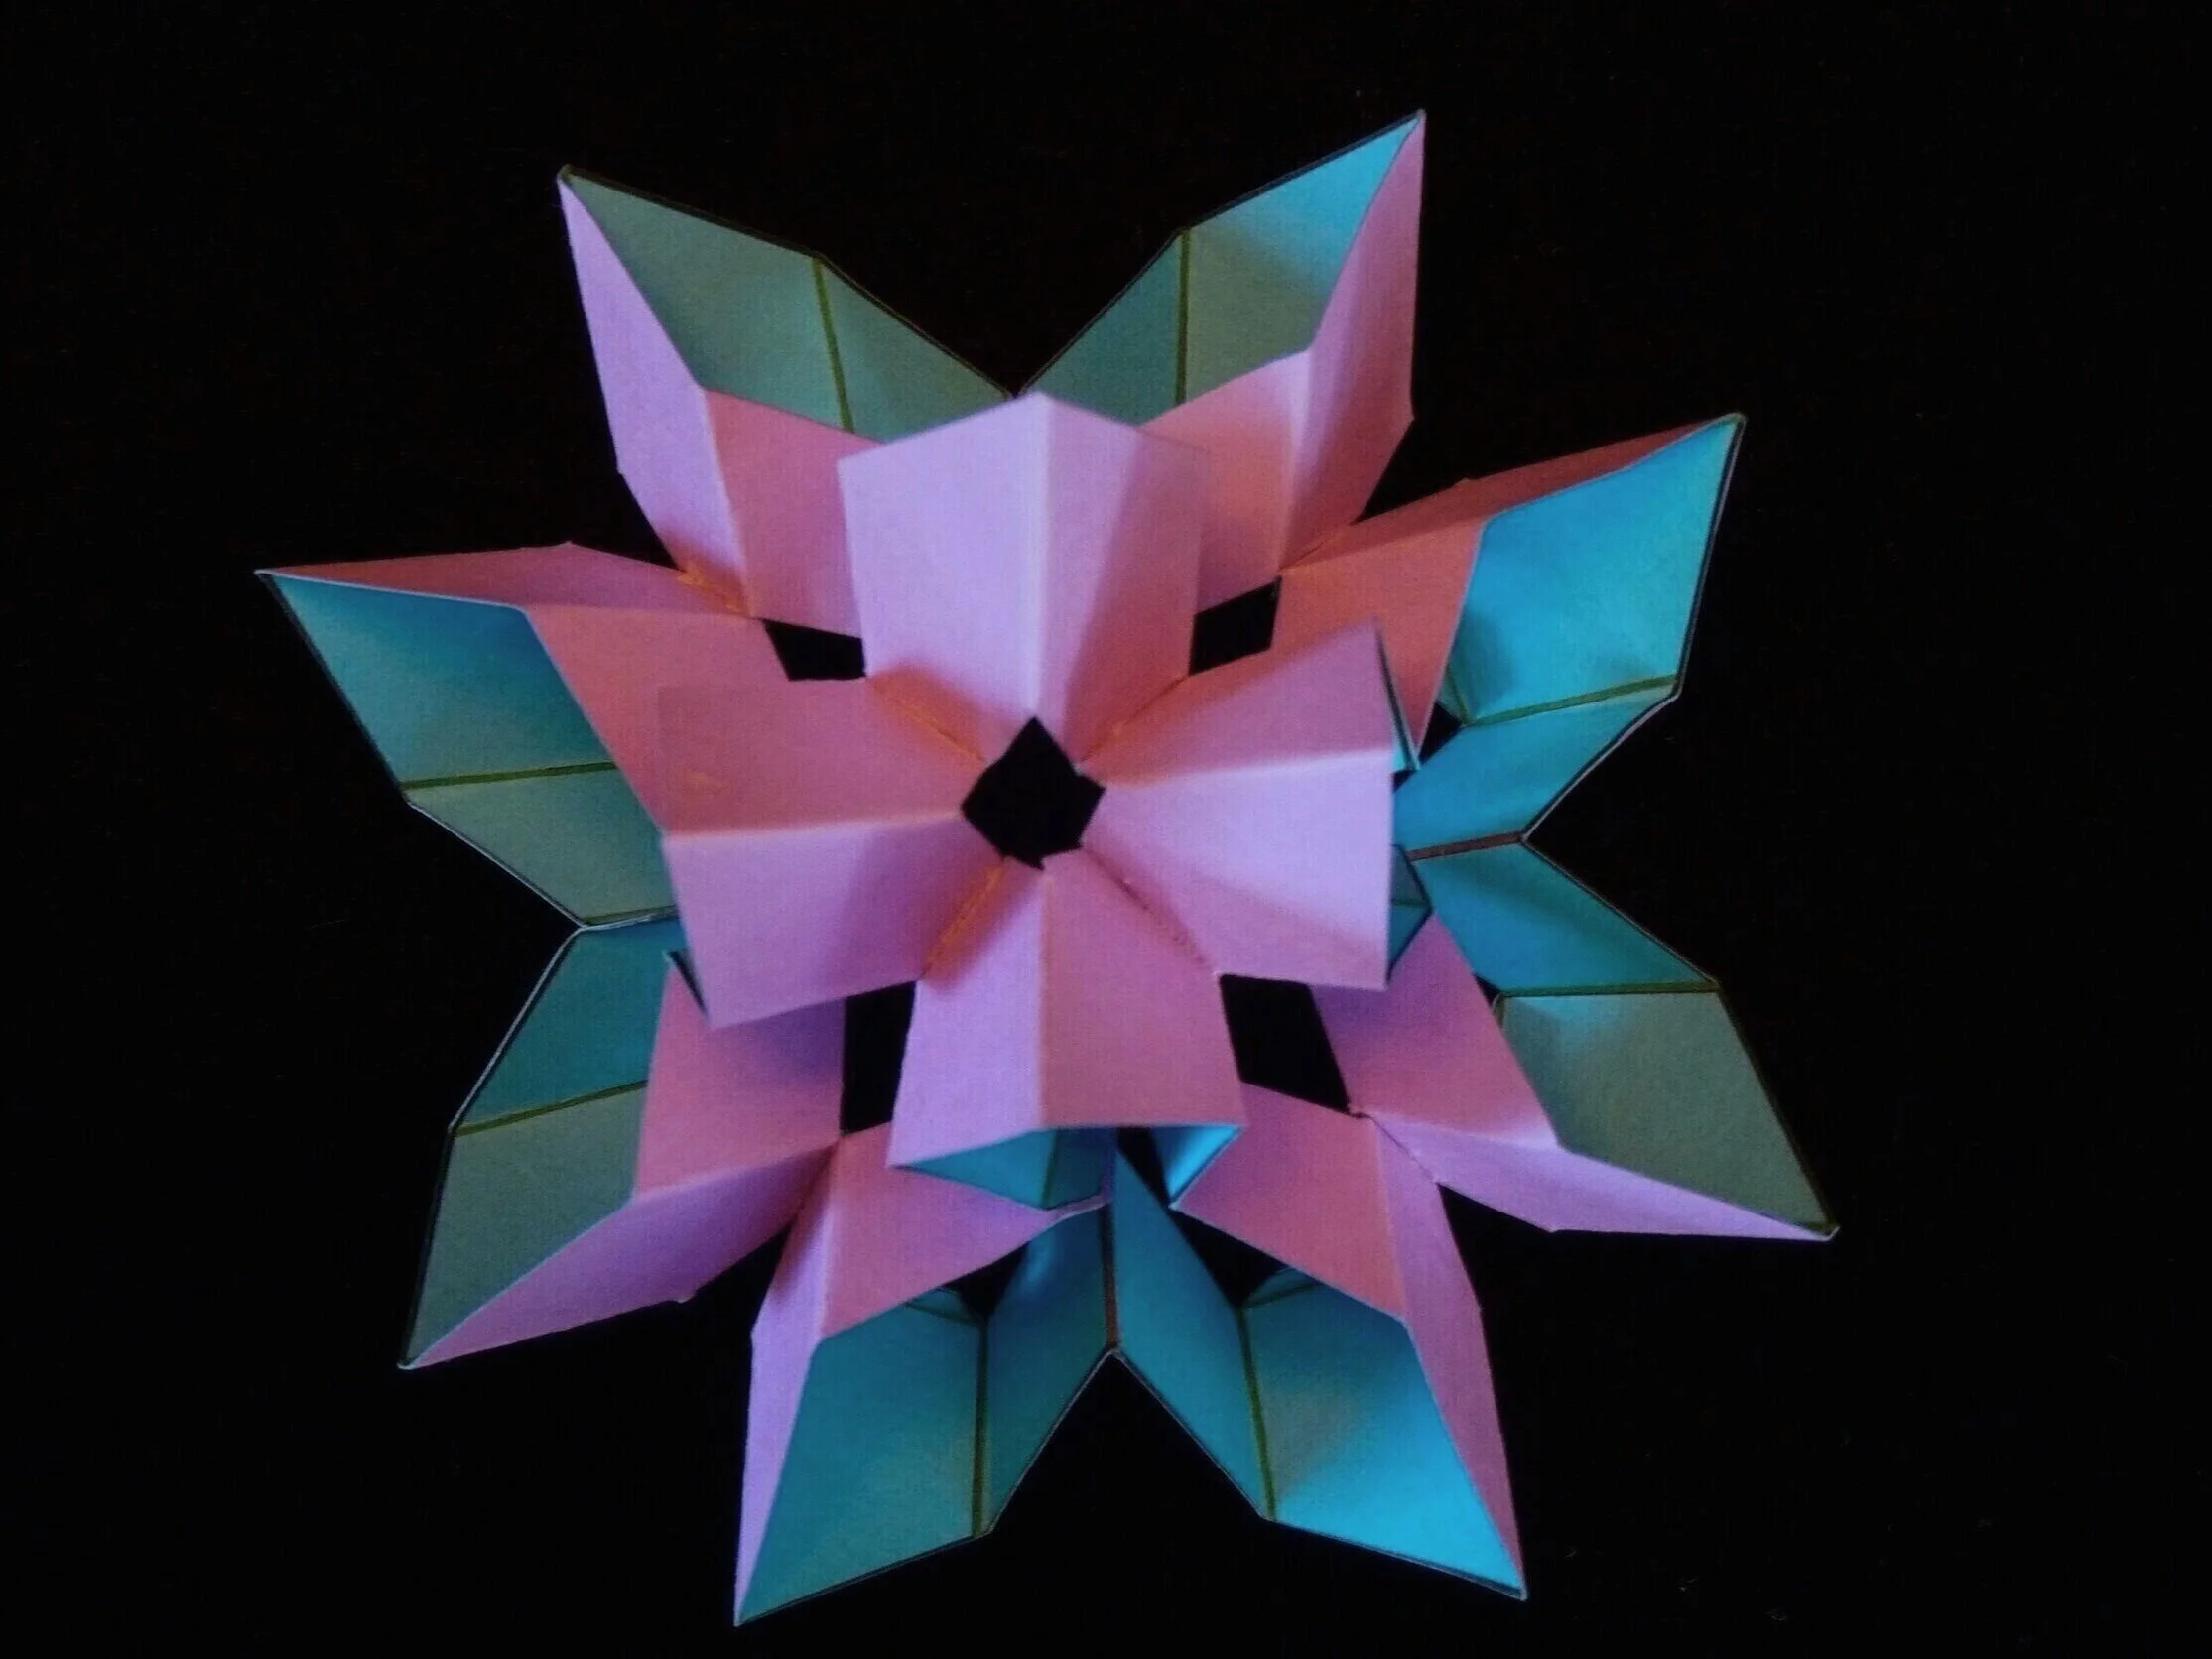
Photo 6. After Step 6, Assembled Unit for Four Pieces, View 1.
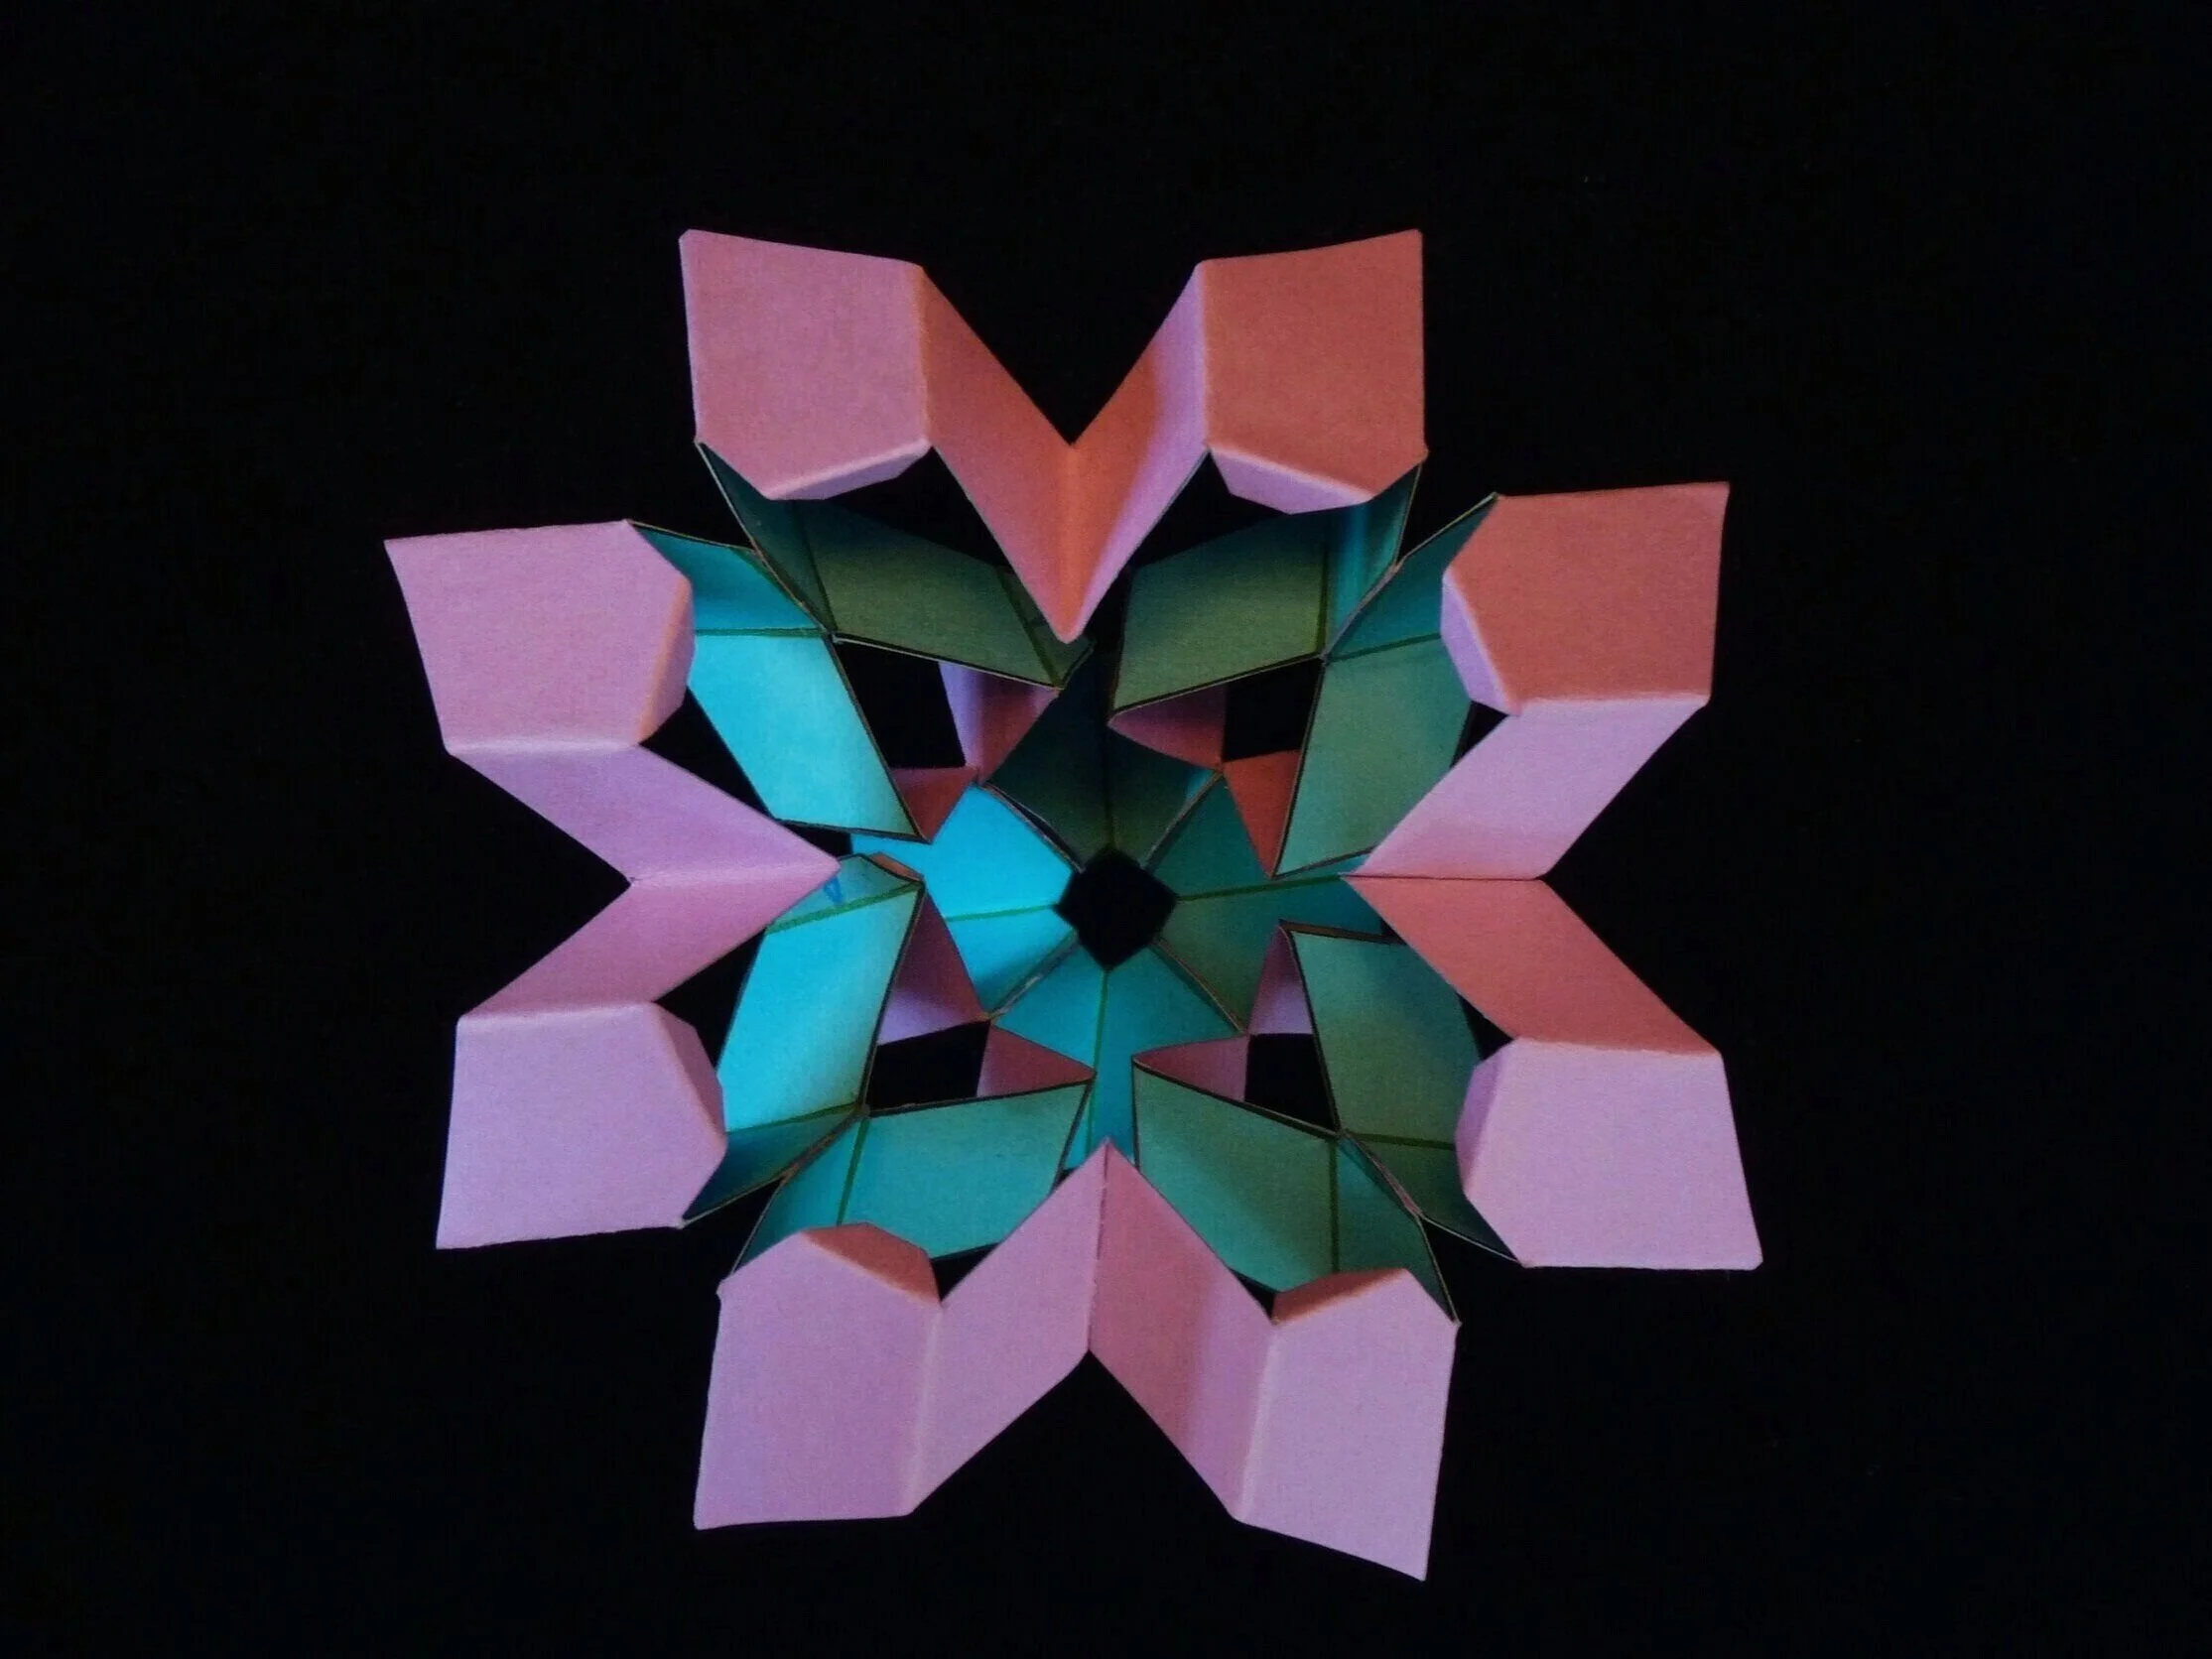
Photo 7. After Step 6, Assembled Unit of Four Pieces, View 2.
Step 7
Assemble the 5th, 6th, 7th, and 8th pattern pieces by repeating Steps 5 and 6 for these four pieces, so that you have two assembled units as shown in Photos 6 and 7.
Step 8
Complete the project by attaching together the two assembled units back to back. Do this by gluing a set of two glue flaps on one of the pieces on the first assembled unit to two glue flaps on one of the pieces on the second assembled unit. Continue around until all eight glue flaps on the first assembled unit are attached to the eight glue flaps on the second assembled unit, and the project is complete.

Photo 8. Completed Octahedral Window, View 1.

Photo 9. Complete Octahedral Window, View 2.

Photo 10. Completed Octahedral Window, View 3.

Photo 11. Completed Octahedral Window, View 4.
More Examples

Photo 12. Second Example Octahedral Window, View 1.

Photo 13. Second Example Octahedral Window, View 2.
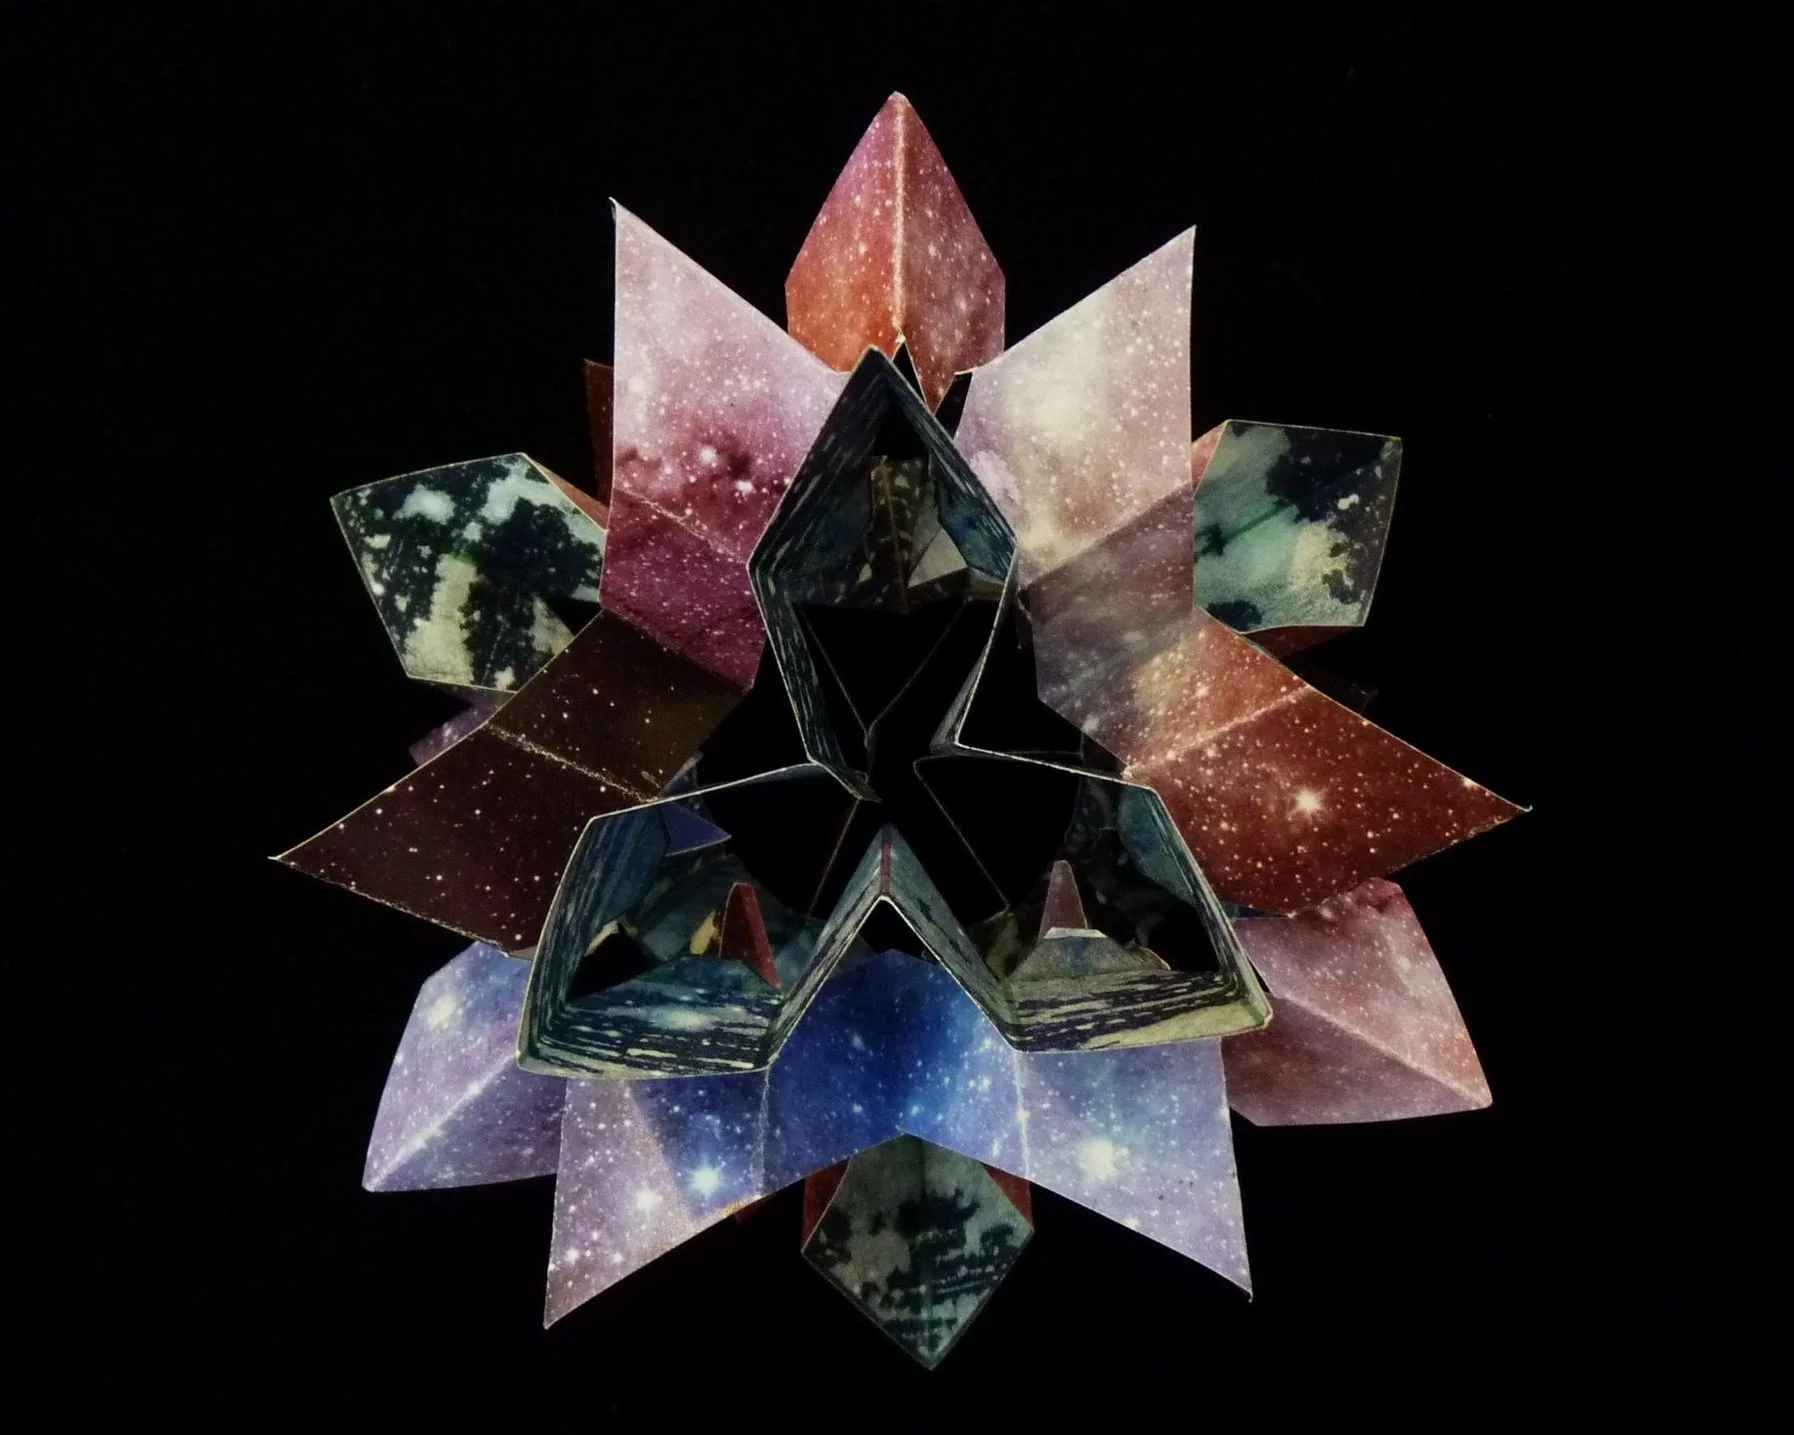
Photo 14. Third Example Octahedral Window, View 1.

Photo 15. Third Example Octahedral Window, View 2.