North Star
Add a North Star to your night time sky. Use its fourteen points to set your ship’s compass.

Project Info
Paper required: two sheets 8.5 x 11 inch (or A4)
Finished Project size: 5 inches (12 cm)
Difficulty Level: beginner
INSTRUCTIONS
STEP 1
Print the two sheets of the North Star pattern on the two matching paper sheets of your choice. A paper type that is slightly stiffer than normal office paper is best for this project. Both sides of the paper will be visible.
Read the pattern key included in the General Instructions.
Step 2
Cut out the six pattern pieces by cutting on the black lines around the edge of each piece.
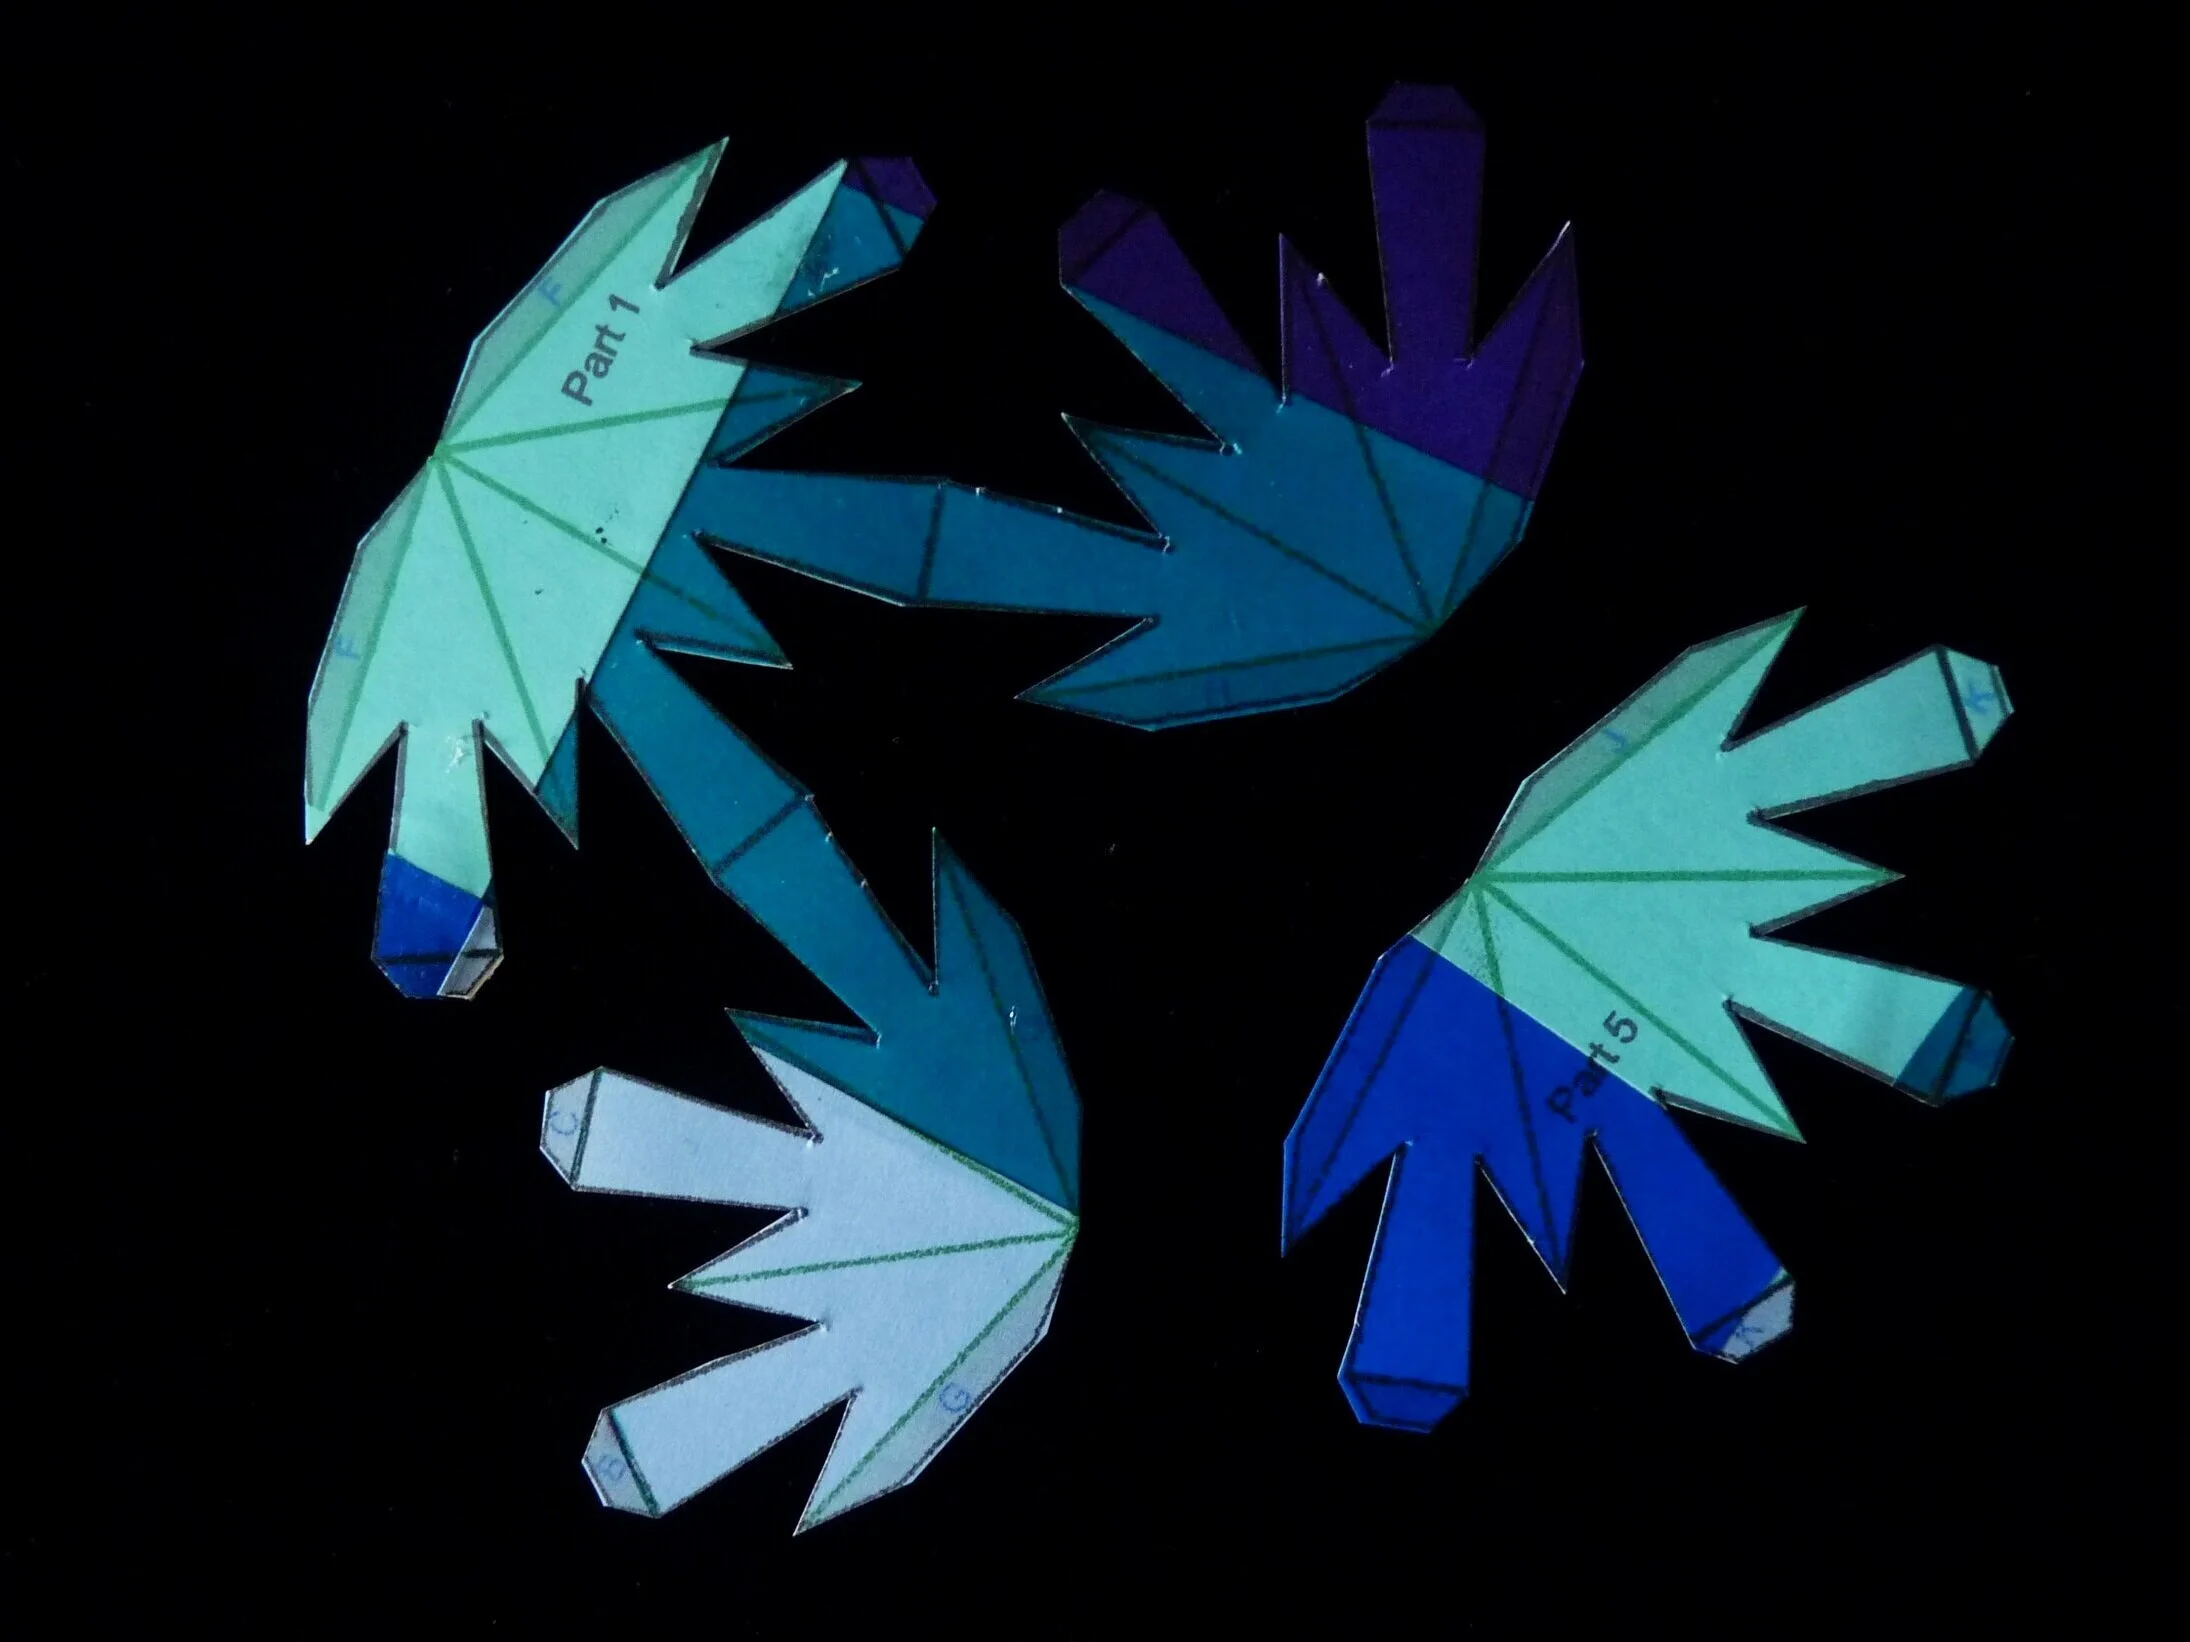
Photo 1. Inside of Pattern Parts 1 and 5 after Step 2

Photo 2. Outside of Pattern Parts 1 and 5 after Step 2
STEP 3
On each of the six pattern pieces, fold the green lines as valley folds. On Parts 1, 2, 3, and 4, fold the red lines as mountain folds.

Photo 3. Inside of Pattern Parts 1 and 5 after Step 3
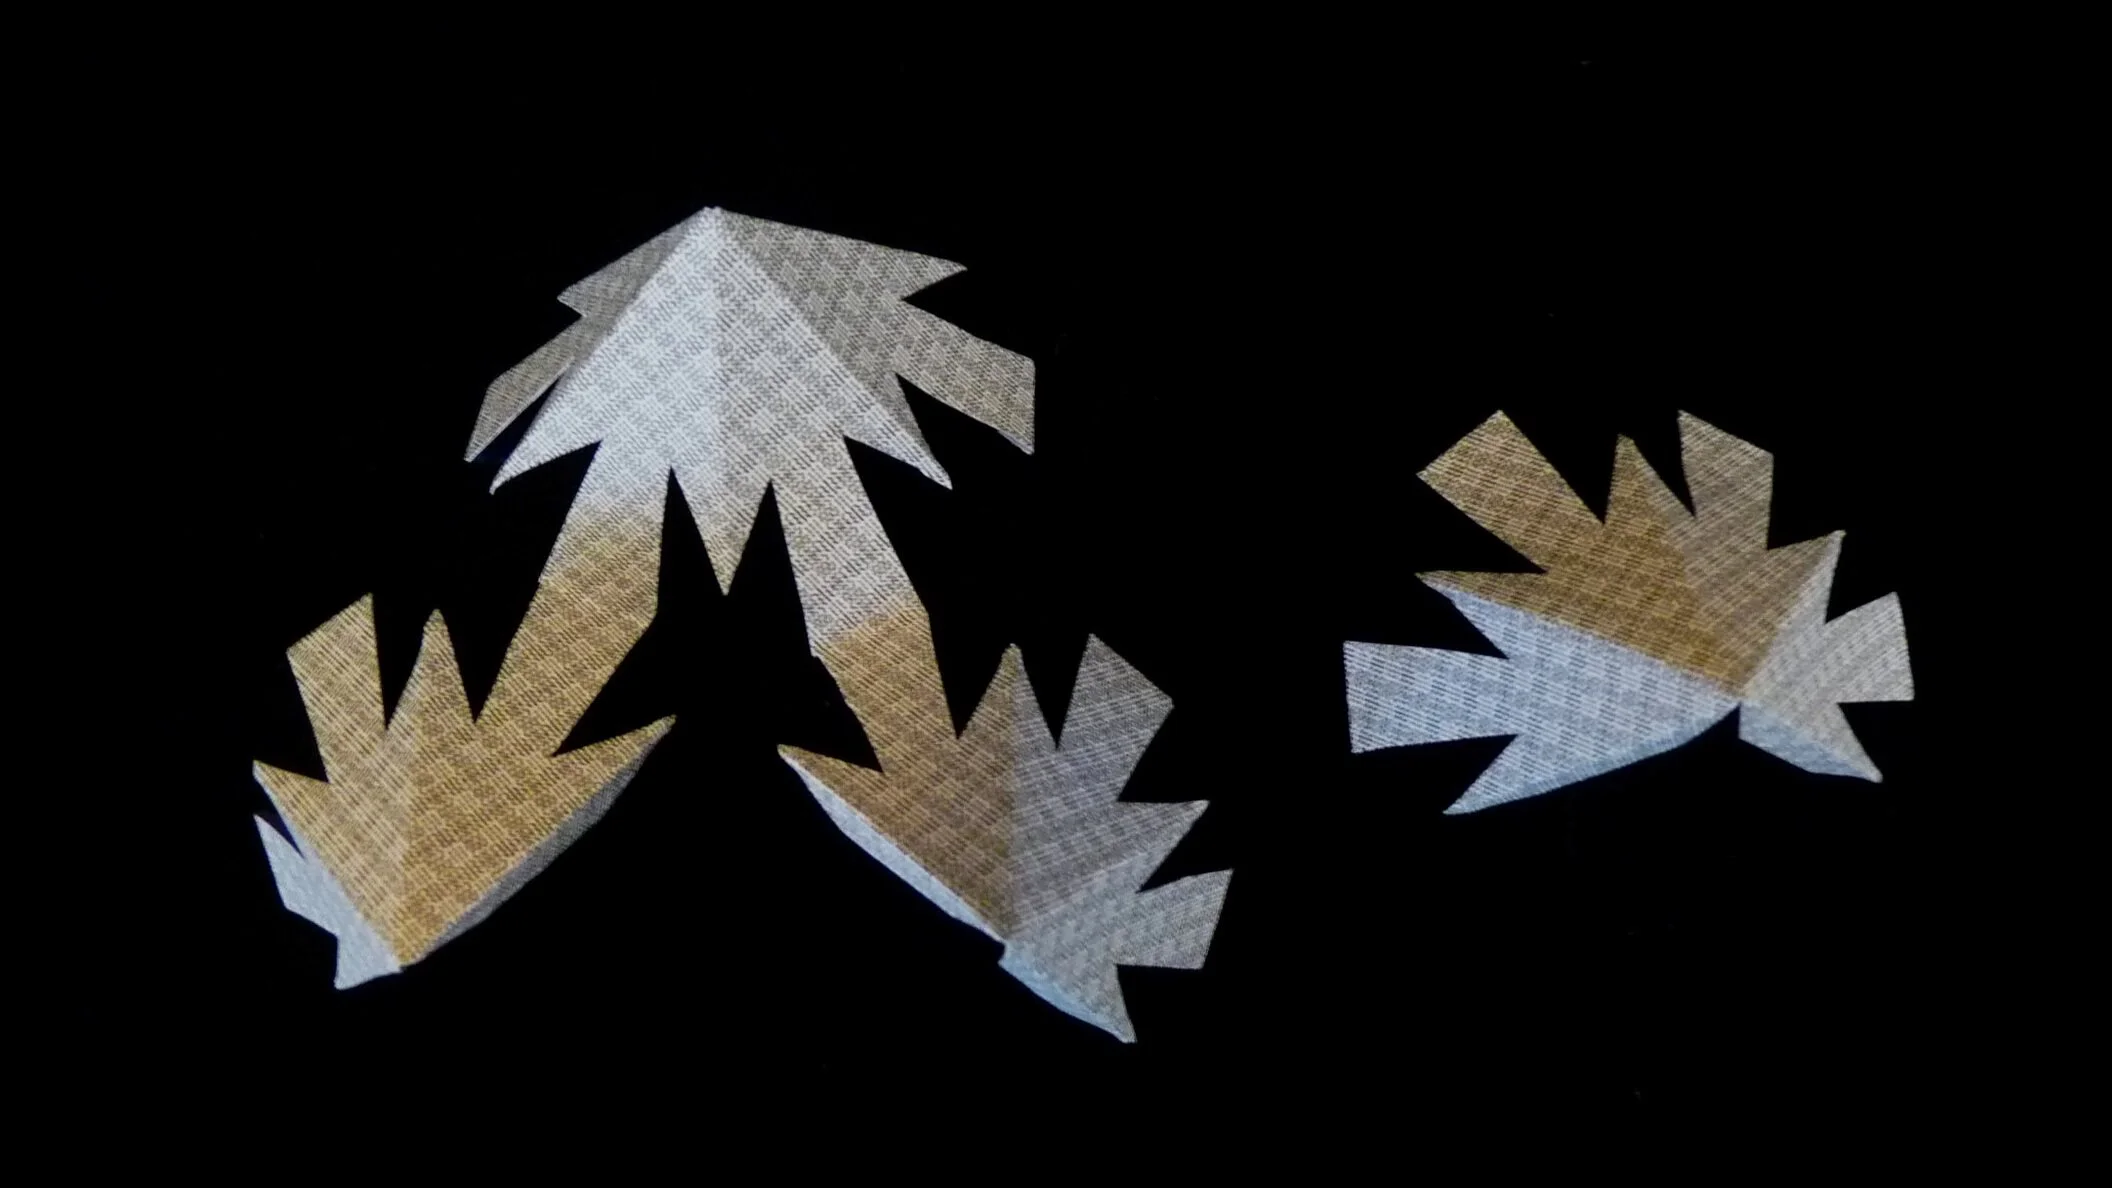
Photo 4. Outside of Pattern Parts 1 and 5 after Step 3
Step 4
On Parts 1, 2, 3, and 4, glue Flap F to the other Flap F, Flap G to the other Flap G, and Flap H to the other Flap H. On Parts 5 and 6, glue Flap J to the other Flap J.
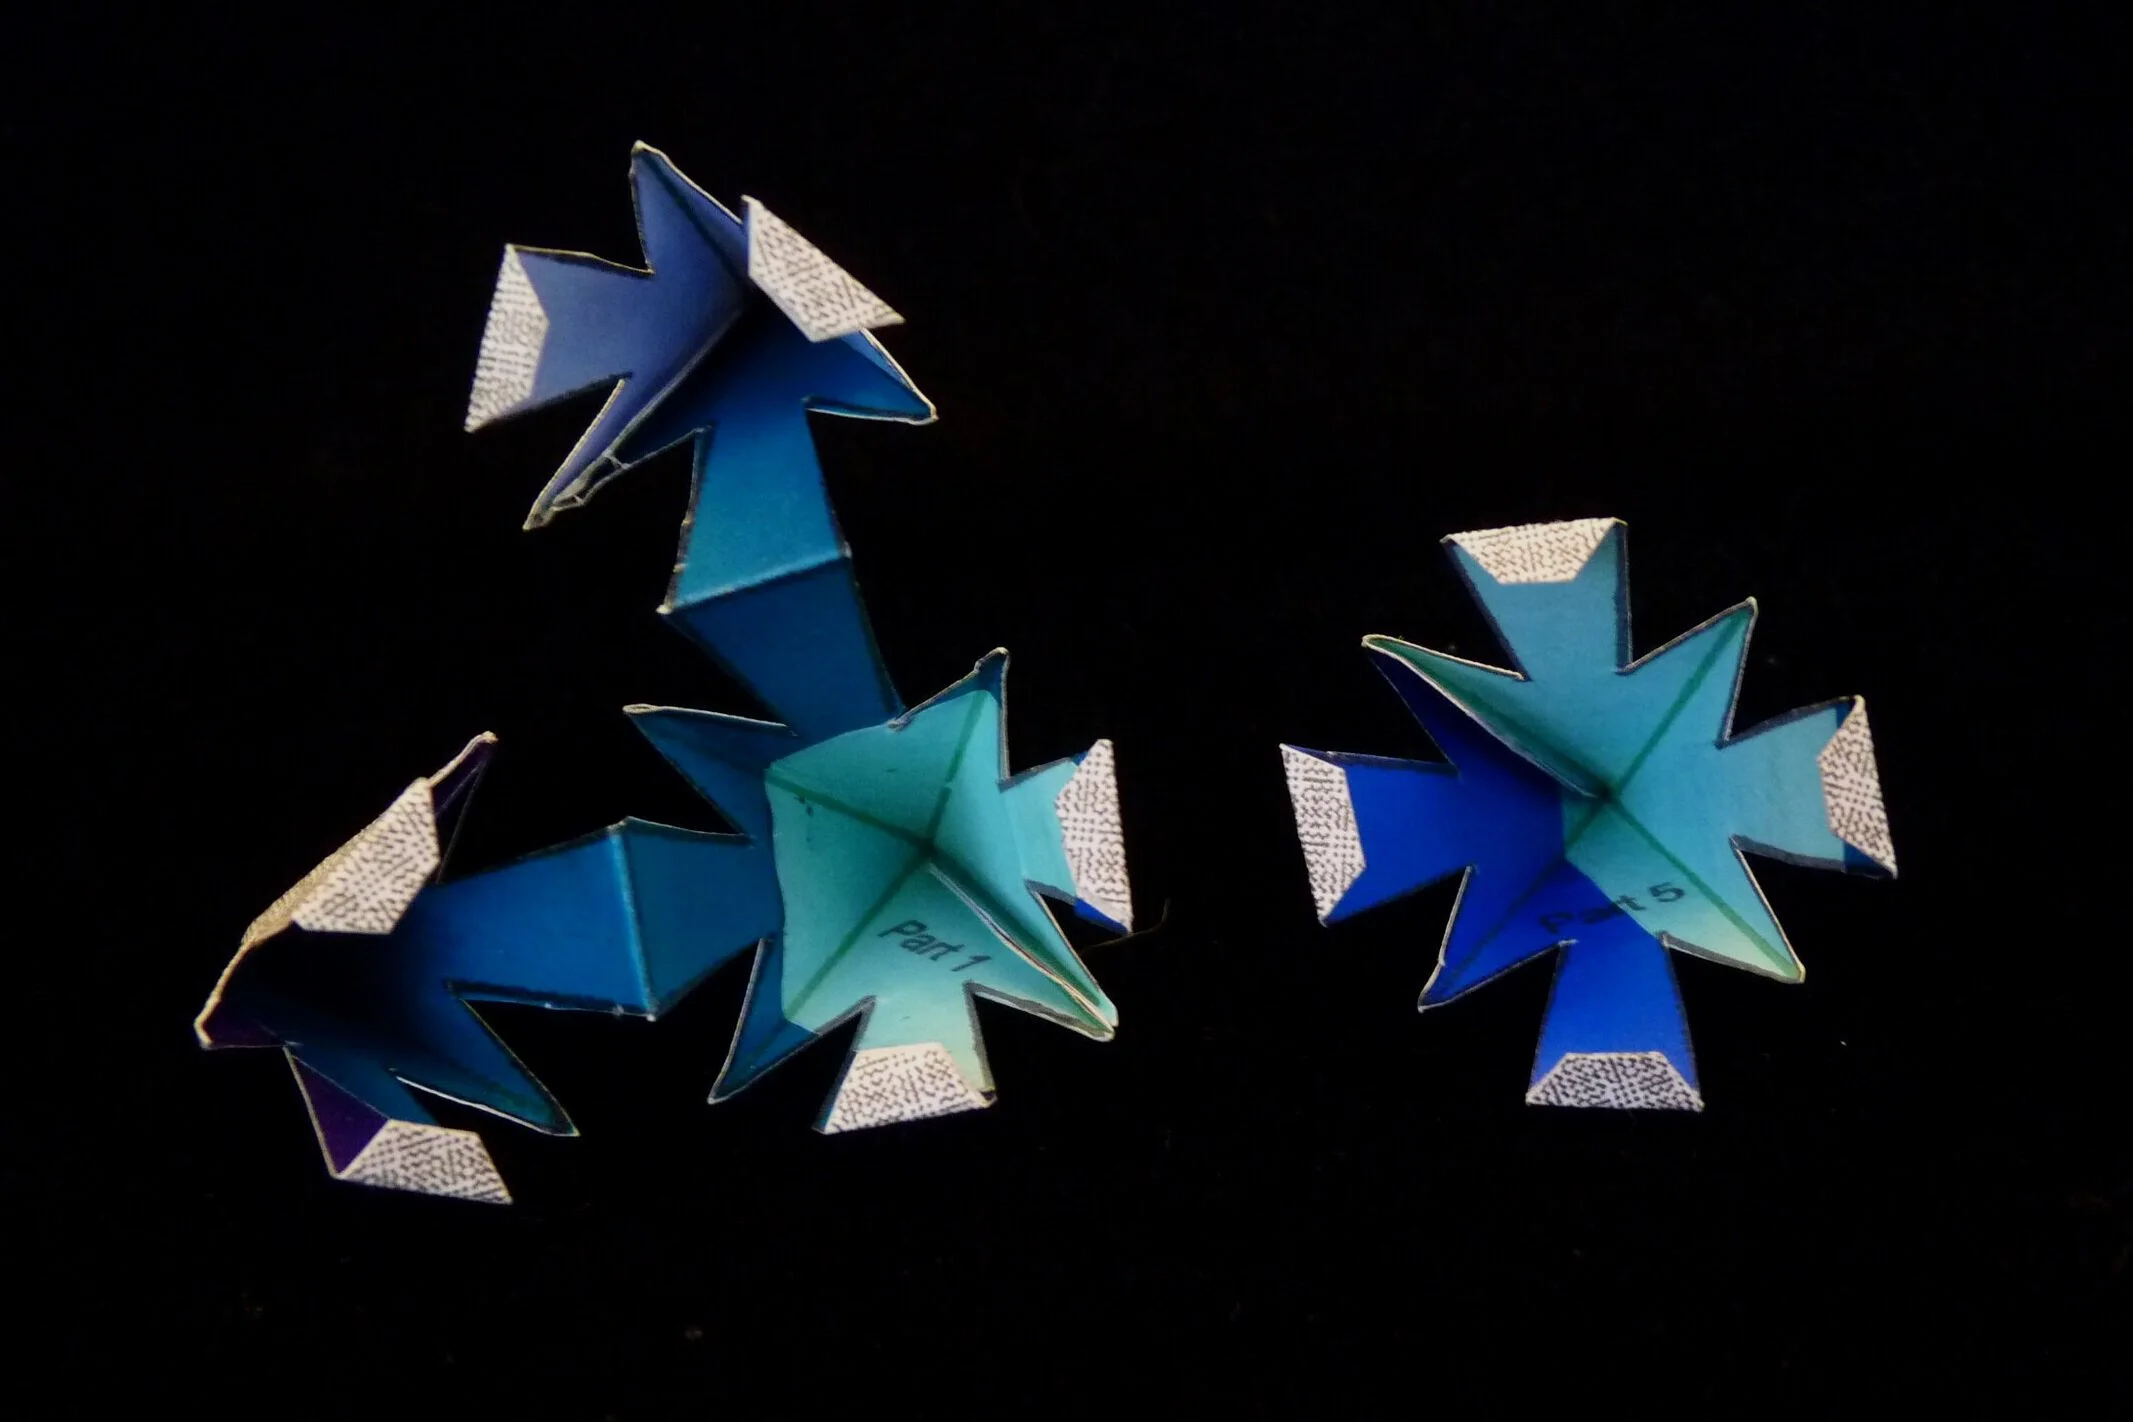
Photo 5. Inside of Parts 1 and 5 after Step 4

Photo 6. Outside of Parts 1 and 5 after Step 4
Step 5
Attach Part 2 to Part 1. Do this by gluing Flap A on Part 2 to Flap B on Part 1; and by gluing Flap D on Part 2 to Flap E on Part 1.

Photo 7. Inside of Project after Step 5
Photo 8. Outside of Project after Step 5
Step 6
Attach Part 3 to Part 2. Do this by gluing Flap A on Part 3 to Flap B on Part 2; and by gluing Flap D on Part 3 to Flap E on Part 2.
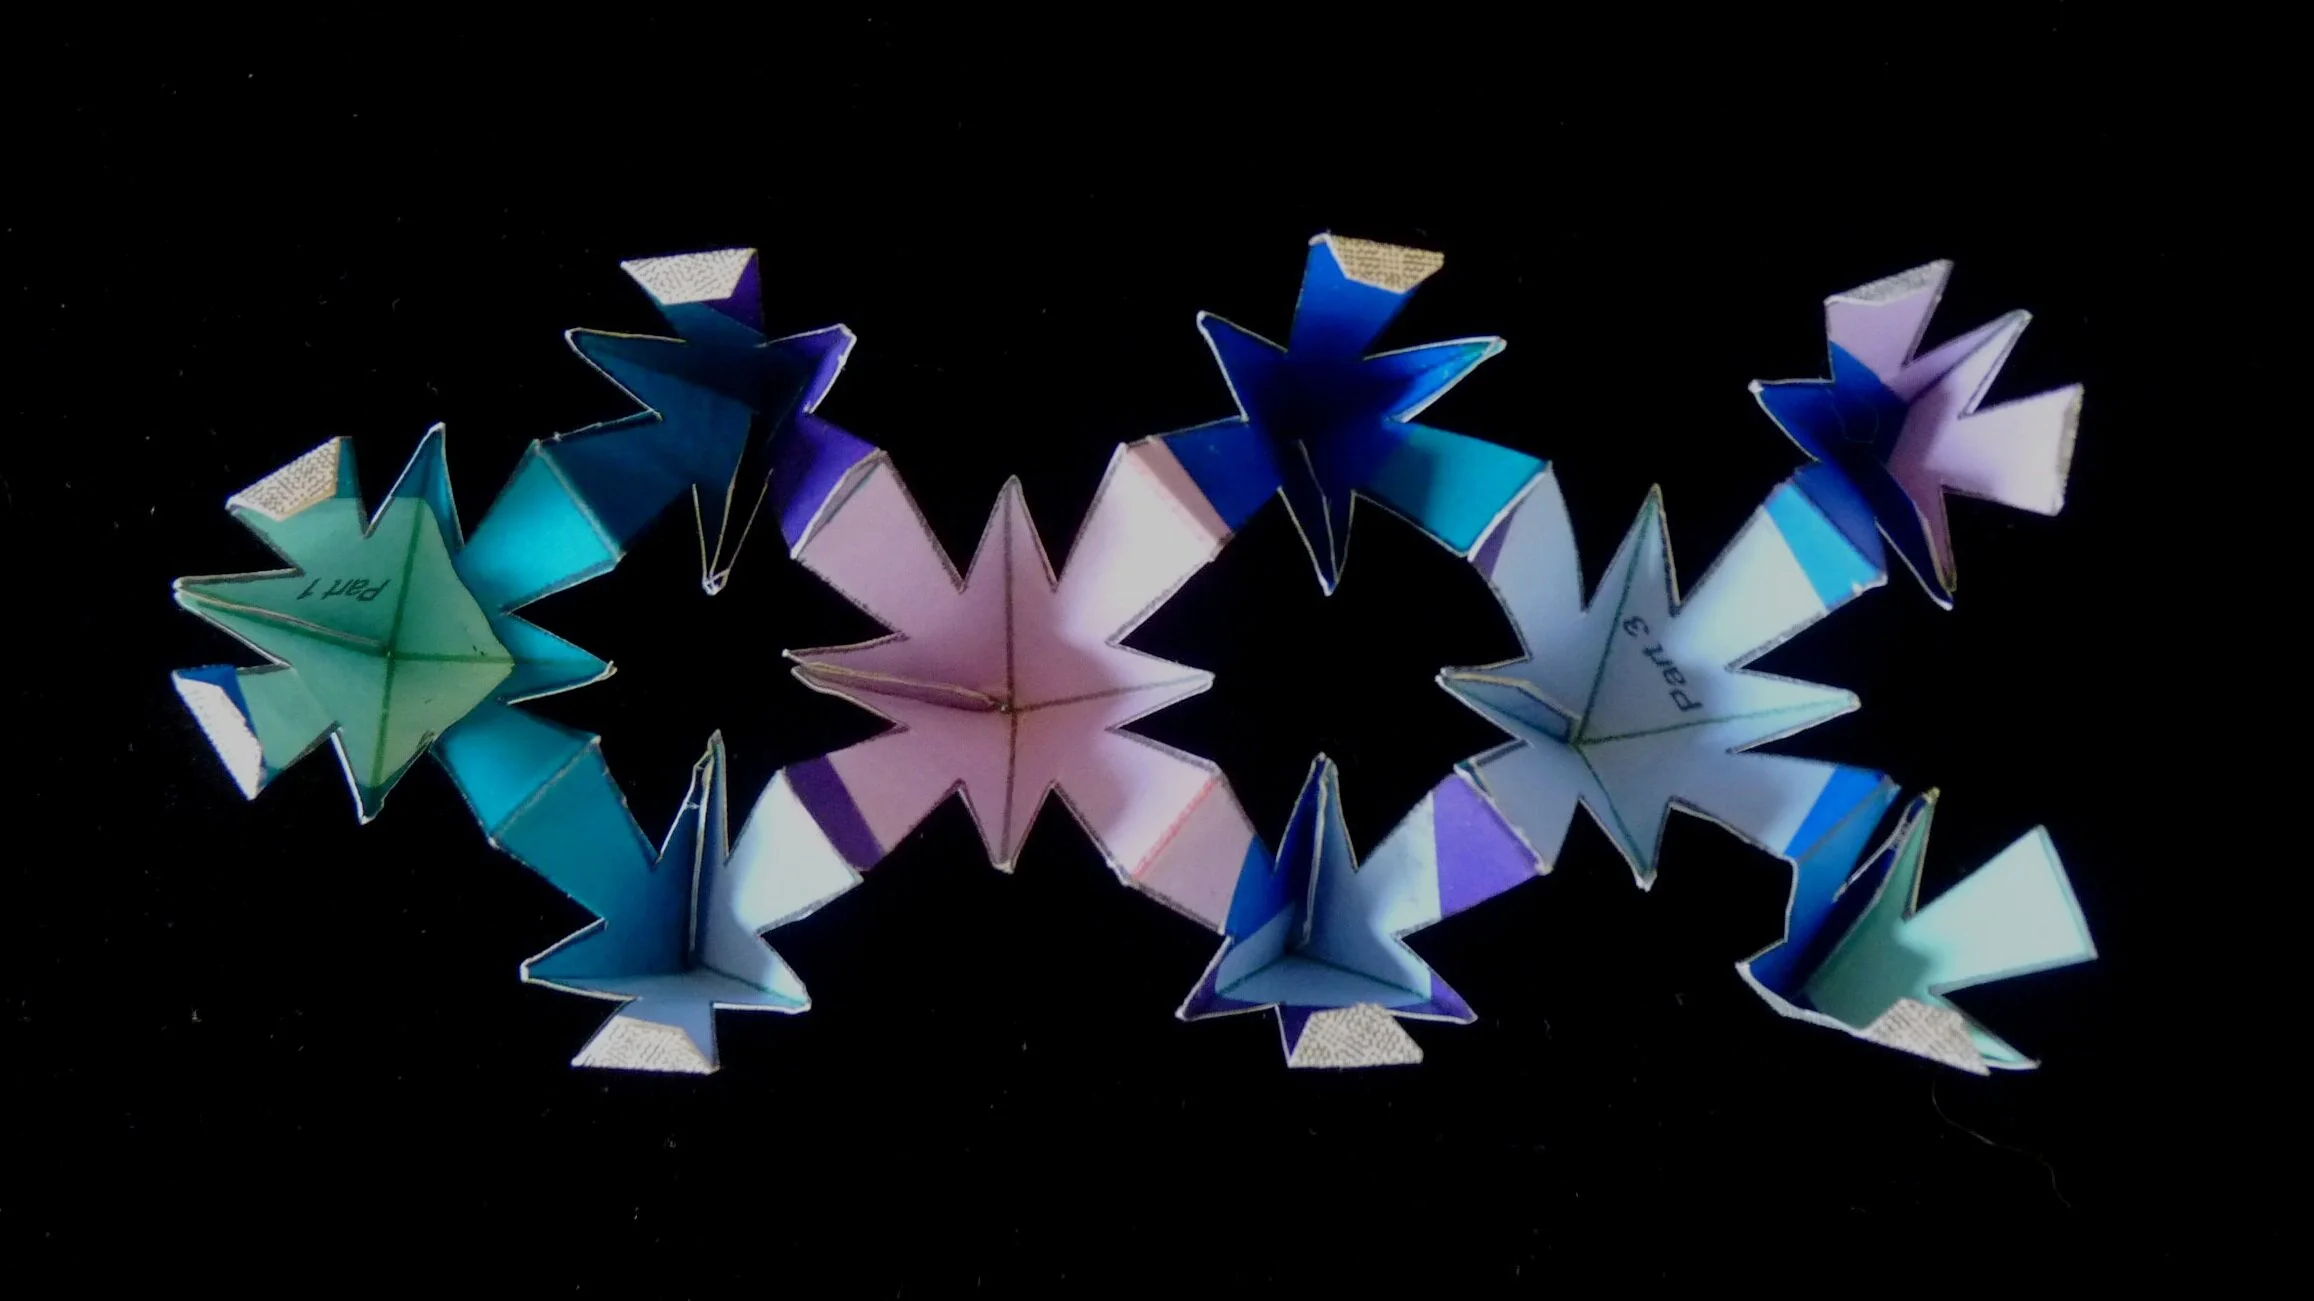
Photo 9. Inside of Project after Step 6
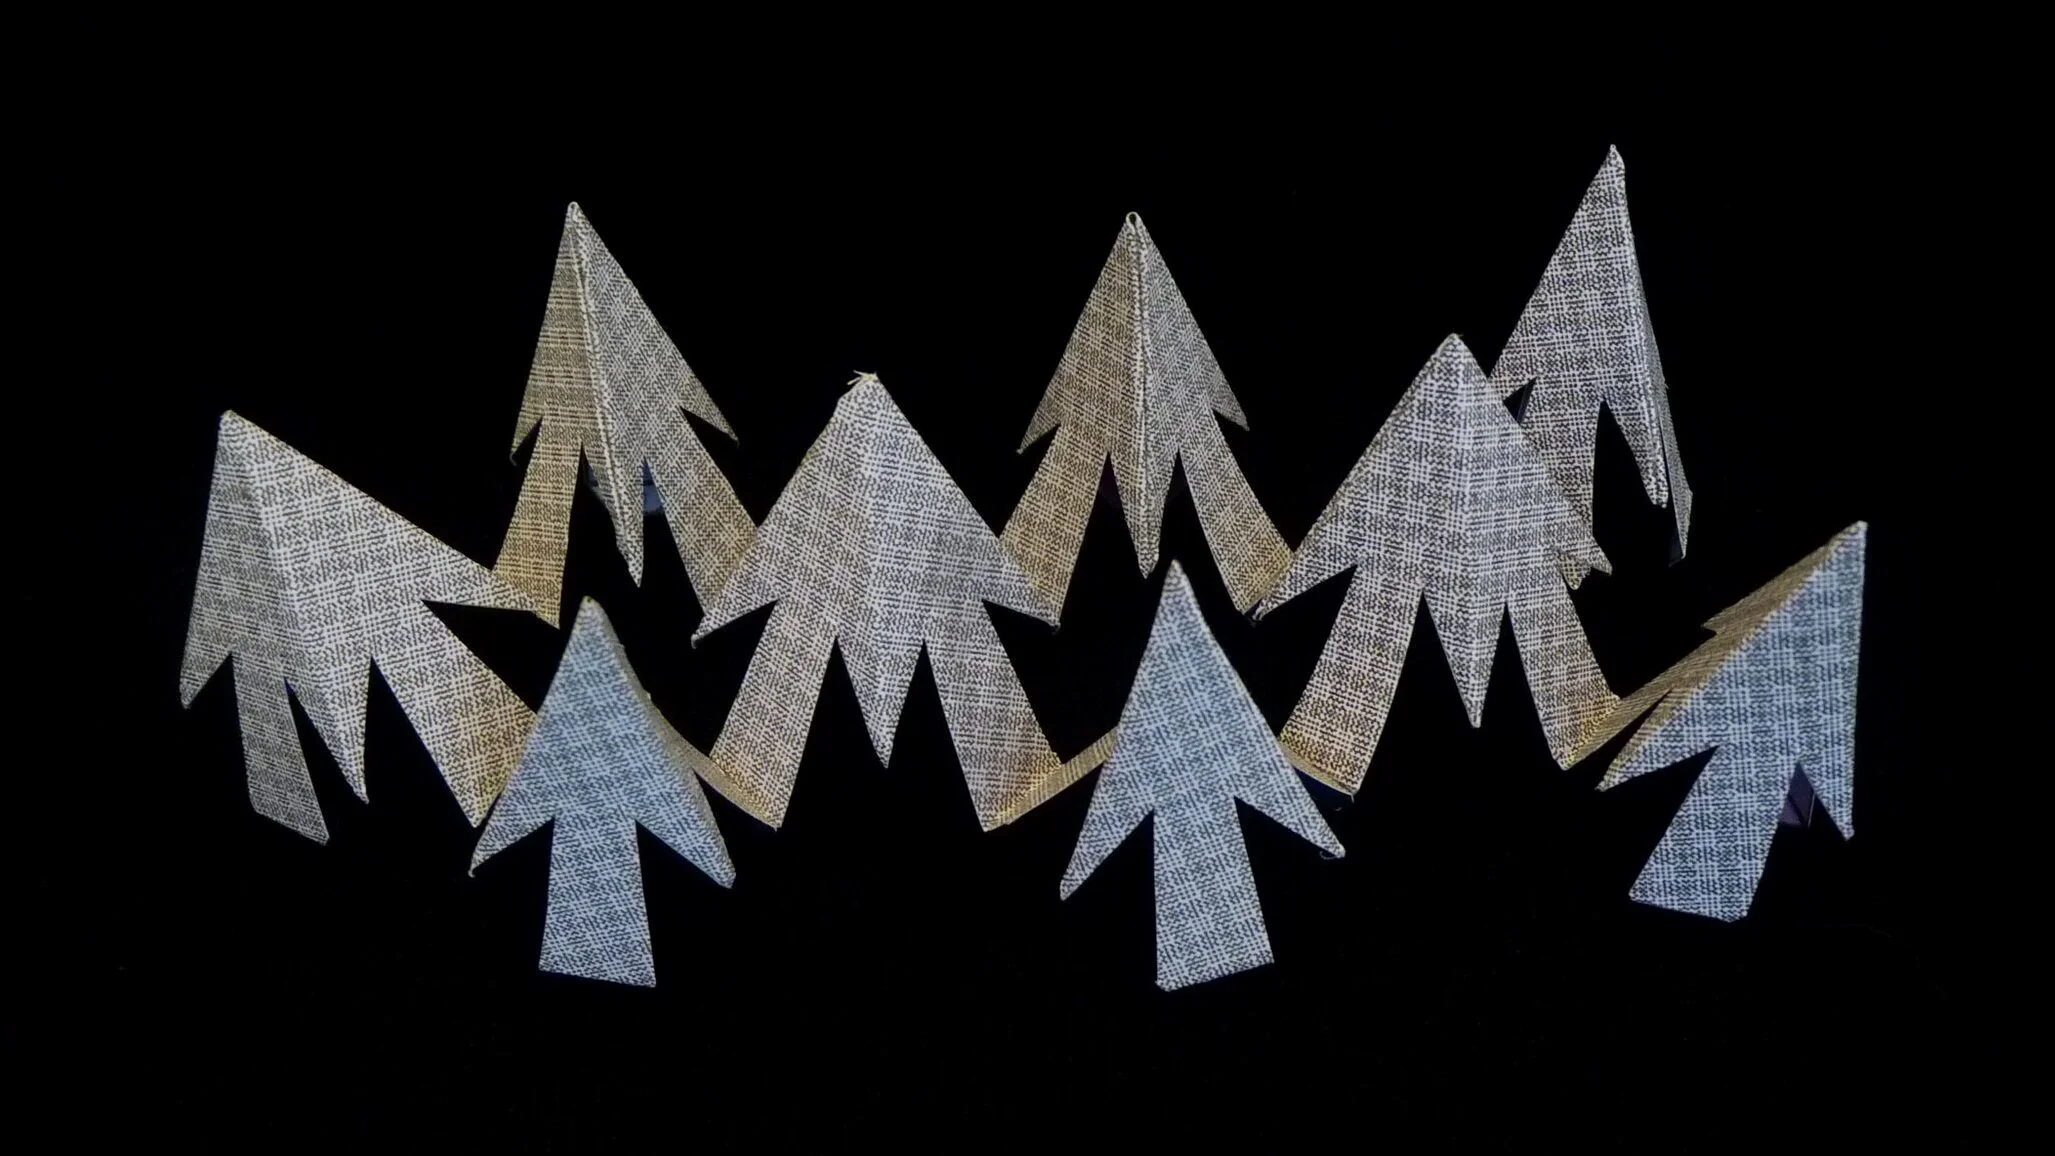
Photo 10. Outside of Project after Step 6
Step 7
Attach Part 4 to Part 3 and to Part 1. Do this by gluing Flap A on Part 4 to Flap B on Part 3: Flap D on Part 4 to Flap E on Part 3; Flap B on Part 4 to Flap A on Part 1; and Flap E on Part 4 to Flap D on Part 1.
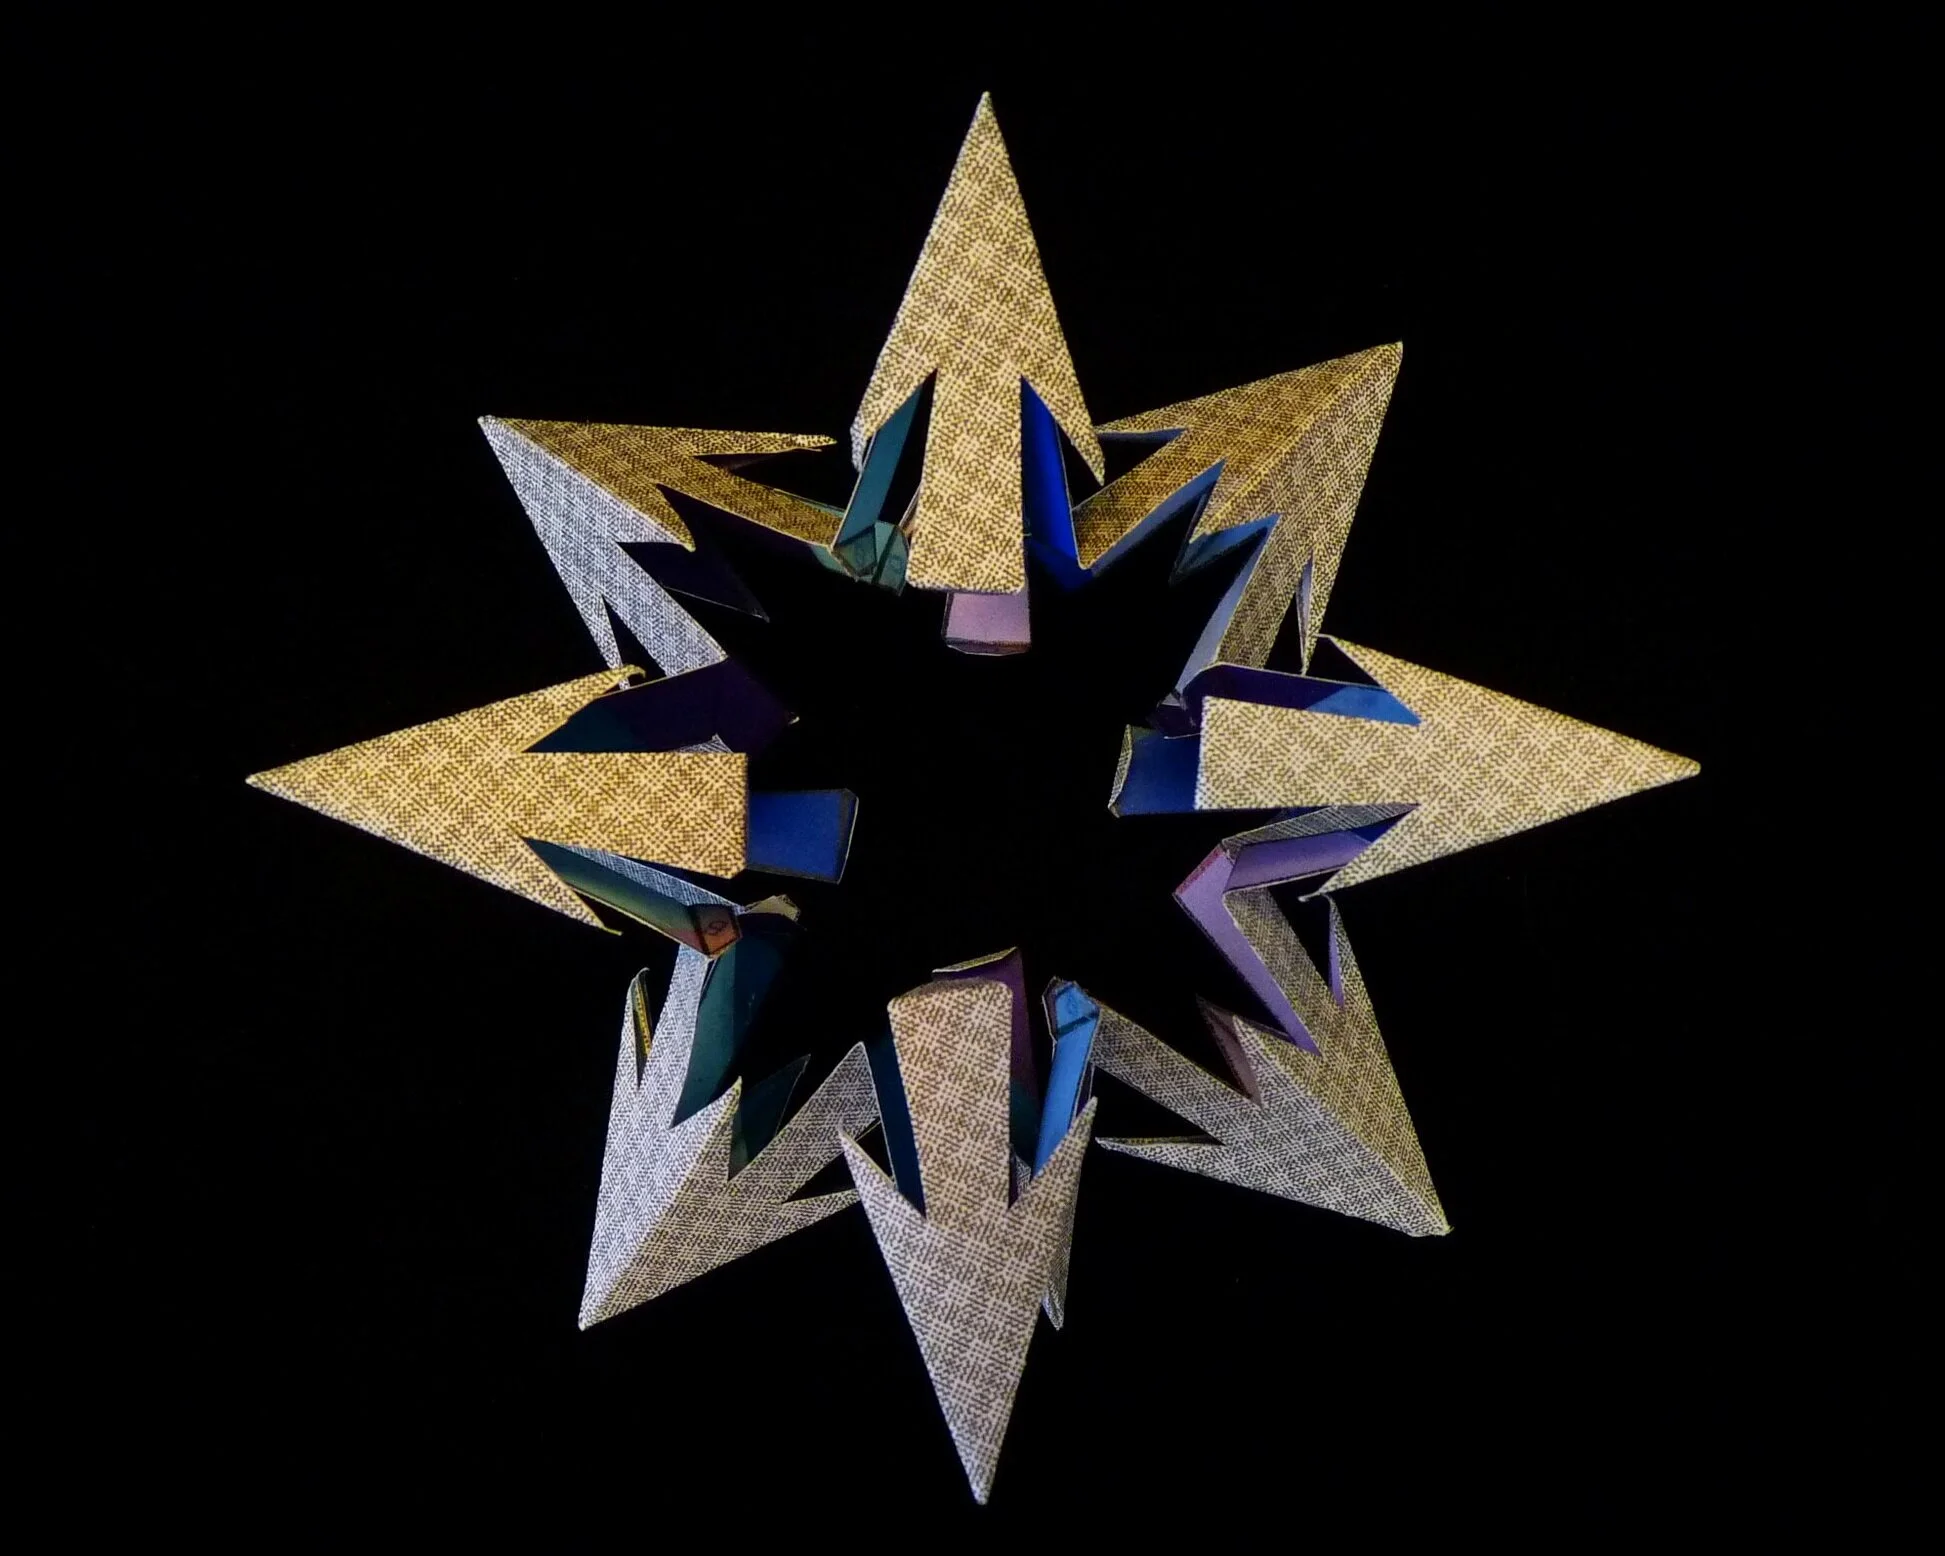
Photo 11. Project after Step 7, View 1

Photo 12. Project after Step 7, View 2
Step 8
Complete the project by attaching Parts 5 and 6. Do this by gluing the four Flap K’s on Part 5 to the four Flap C’s on one side of the project; and by gluing the four Flaps K’s on Part 6 to the four Flap C’s on the other side of the project.

Photo 13 . Completed North Star, View 1
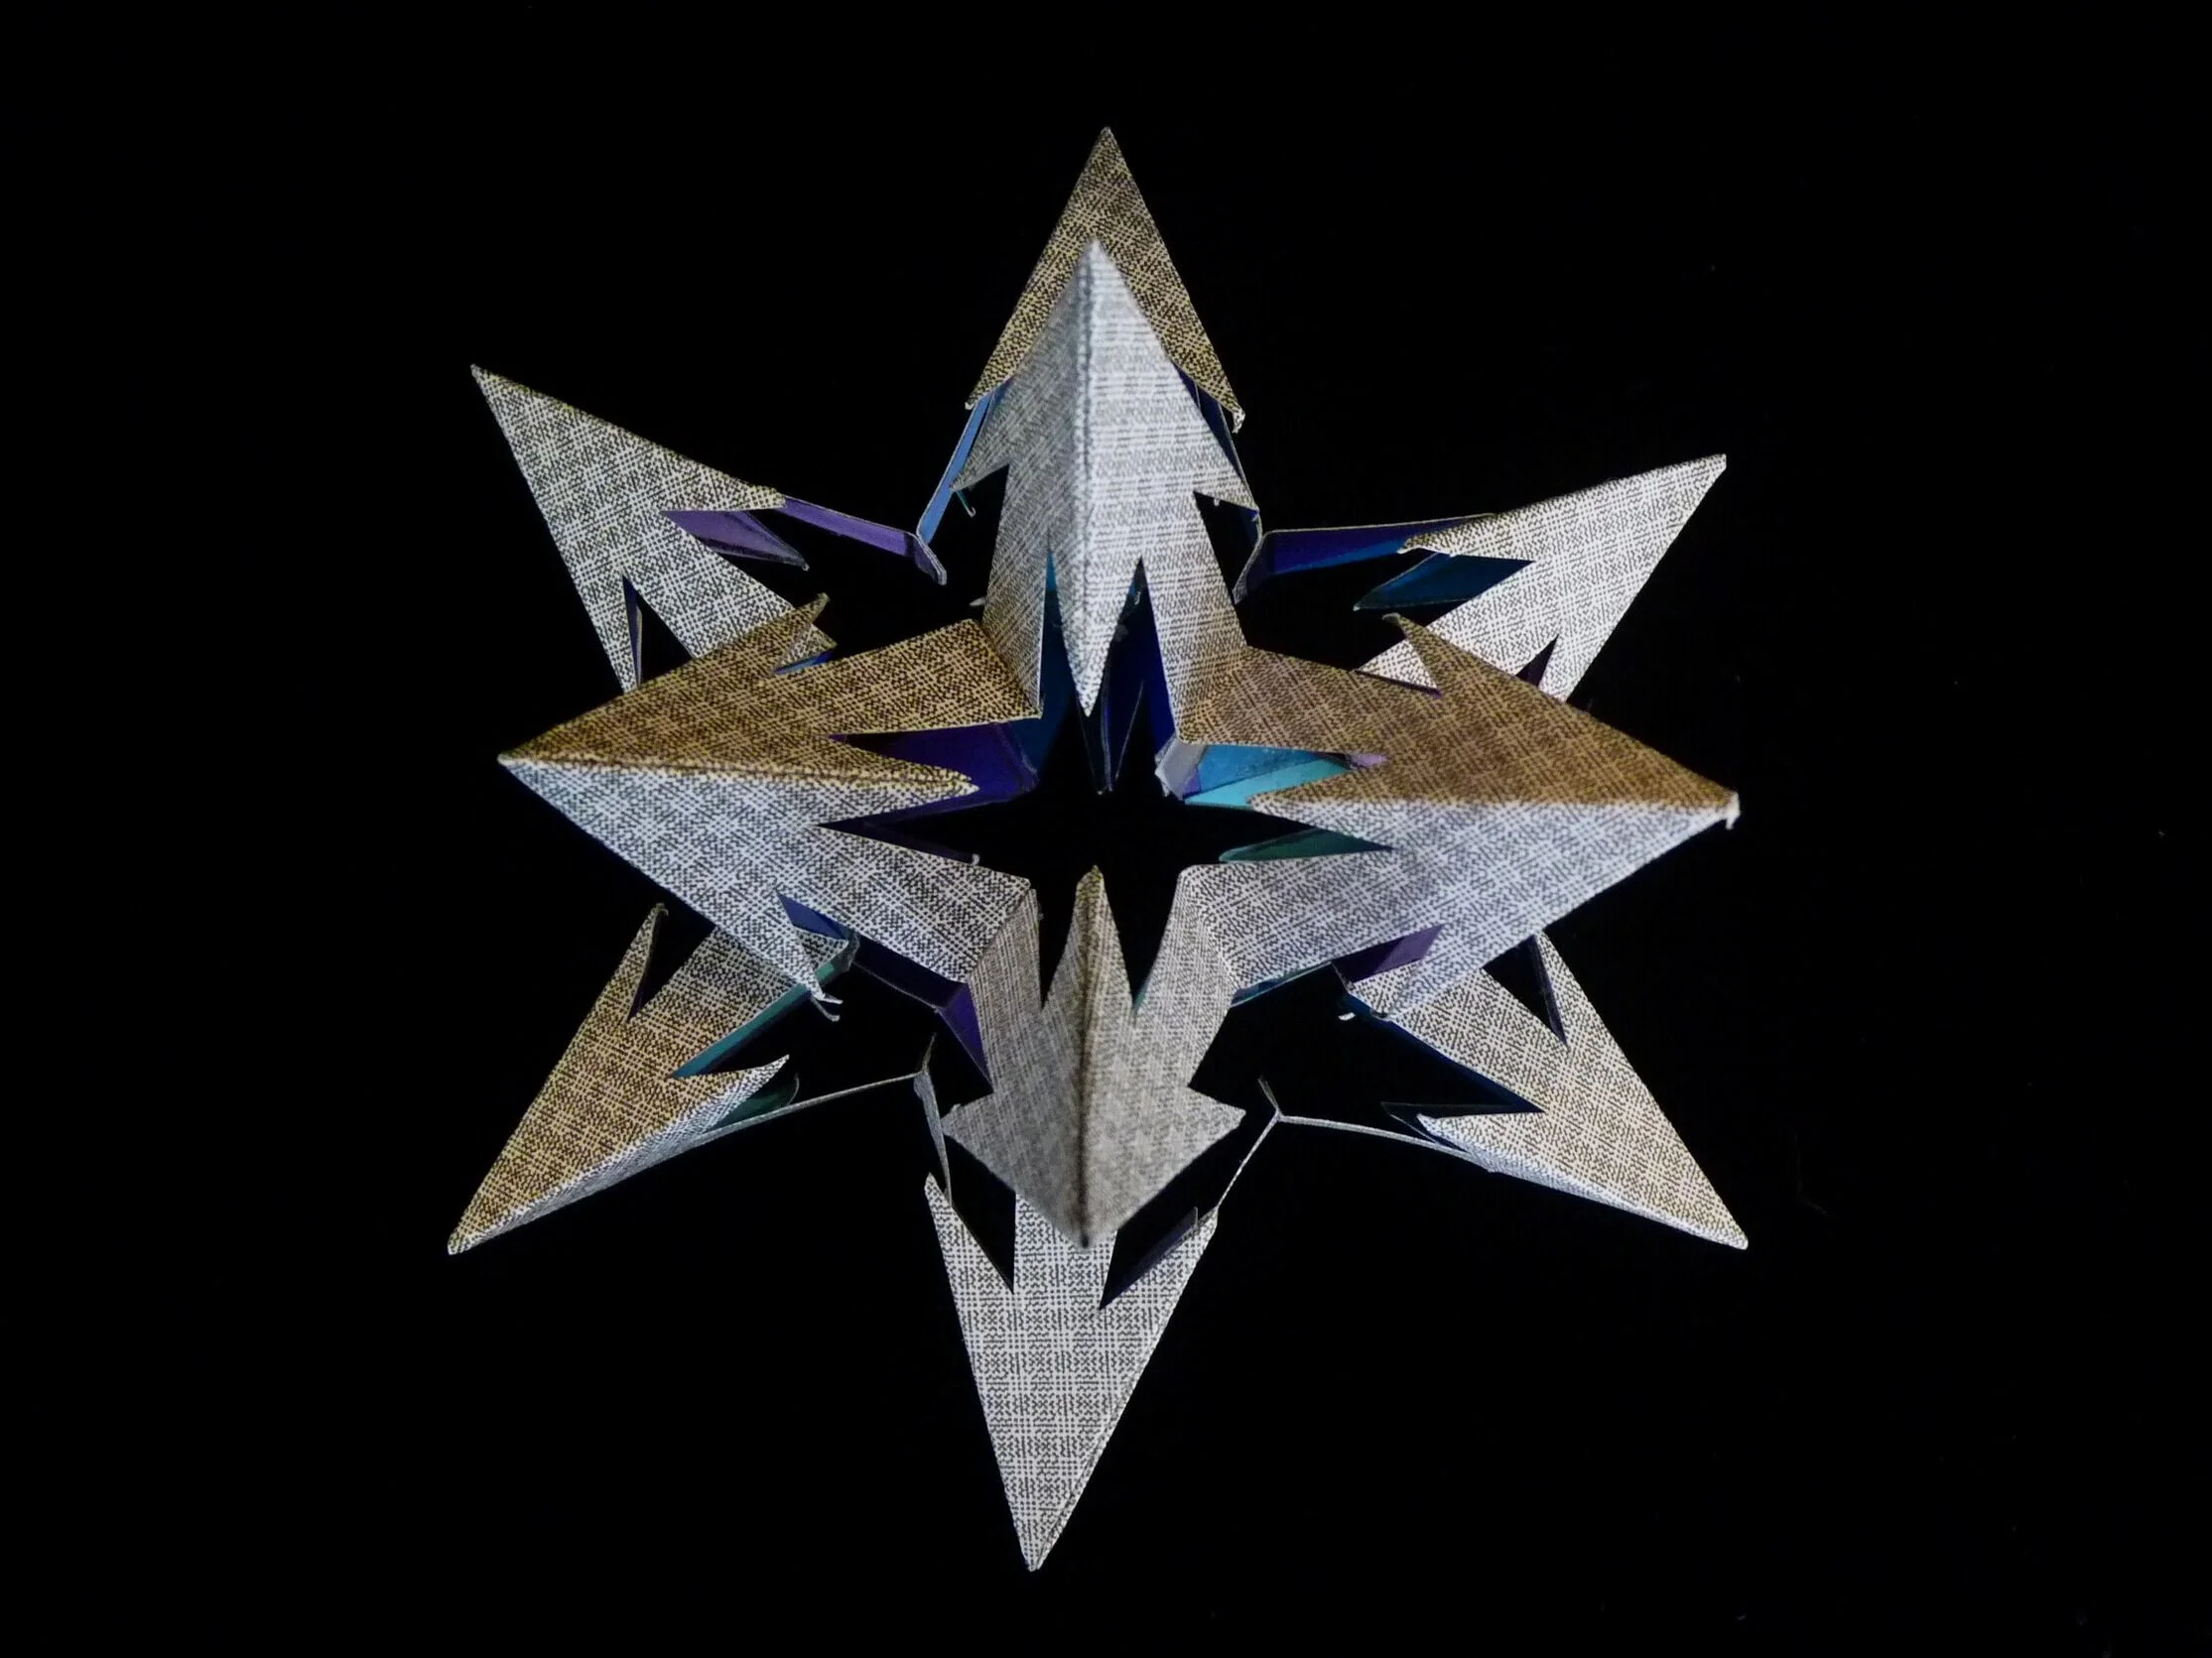
Photo 14. Completed North Star, View 2
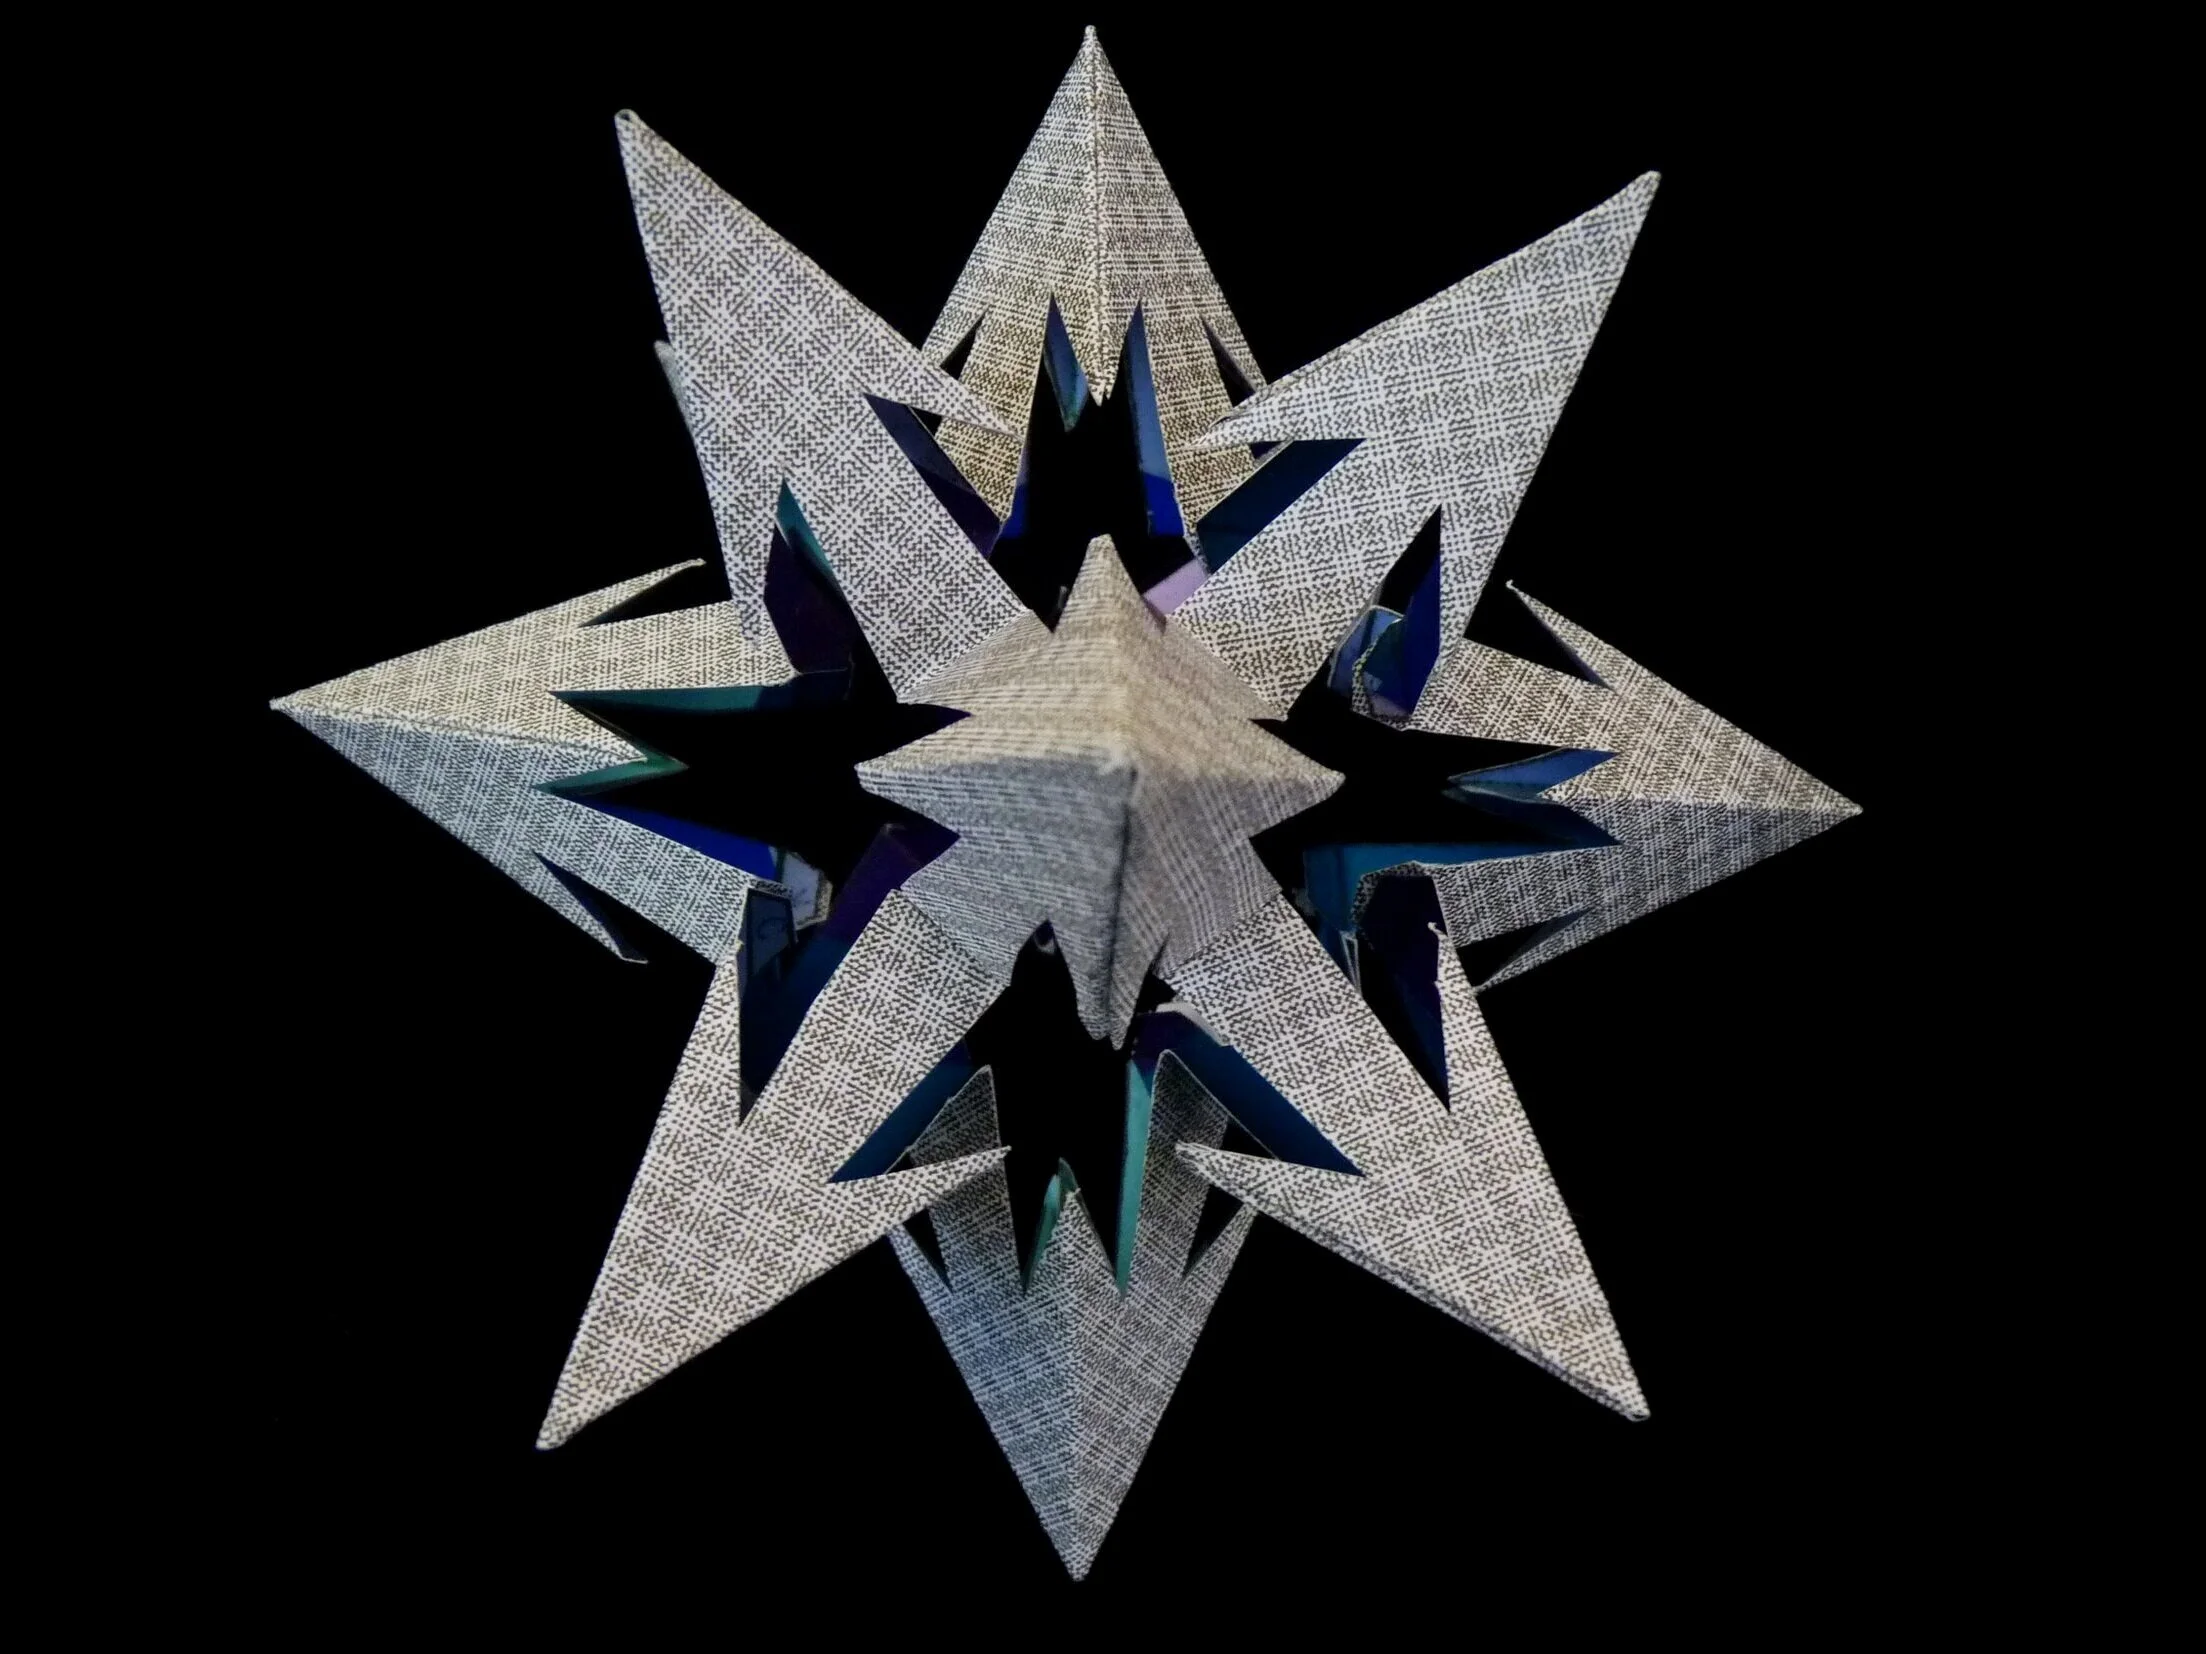
Photo 15. Completed North Star, View 3

Photo 16. Completed North Star, View 4
ANOTHER EXAMPLE
Another example of a completed North Star.
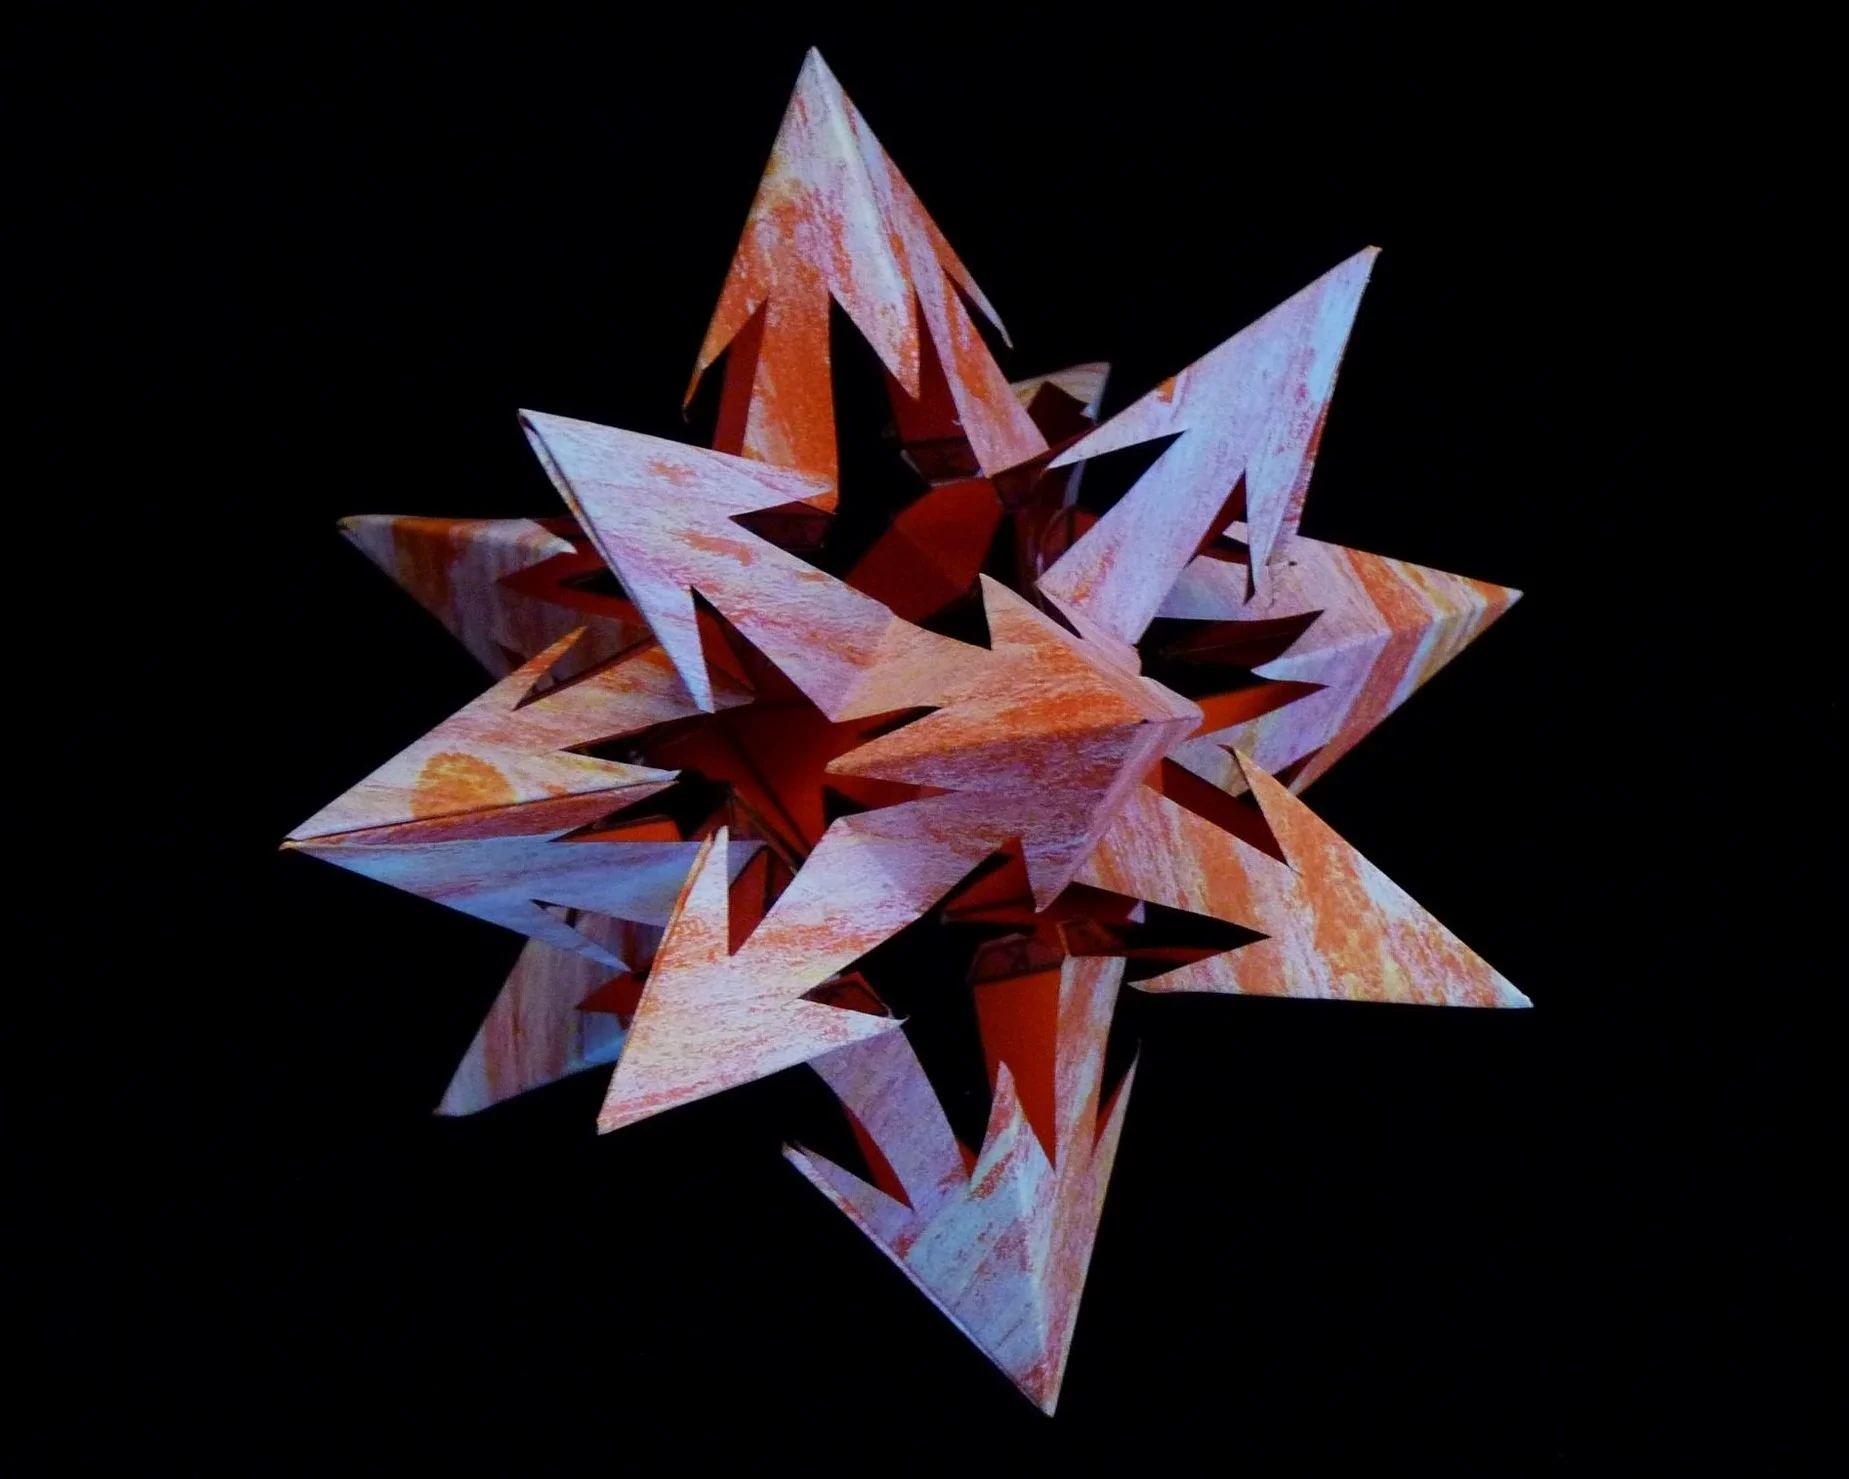
Photo 17. Another Completed North Star, View 1

Photo 18. Another Completed North Star, View 2