Moon Flower
Make any room bloom at night. Add a few moon flowers.
Project Info
Paper required: Two sheets 8 ½ x 11 inch (or A4)
Finished Project size: 8 inches (20 cm) tall x 3 inches (8 cm) wide
Difficulty Level: Intermediate
Click button below to get your free printable pattern !
Click button below to get your free printable pattern !
INSTRUCTIONS
STEP 1
Print the Moon Flower pattern onto two paper sheets of your choice. Sheet one is for the flower and sheet two is for the stem and leaves, so choose your colors accordingly.
Read the pattern key included in the General Instructions.
Step 2
Cut out the 5 parts (one flower, one stem , two leaves, and one base) by cutting on the black lines.

Photo 1. Inside of 5 Parts after Step 2

Photo 2. Outside of 5 Parts after Step 2
STEP 3
On each of the two leaves, fold the red lines as mountain folds and the green lines as valley folds.

Photo 3. Lower Side of Leaf after Step 3

Photo 4. Upper Side of Leaf after Step 3
Step 4
On the stem, fold the green lines as valley folds and the red lines as mountain folds. Glue the two long flaps together to close the stem.

Photo 5. Stem after Folding

Photo 6. Stem after Gluing Flaps
Step 5
On the flower, fold all red lines as mountain folds and fold all green lines as valley folds.

Photo 7. Inside of Flower after Step 5

Photo 8. Outside of Flower after Step 5
Step 6
Continue on the flower by gluing the glue flap to the adjacent checkered patch.

Photo 9. Inside of Flower after Step 6

Photo 10. Outside of Flower after Step 6
Step 7
Glue the flower to the stem. The sepals on the stem should fit into and be glued to the valleys on the outside of the flower. Glue the leaves to the stem.

Photo 11. Project after Step 7
Step 8
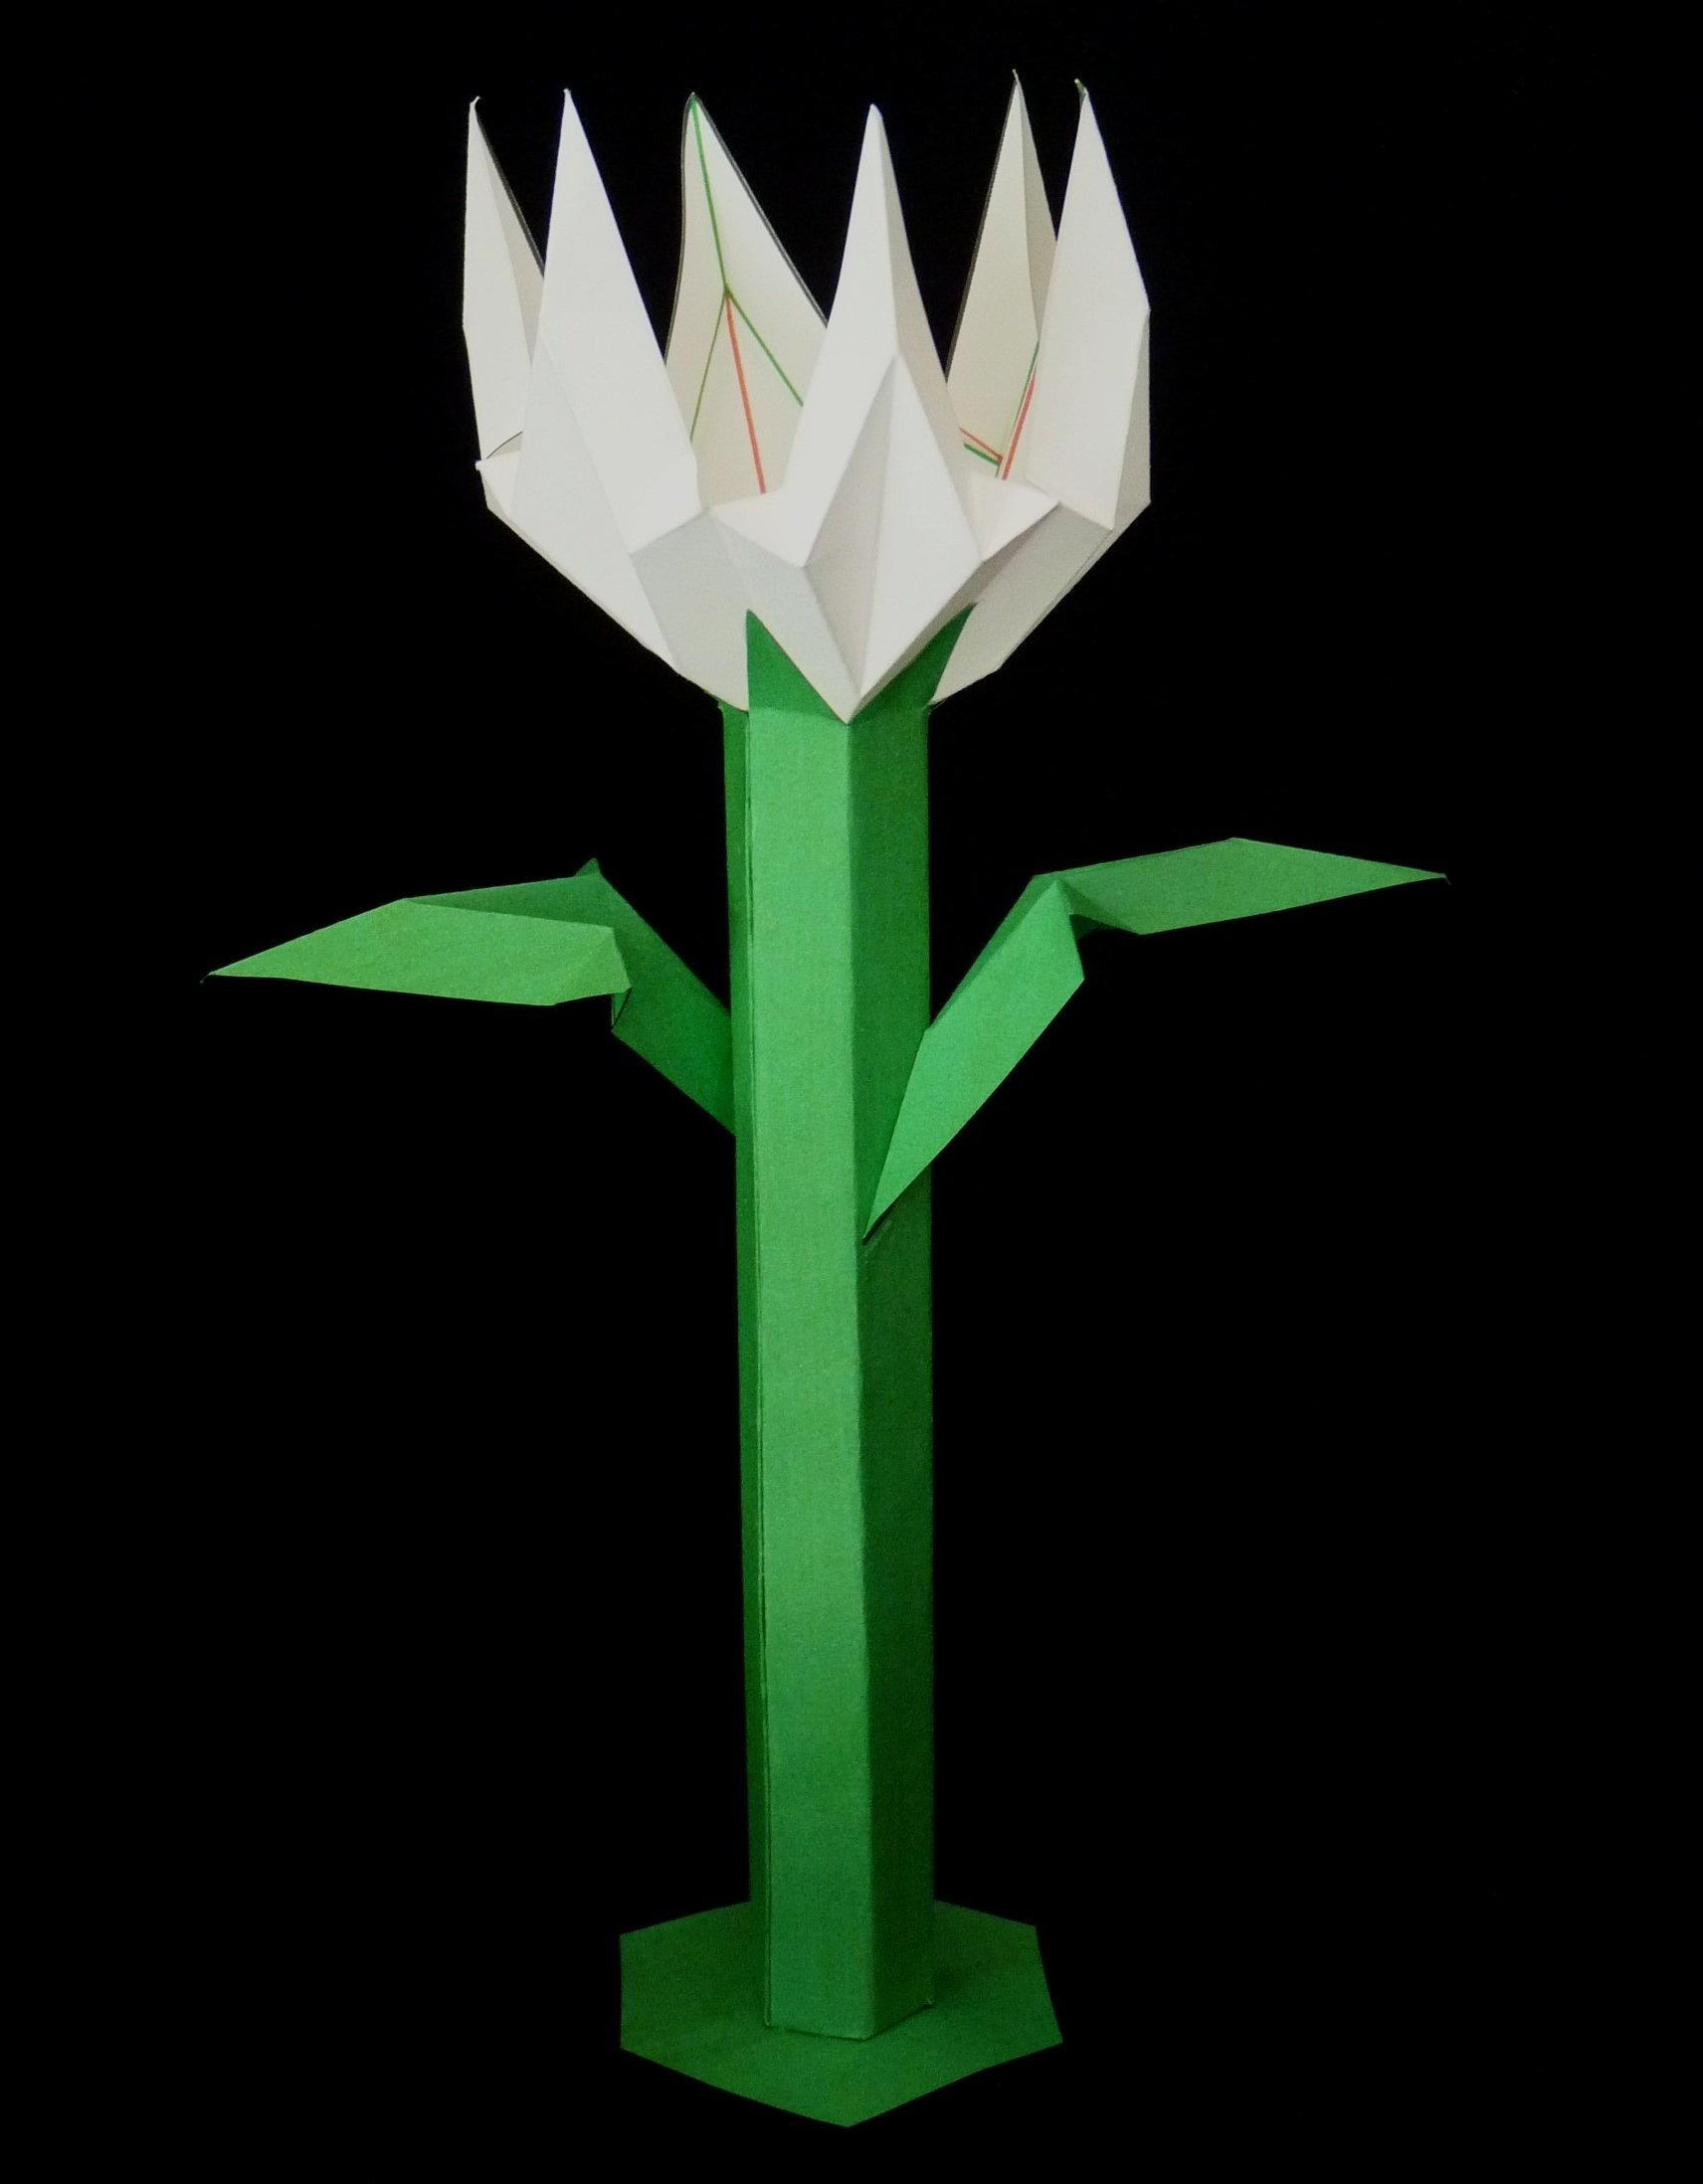
Display your moon flower in a vase or use the glue flaps at the bottom of the stem to attach the optional base.

Photo 12. Completed Moon Flower in a Vase

Photo 13. Completed Moon Flower with Optional Base
Another Example

Photo 14. Completed Moon Flower, Lunar Variety

Photo 15. Completed Moon Flower, Lunar Variety