Martian Dinosaur
Thought to be extinct, but is it really ? Craft one today for your Martian canal.
Project Info
Paper required: 2 sheets 8½ x 11 inch (or A4)
Finished Project size: 14 inches (35 cm) long x 4 inches ( 10cm ) tall
Difficulty Level: advanced
Click button below to get your free printable pattern !
Click button below to get your free printable pattern !
INSTRUCTIONS
STEP 1
Print the pattern onto the two matching paper sheets of your choice.
Read the pattern key included in the General Instructions.
Step 2
Cut out the body part by cutting of all black lines.

Photo 1. Back of Body Part after Step 2

Photo 2. Front of Body Part after Step 2.
STEP 3
On the body part, fold green lines as valley folds and red lines as mountain folds. Crease green lines first, then crease red lines. Then gently collapse body part all at once so that all valley and mountain folds go in the correct directions.
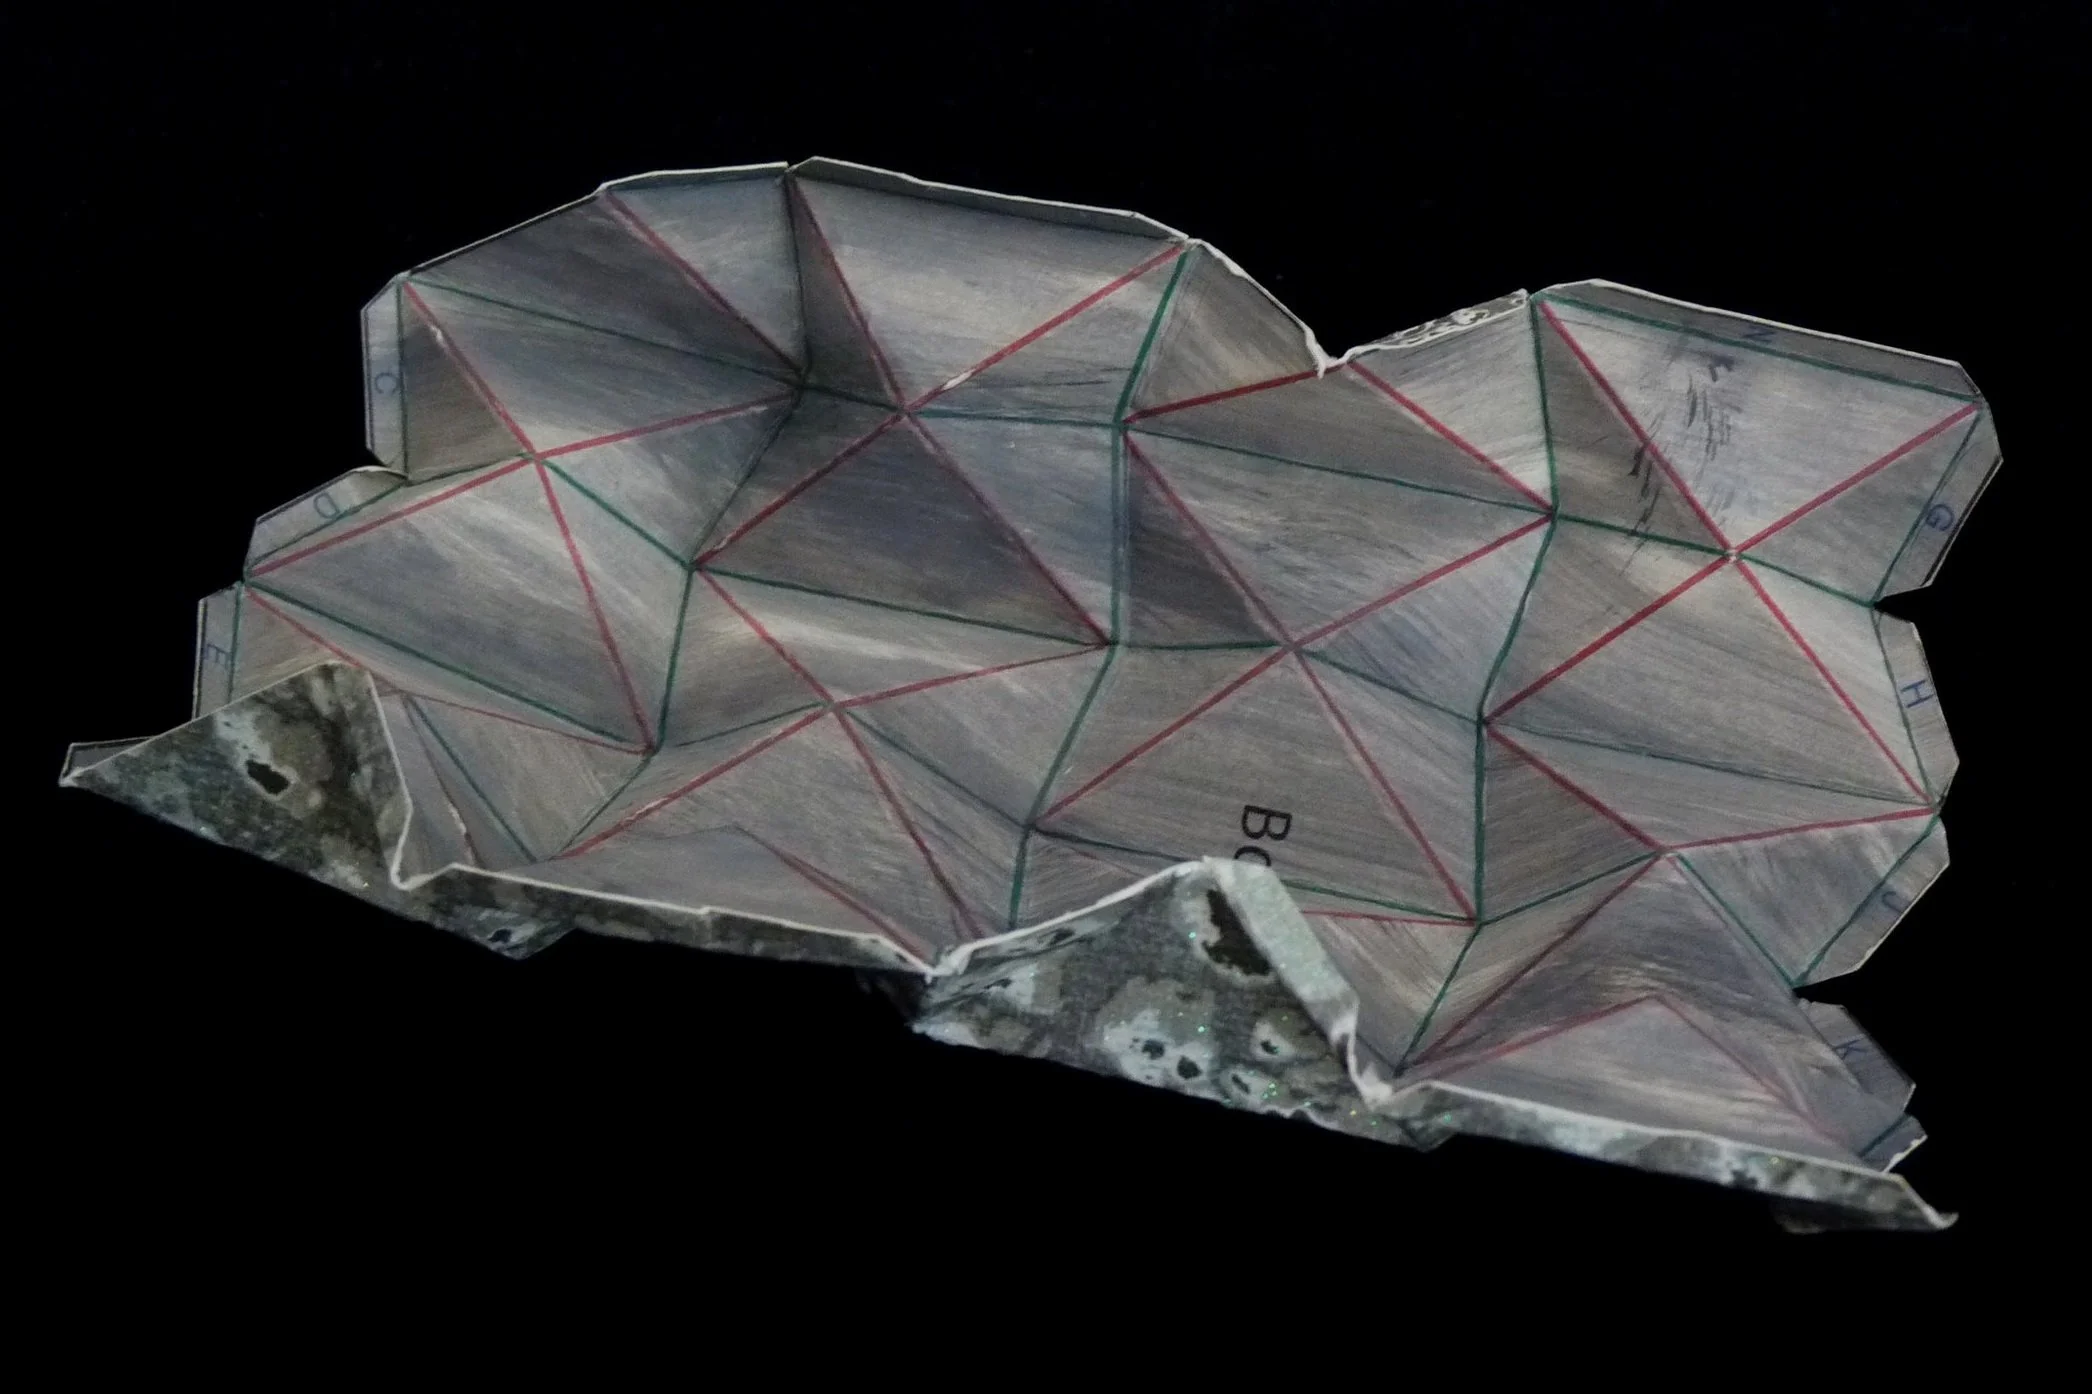
Photo 3. Back of Body after Step 3

Photo 4. Front of Body after Step 3
Step 4
Cut out the head and tail parts by cutting on all black lines, including the one interior black line between squares on the head part.
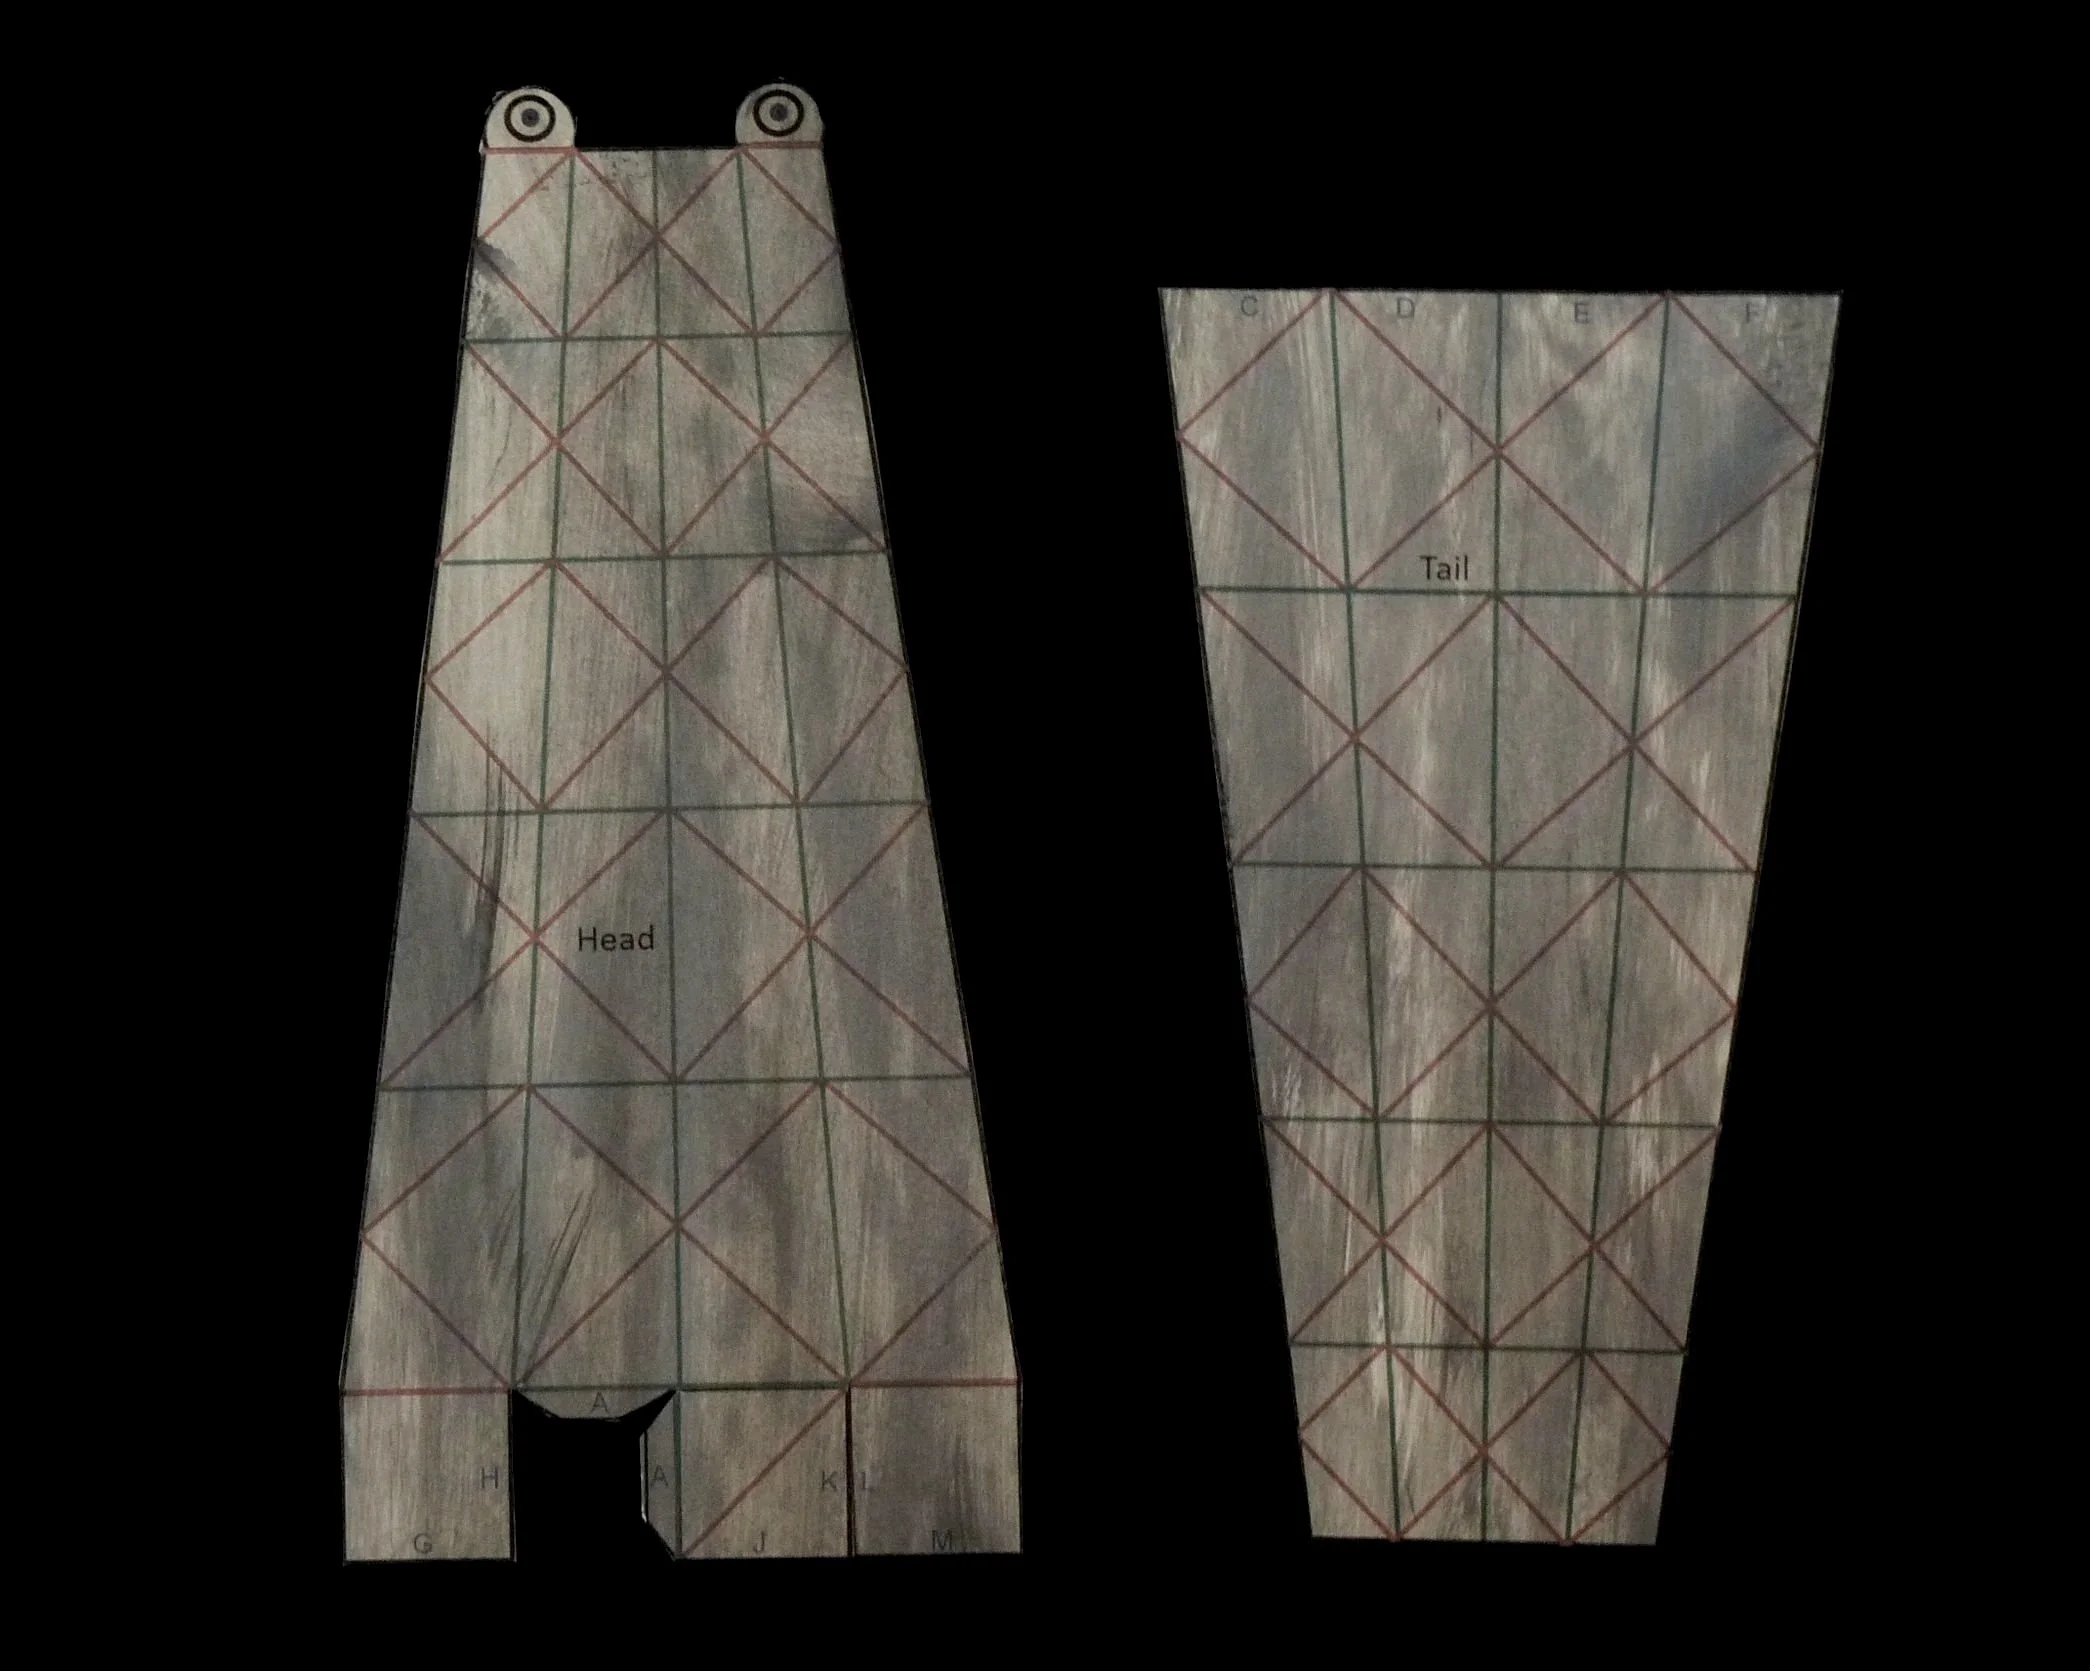
Photo 5. Back of Head and Tail Parts after Step 4
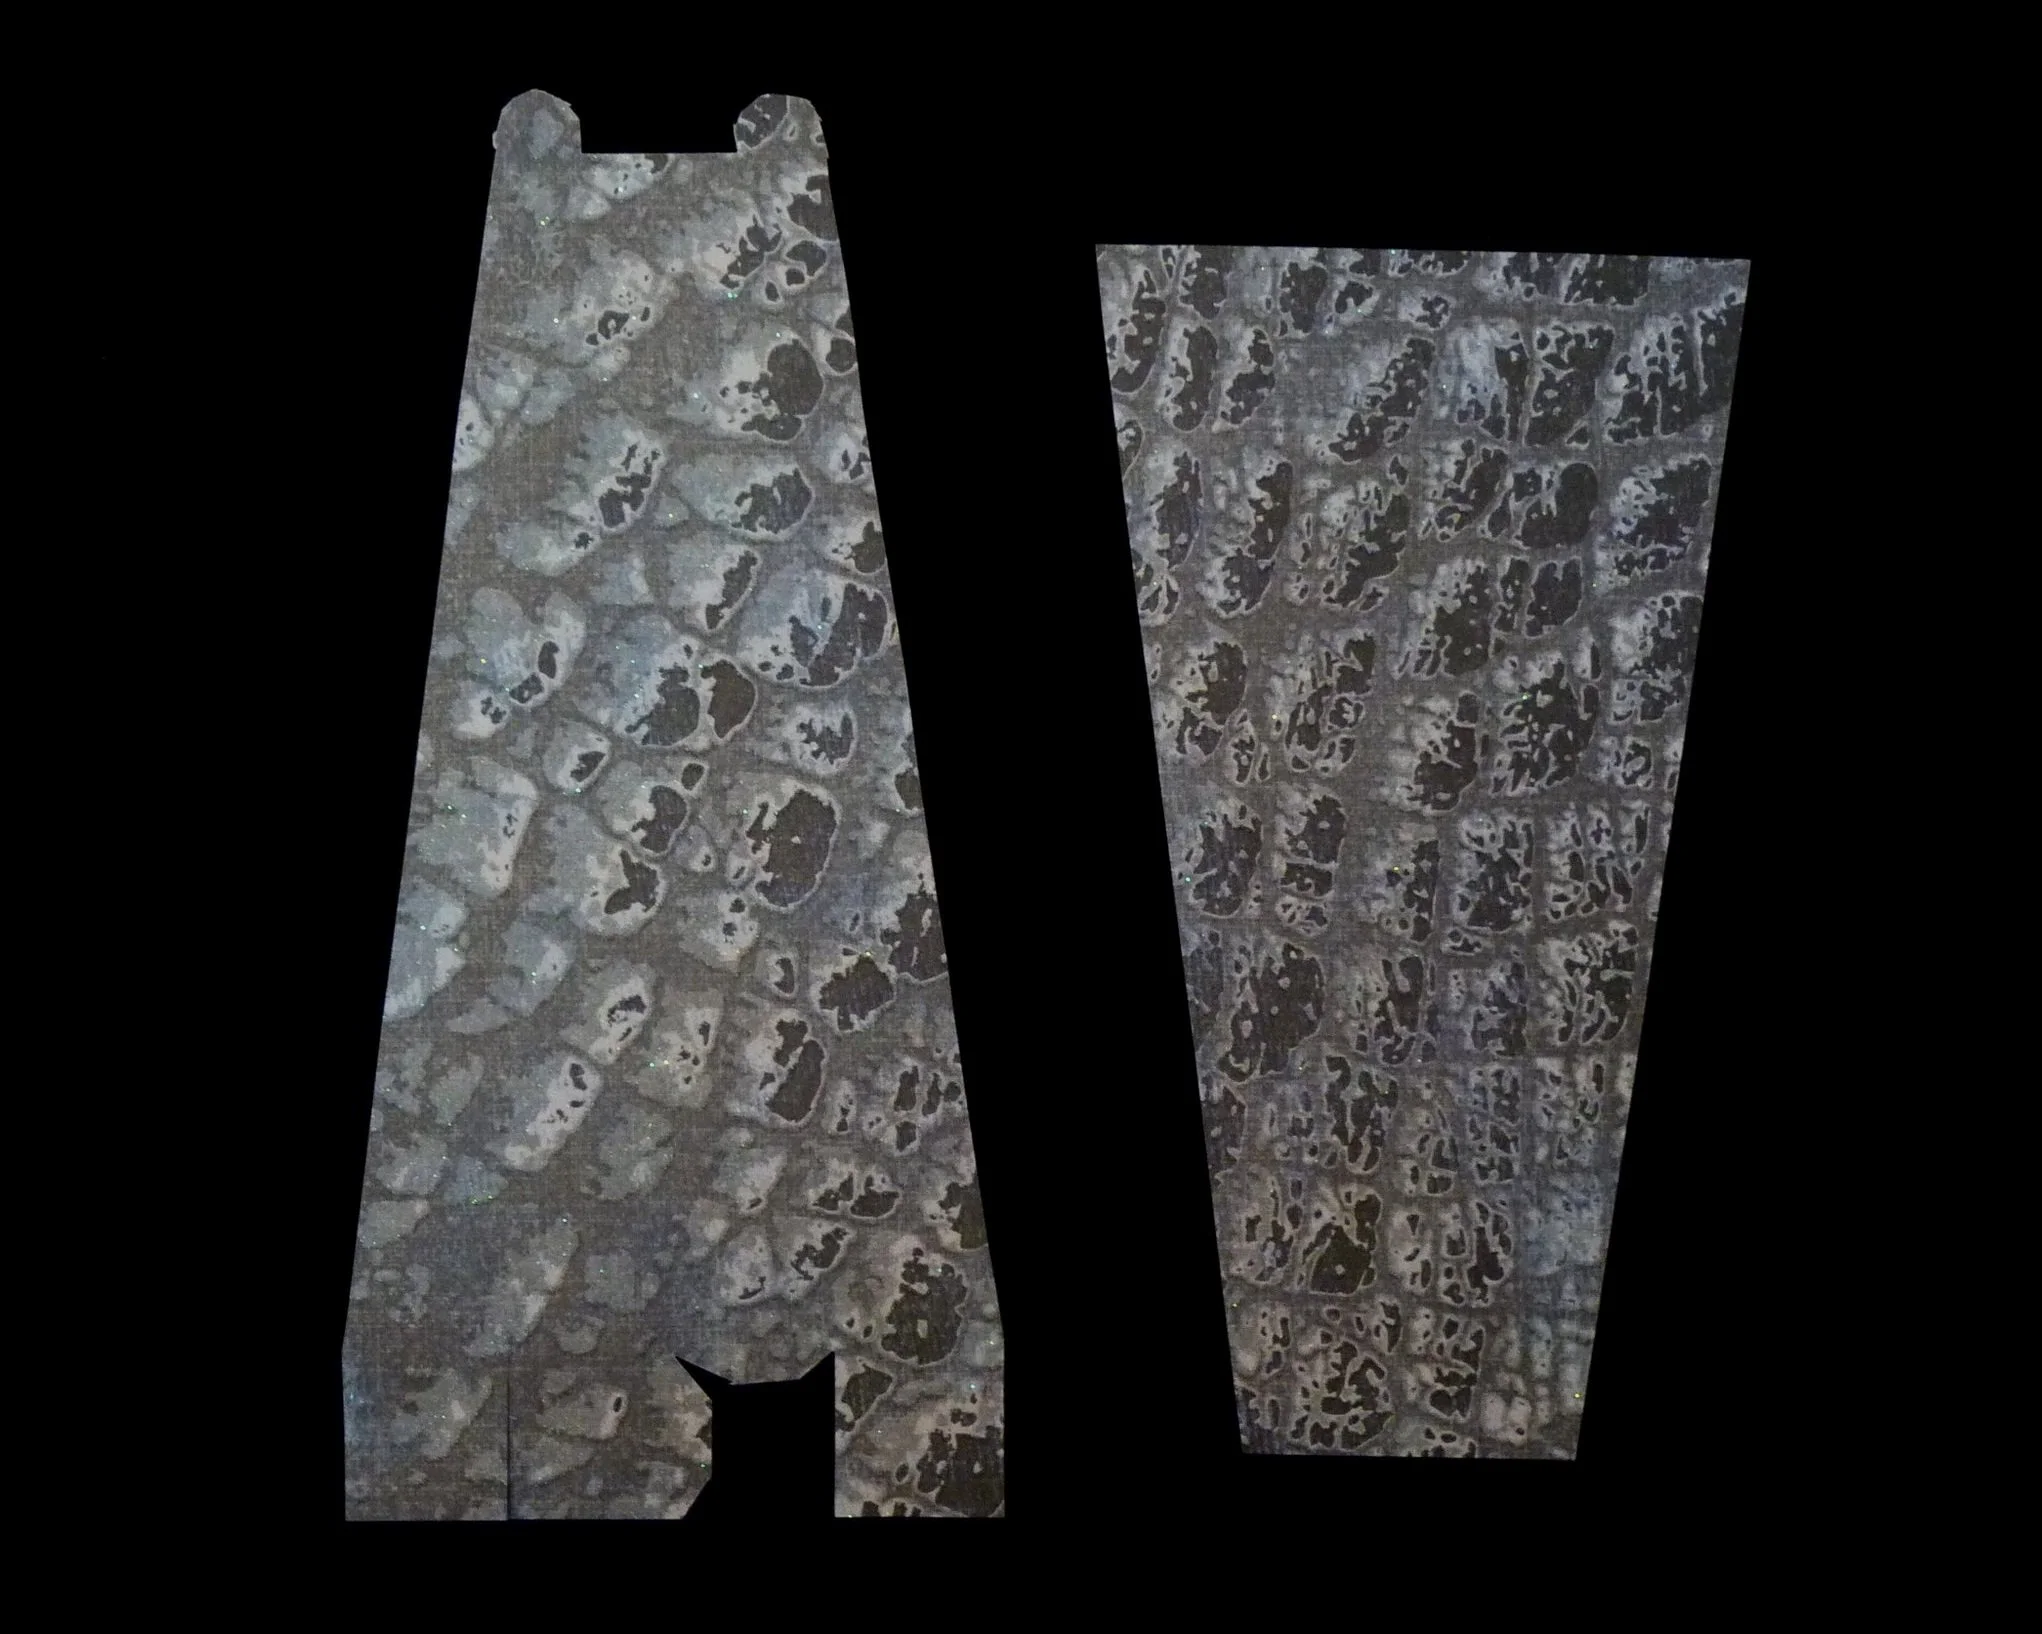
Photo 6. Front of Head and Tail Parts after Step 4
Step 5
On the head and tail parts, fold all green lines as valley folds and all red lines as mountain folds. Use a similar process as you did for the body, that is, crease the green lines first, then crease red lines. Then gently collapse the part all at once so that all valley and mountain folds go in the correct directions. Glue Flap A to the other Flap A on the head part.

Photo 7. Back of Head and Tail after Step 5

Photo 8. Front of Head and Tail after Step 5
Step 6
Cut out the four leg parts by cutting on all black lines including the two interior black lines on each leg.
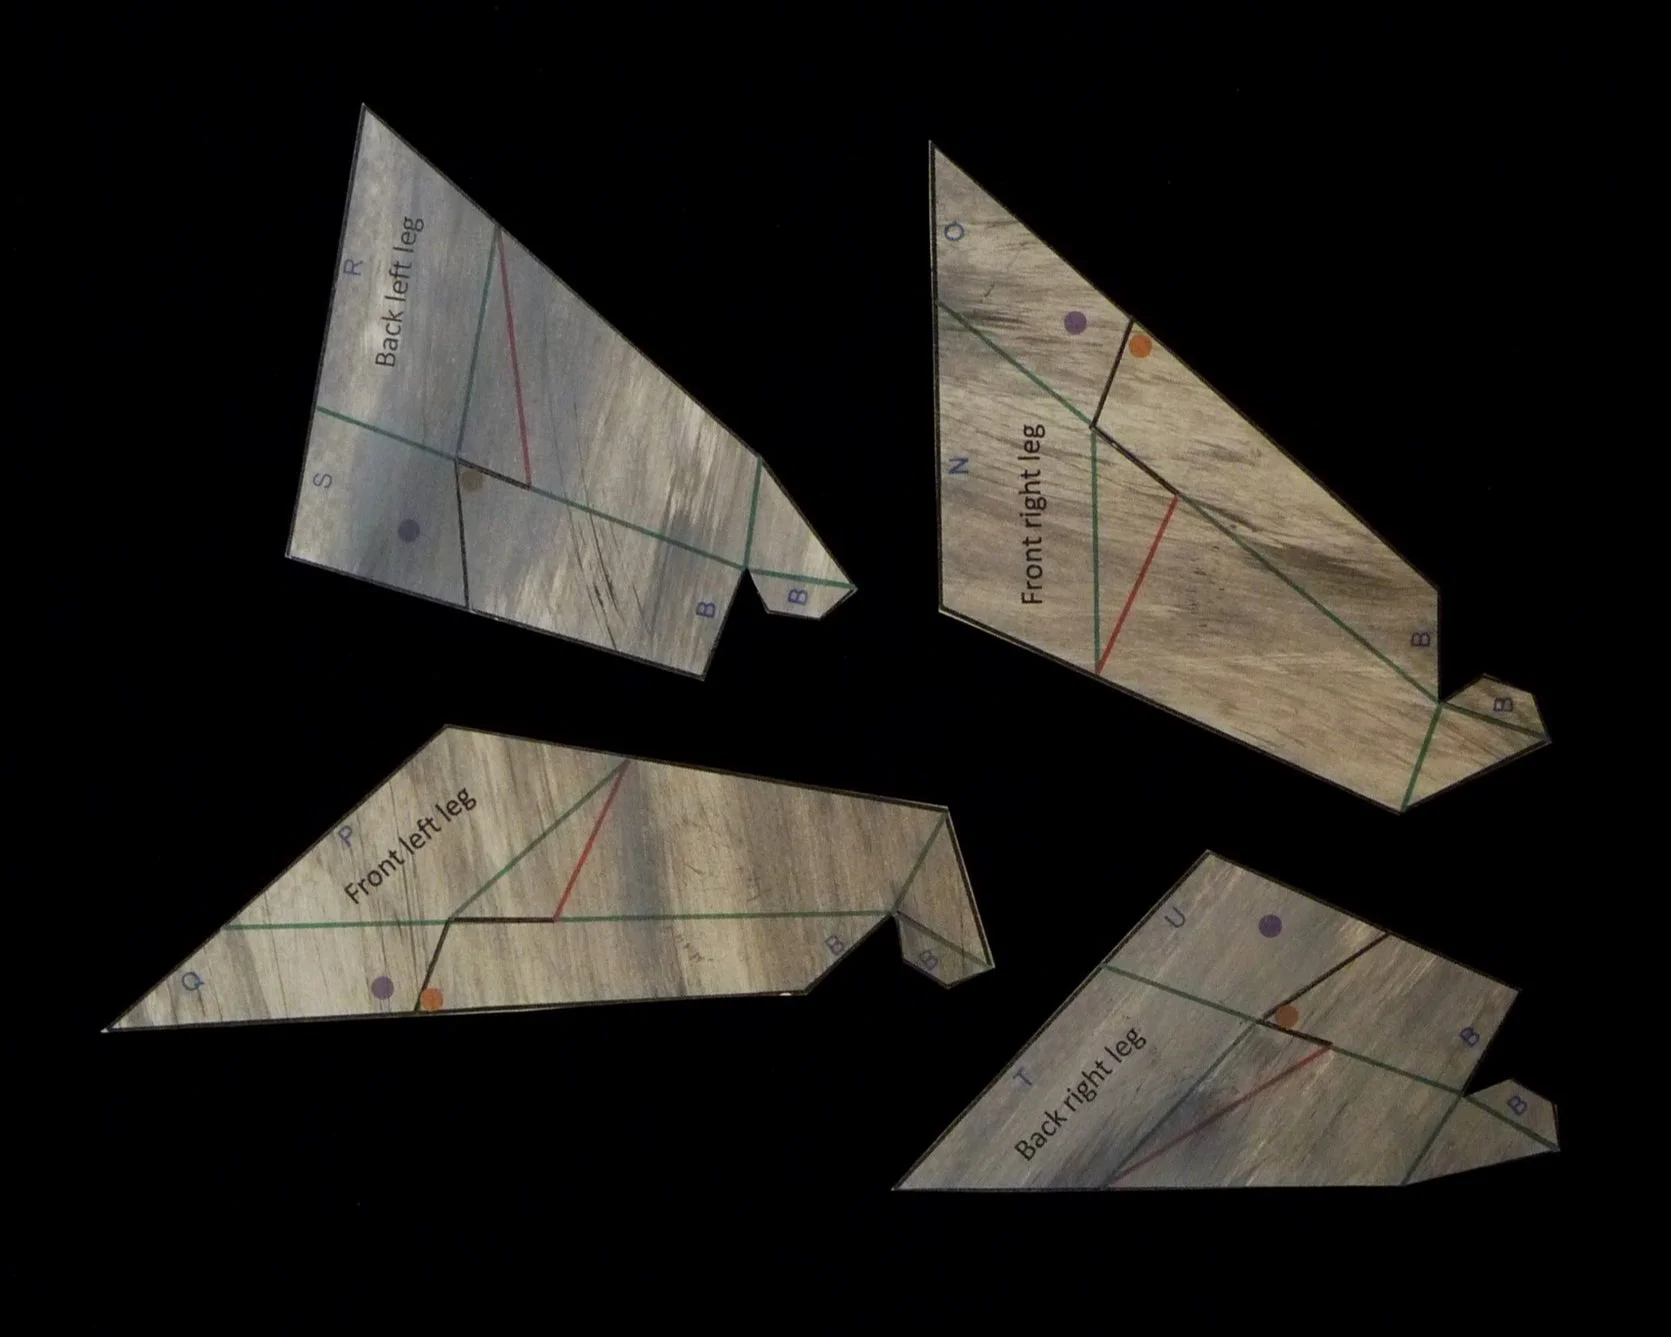
Photo 9. Back of Leg Parts after Step 6

Photo 10. Front of Leg Parts after Step 6
Step 7
On each leg part, fold the green lines as valley folds and the red lines as mountain folds. On each leg, glue Flap B to the checkered Patch B. On each leg, glue the lower leg section behind the upper leg section so that the orange circle aligns with and covers the purple circle.
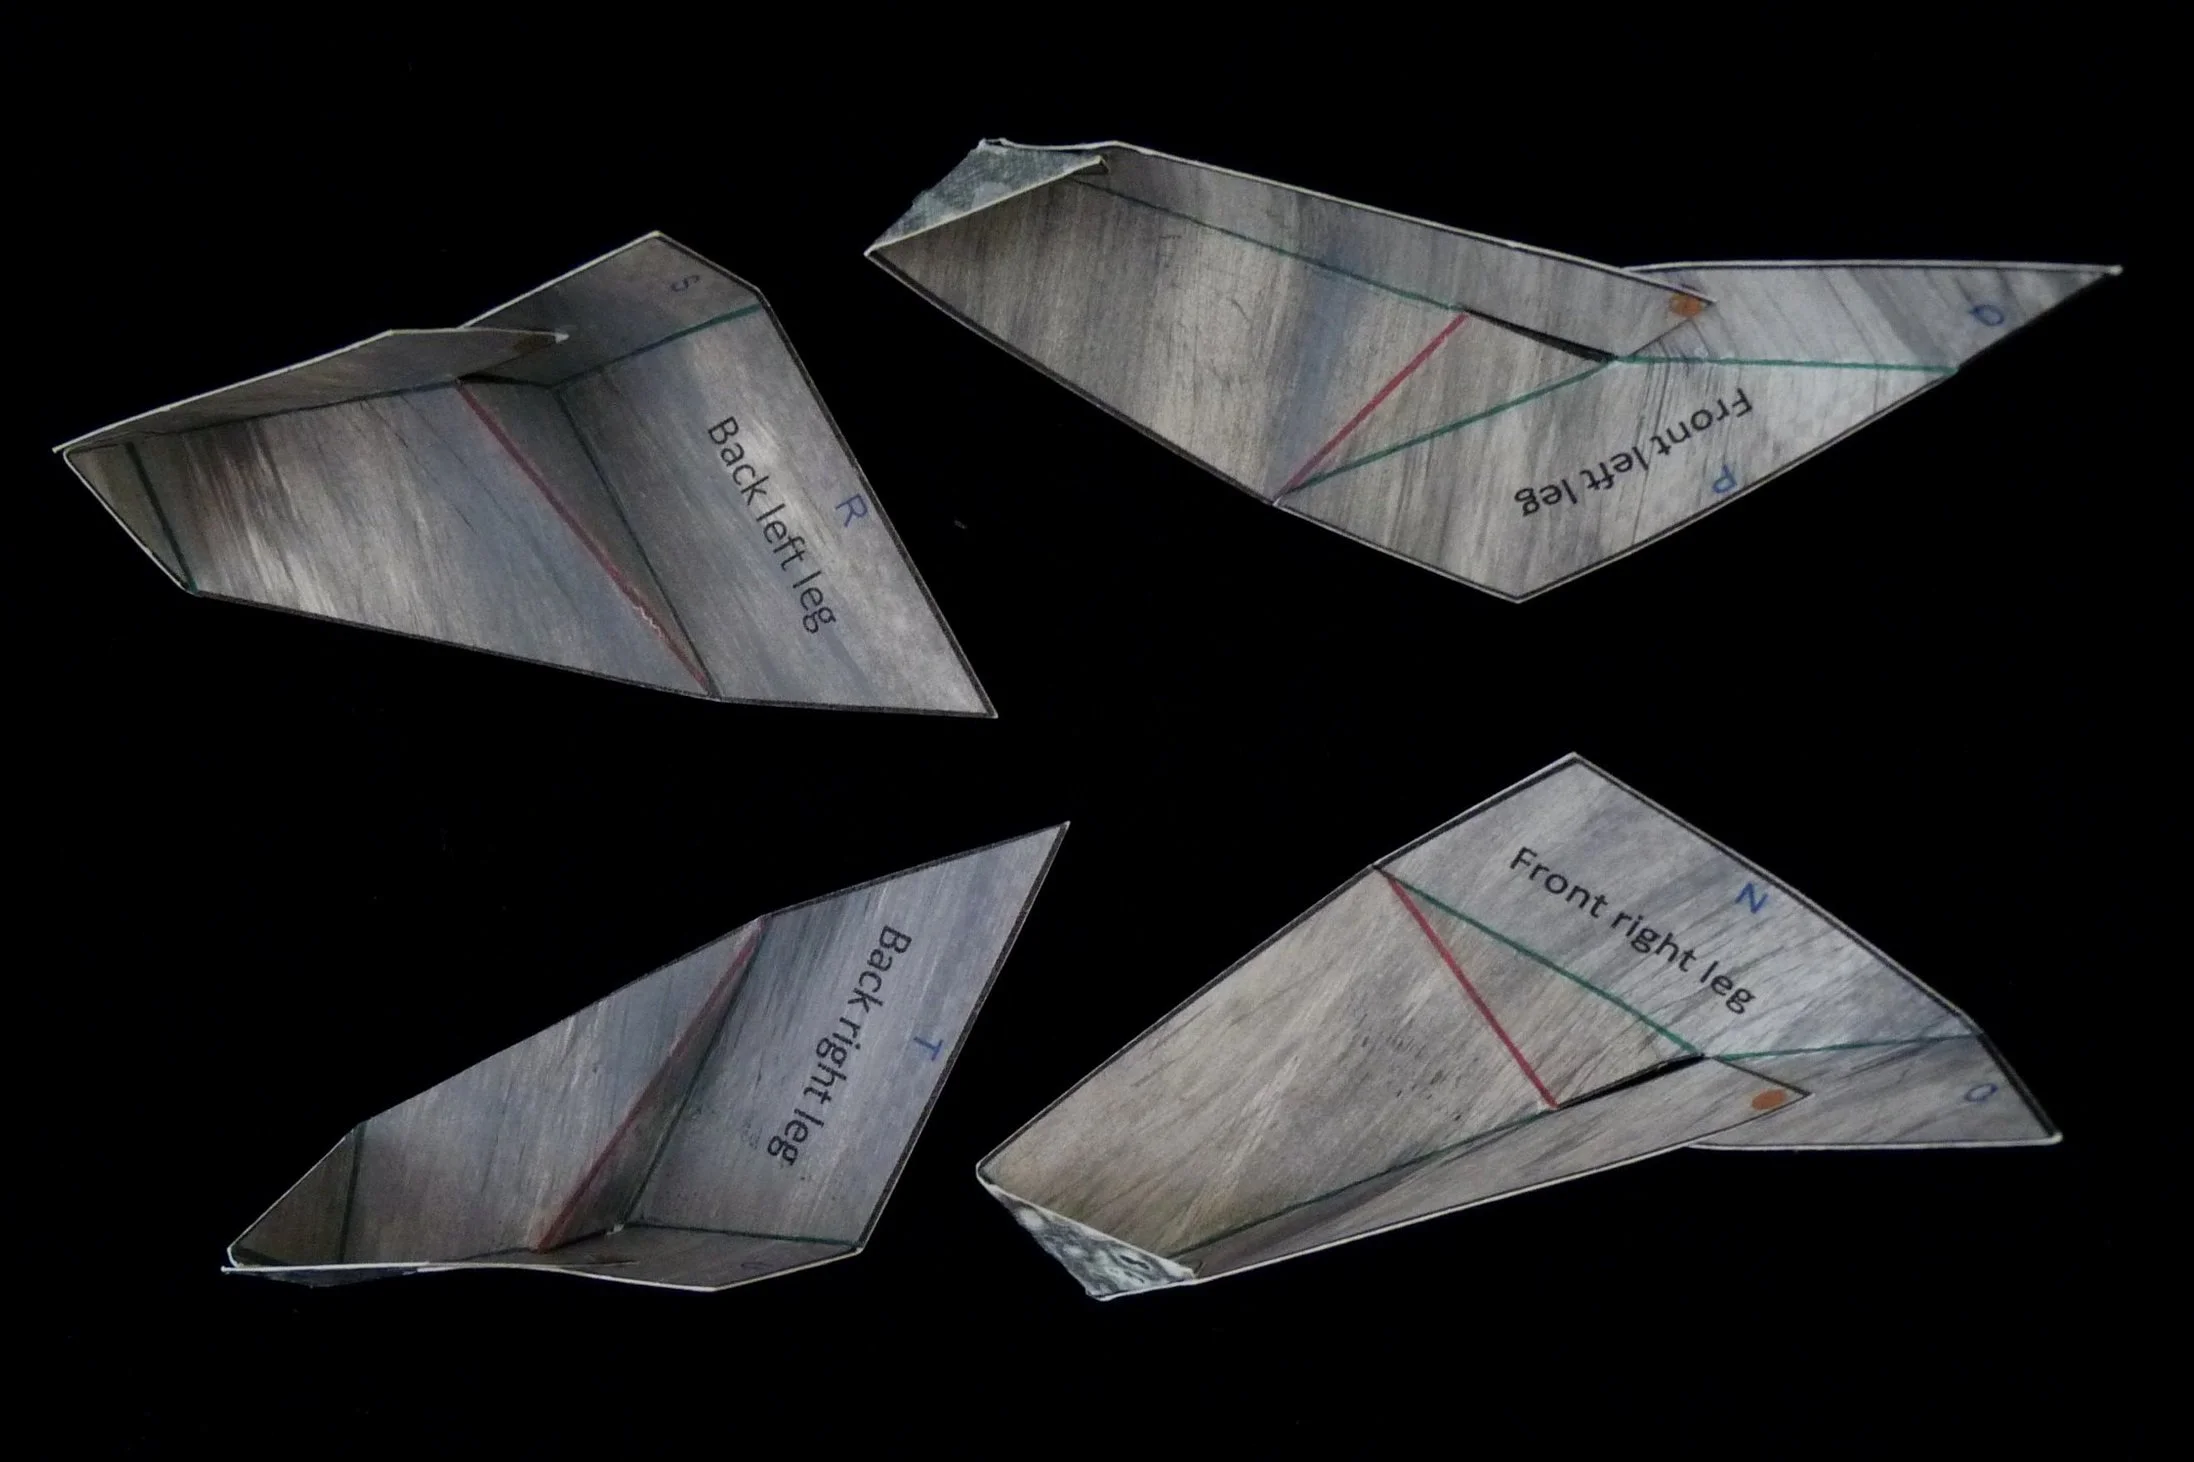
Photo 11. Back of Leg Parts after Step 7
Photo 12. Front of Leg Parts after Step 7
Step 8
Connect the head to the body. Glue Flaps G, H, J, K, L, and M on the body to the same lettered patches on the head.
Connect the tail to the body. Glue Flaps C, D, E, and F on the body to the same lettered patches on the tail.

Photo 13. Project after Step 8
Step 9
Connect the four legs to the body. Glue Flaps N and O on the body to Patches N and O on the front right leg. Glue Flaps P and Q on the body to Patches P and Q on the front left leg. Glue Flaps T and U on the body to Patches T and U on the back right leg. Glue Flaps R and S on the body to Patches R and S on the back left leg.
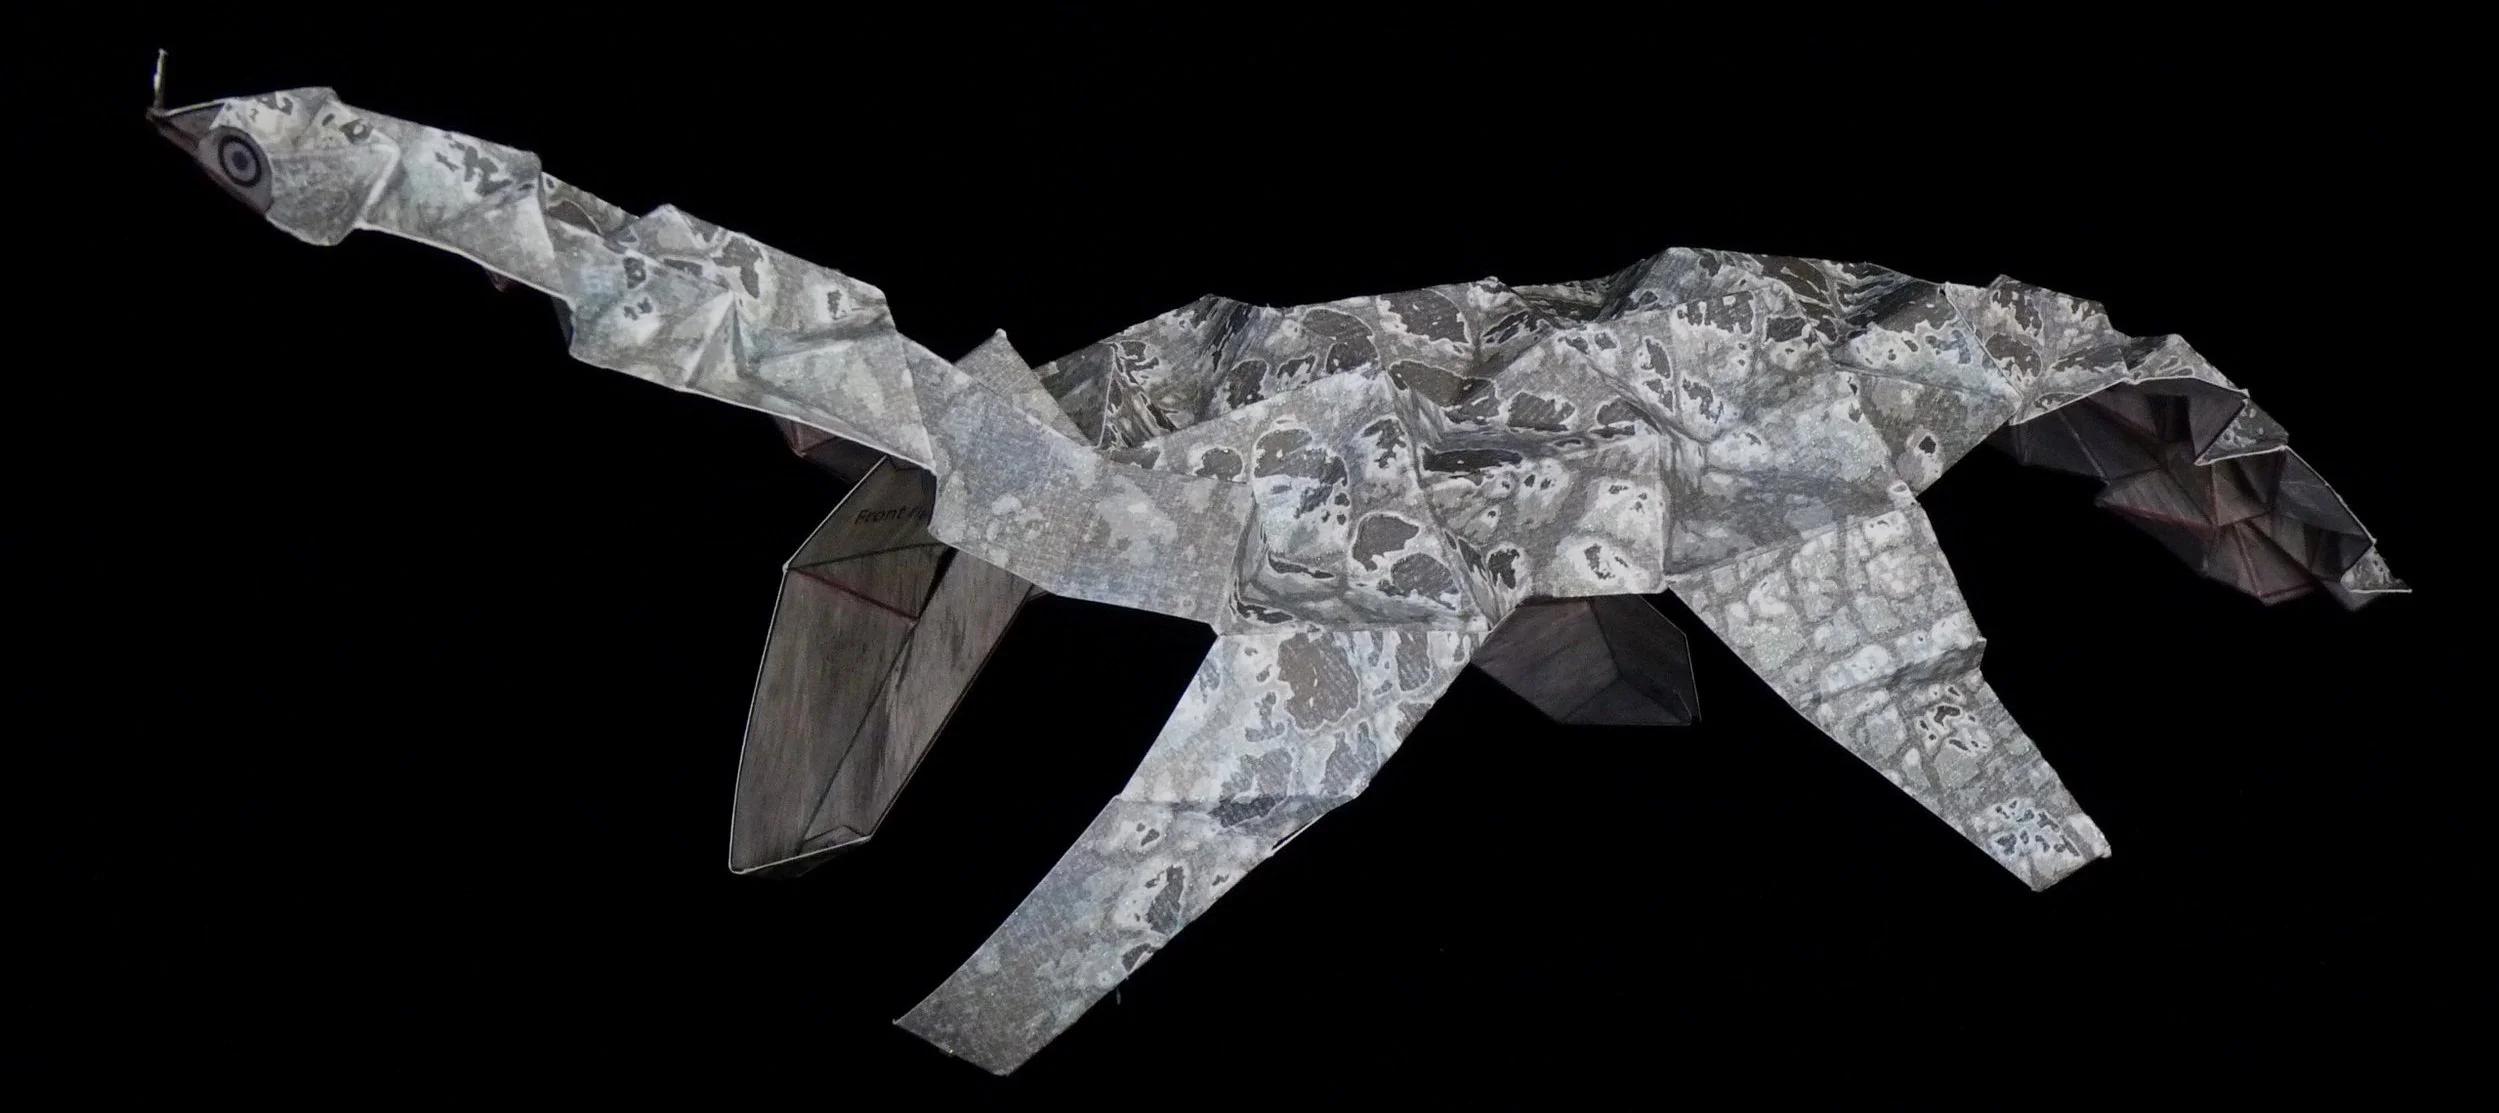
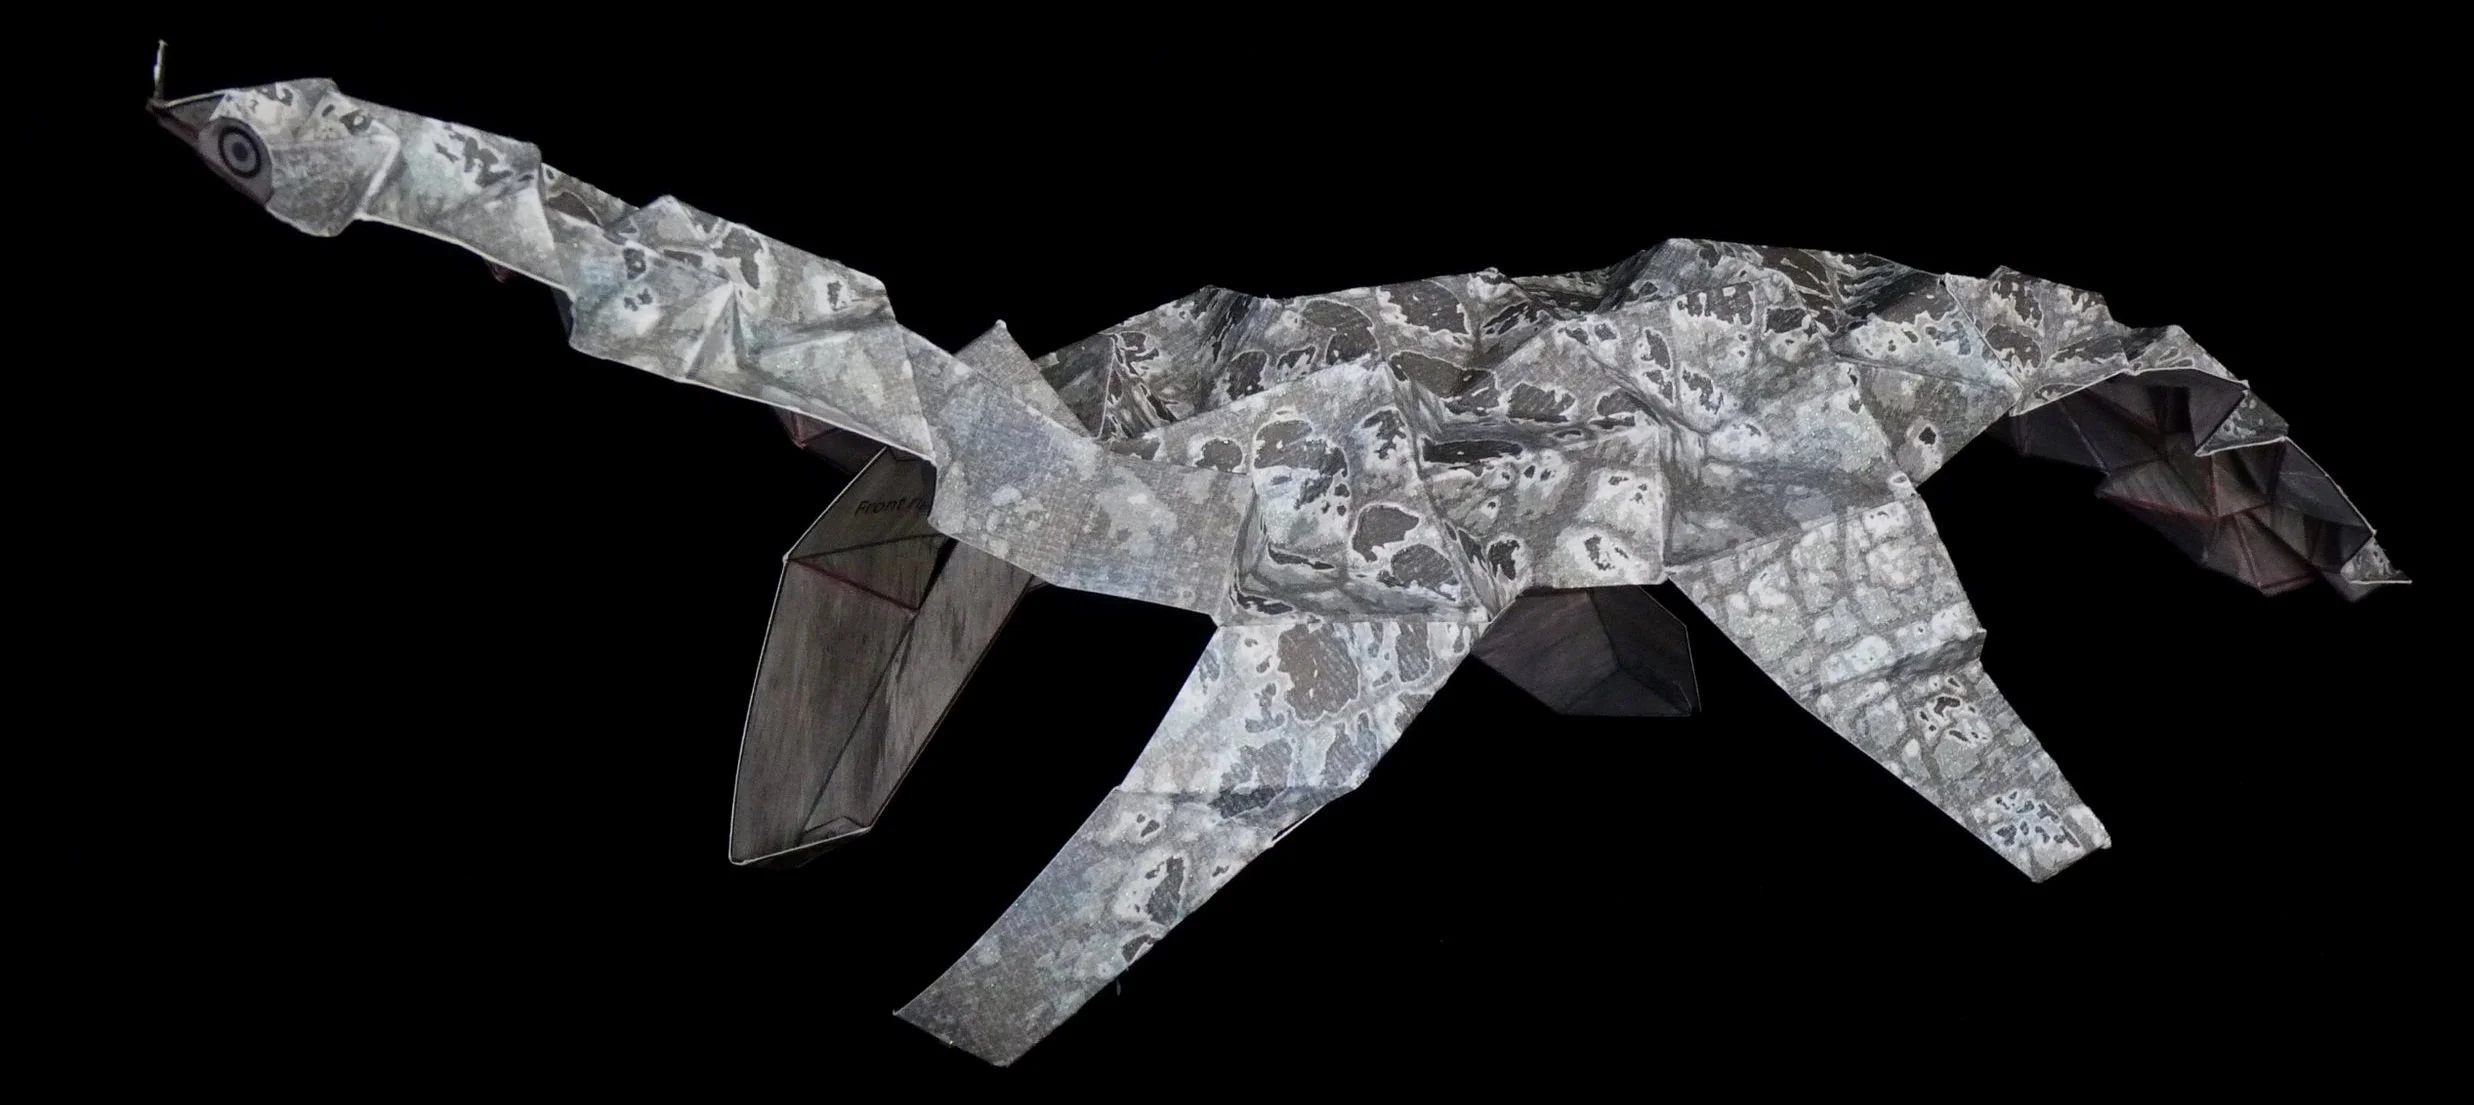
Photo 14. Completed Martian Dinosaur - Side View 1

Photo 15. Completed Martian Dinosaur - Side View 2

Photo 16. Completed Martian Dinosaur - Top View

Photo 17. Completed Martian Dinosaur - Bottom View
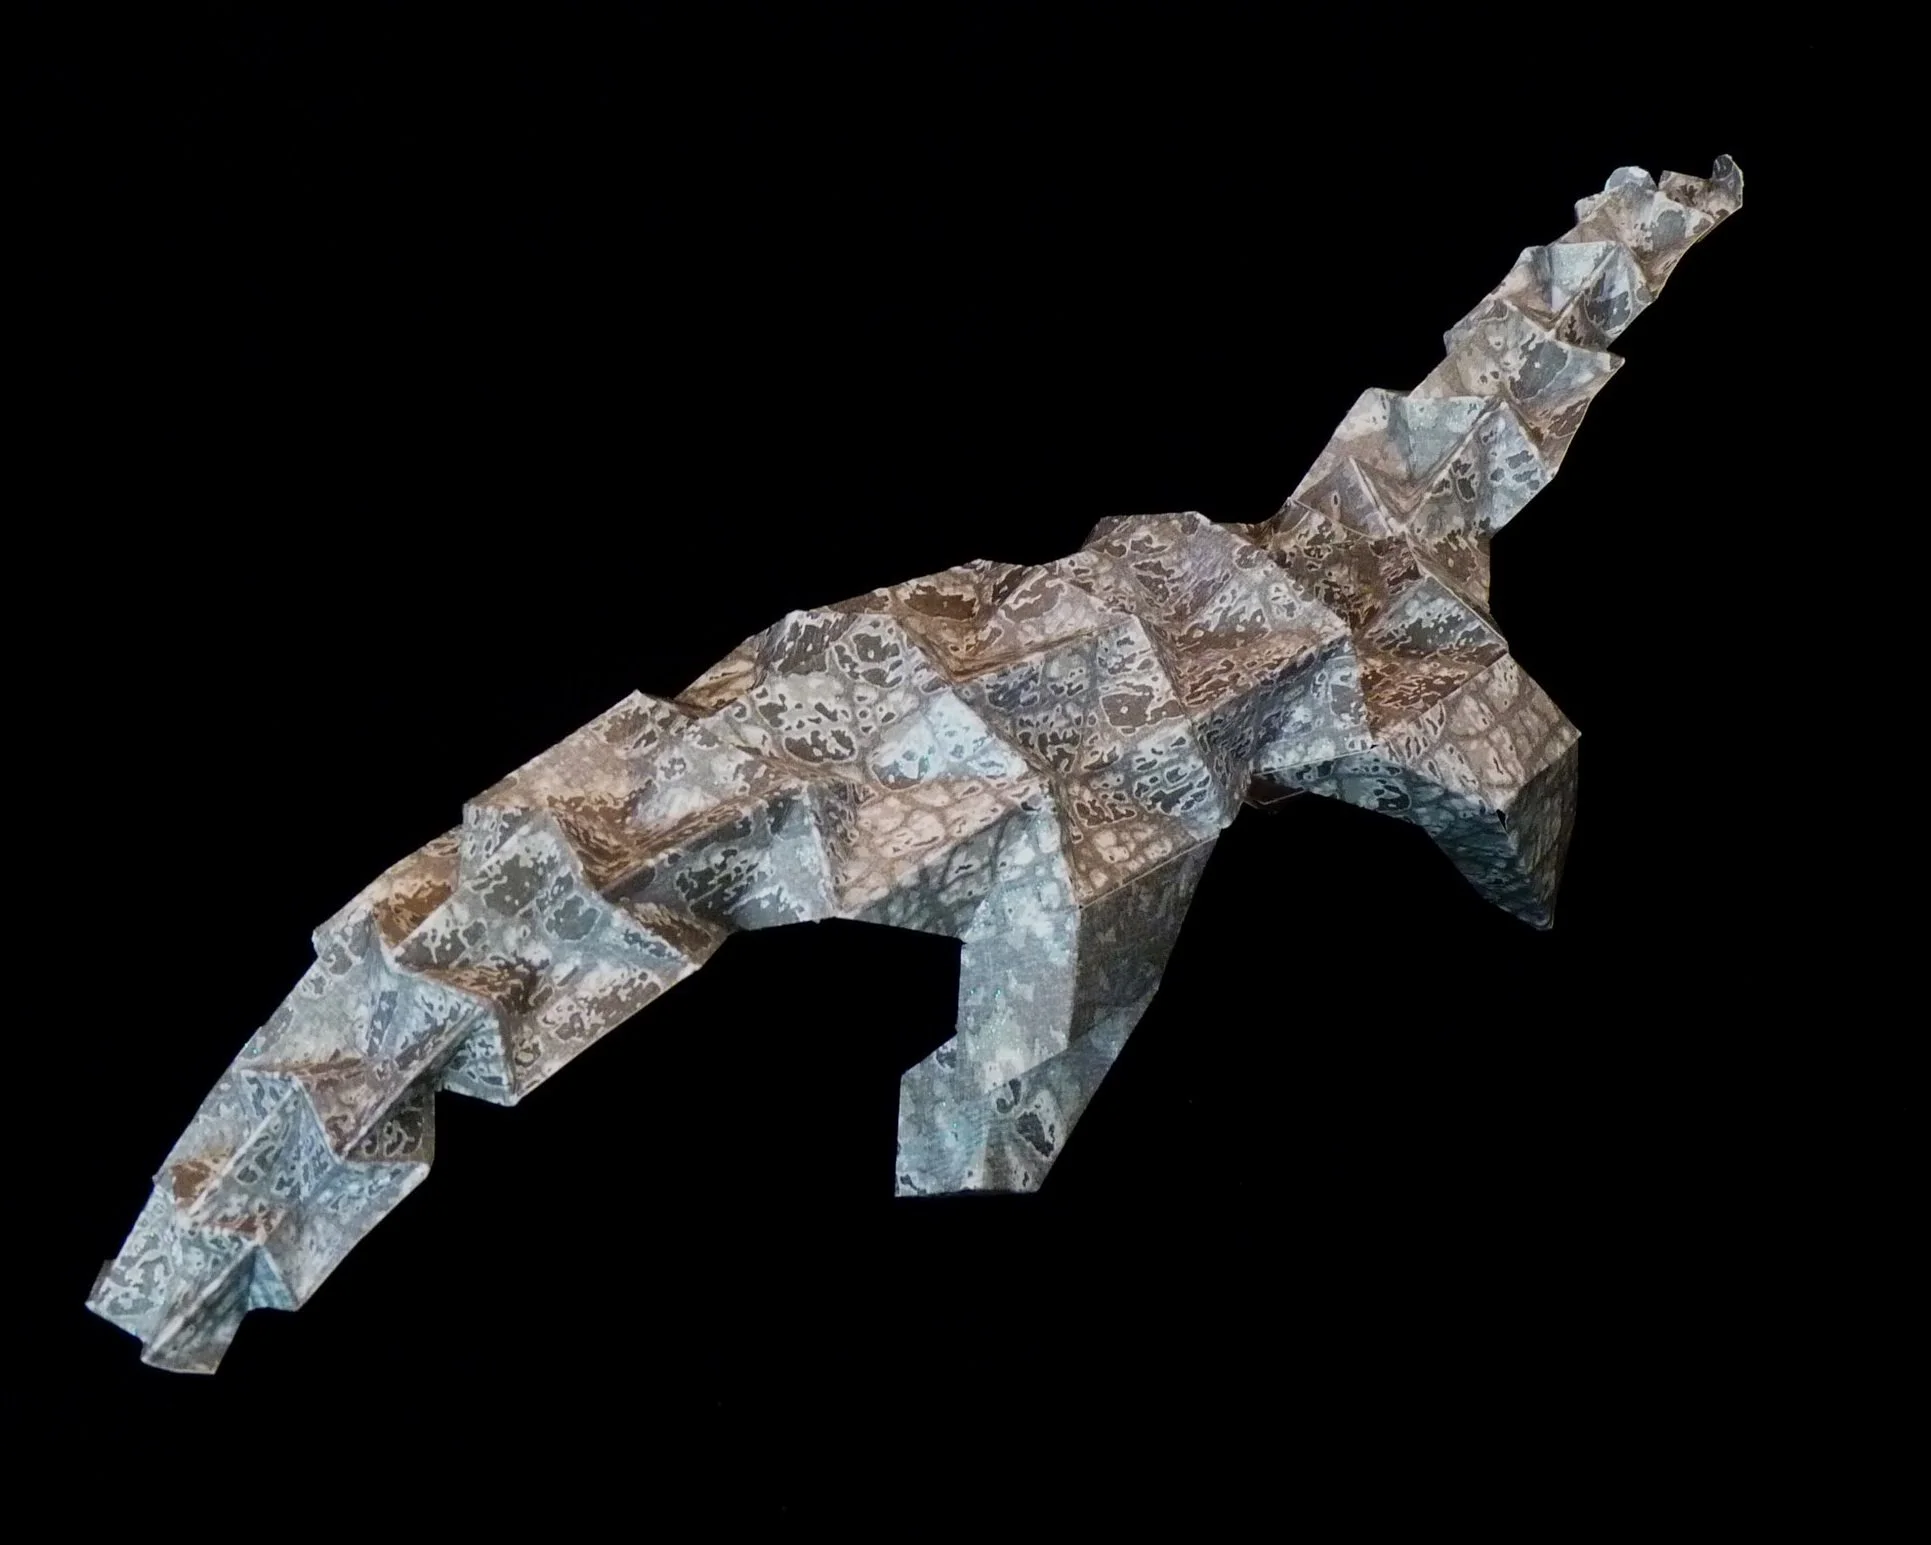
Photo 18. Completed Martian Dinosaur - Side View 3

Photo 19. Completed Martian Dinosaur - Front View
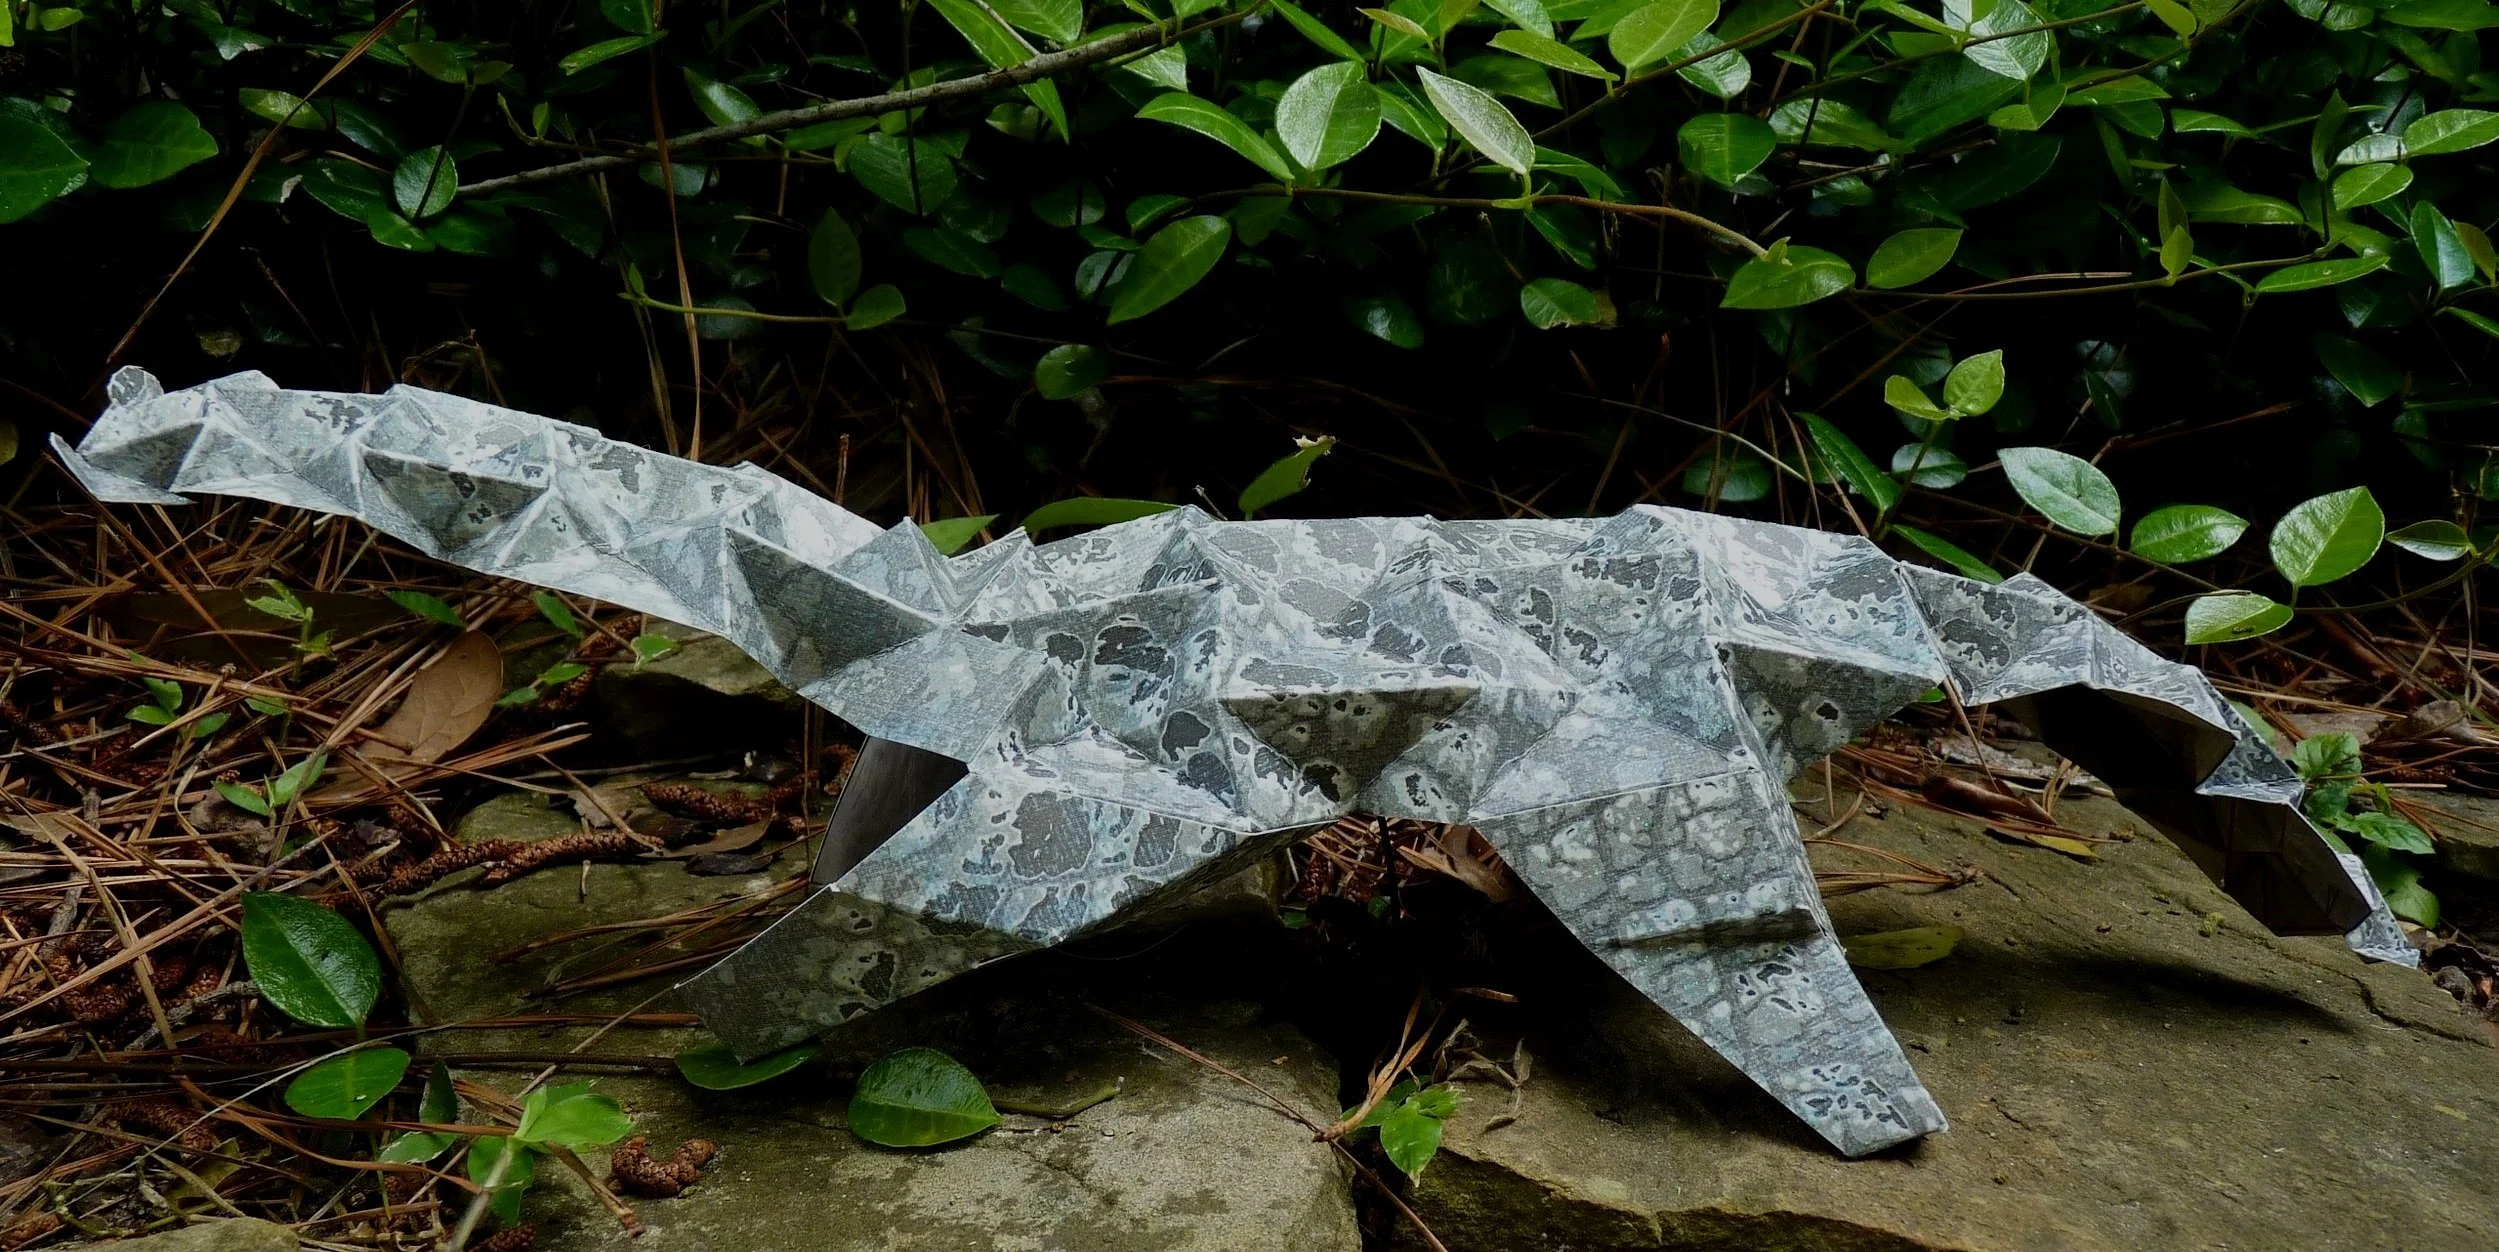
Photo 20. Martian Dinosaur at Home in the Space City Zoo
Enjoy your new gentle giant friend.