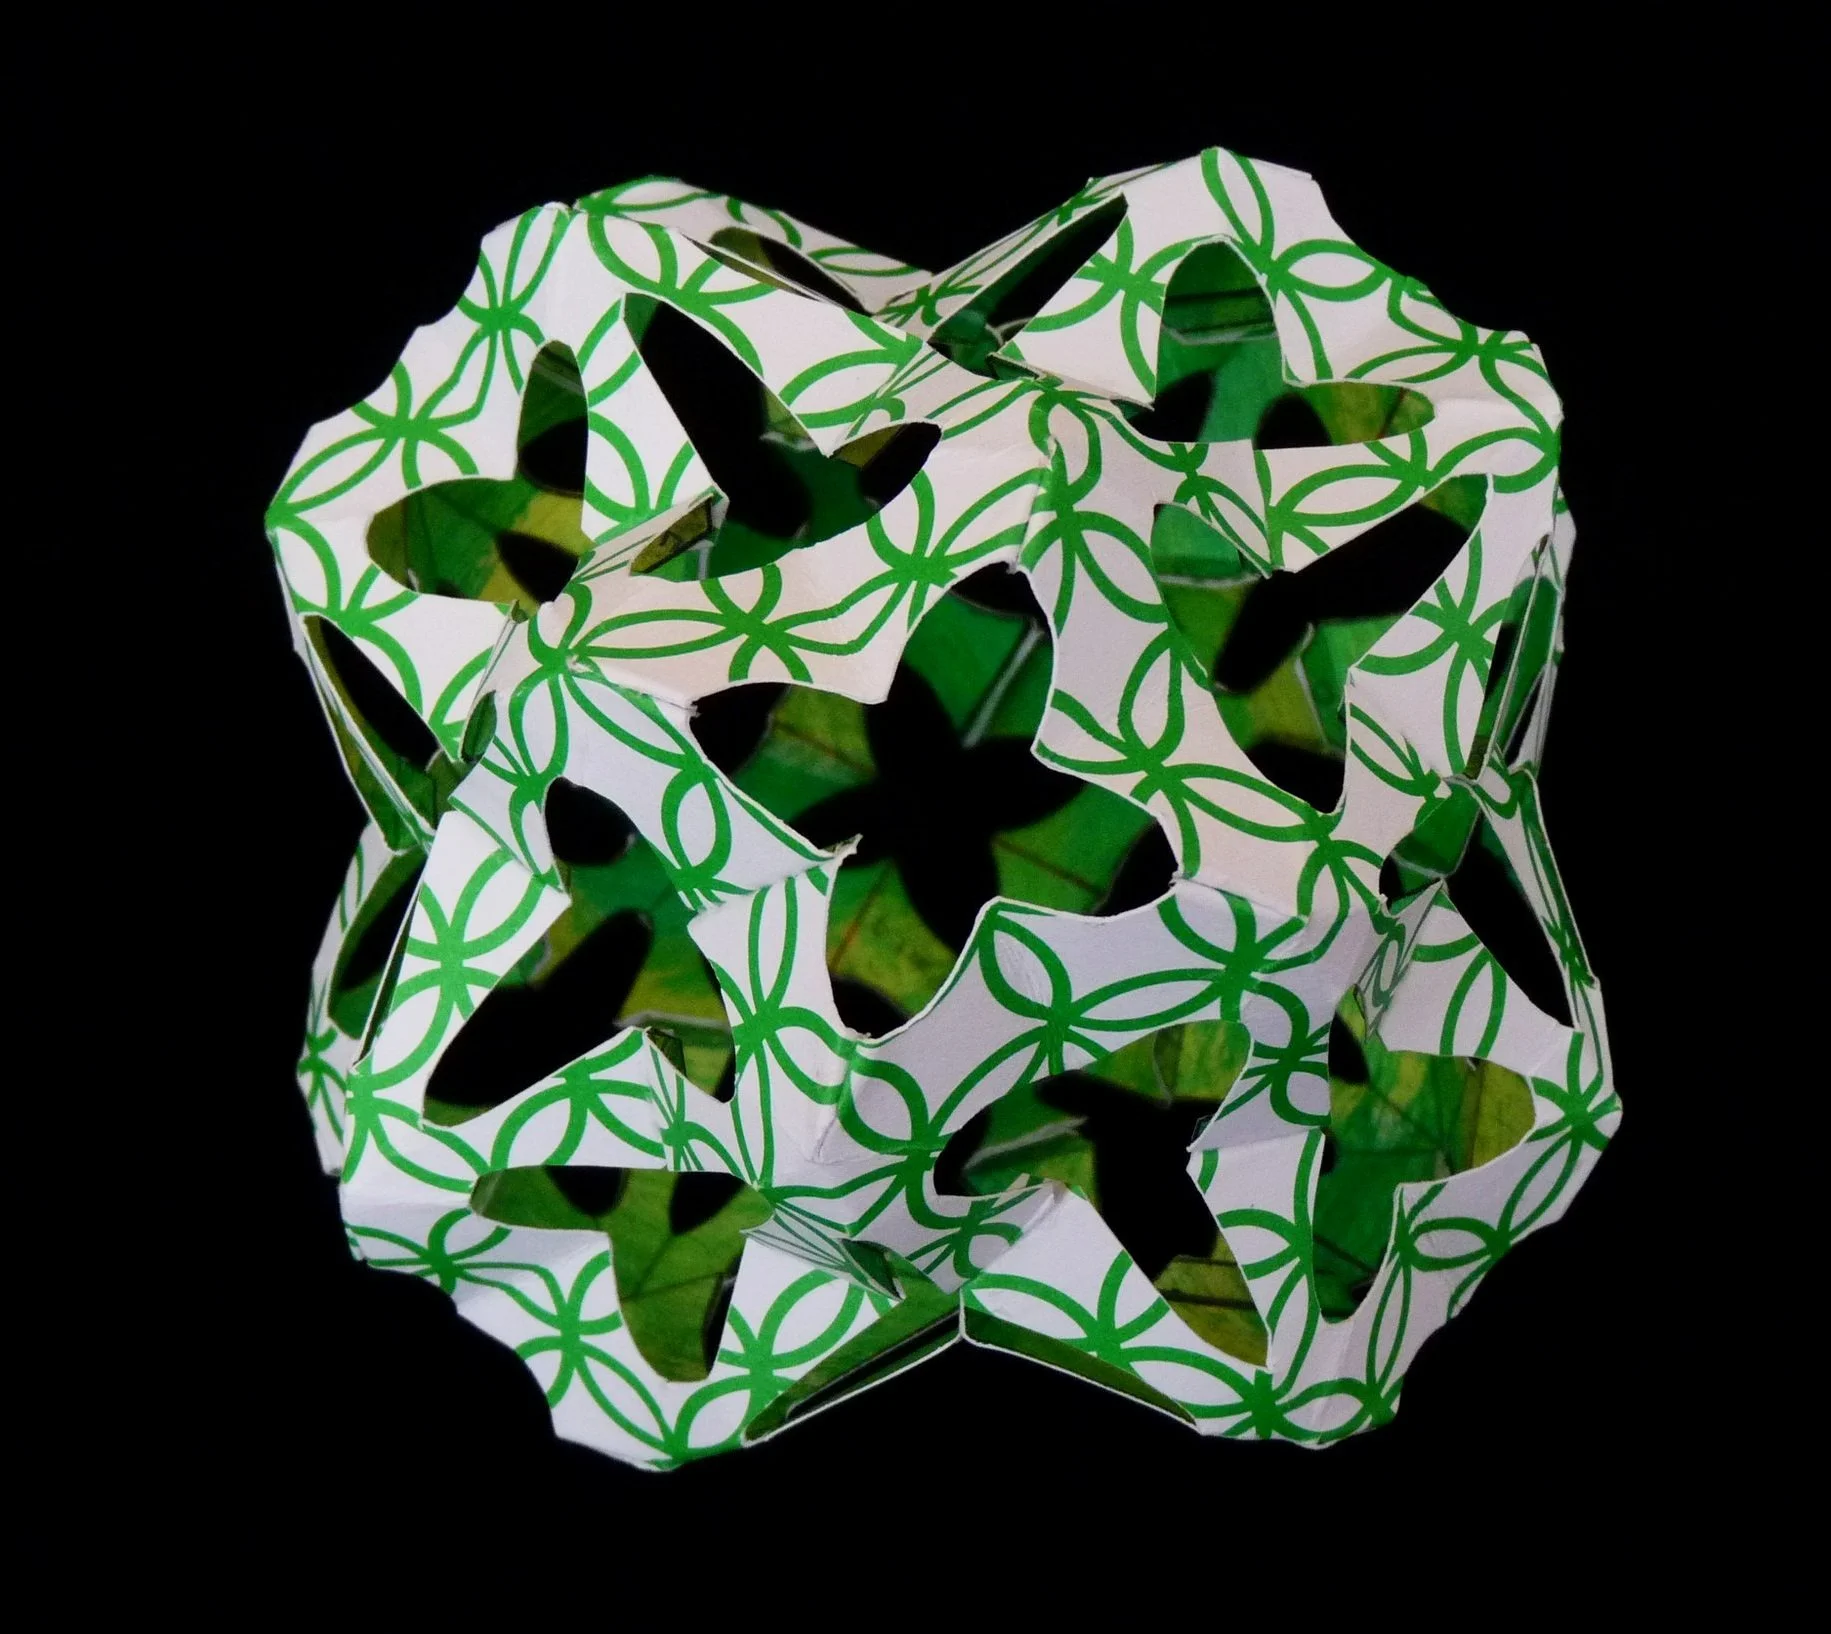
Icositetrahedron
Question: What is an icositetrahedron? Answer: A polyhedron with 24 faces. This one has pentagon faces, is stellated, and has cut-outs at each vertex. The base is one of the thirteen Catalan solids.
Project Info
Paper required: Two sheets 8.5 inch x 11 inch (or A4)
Finished Project size: 4.5 inches (11cm)
Difficulty Level: Intermediate
Click button below to get your free printable pattern !
Click button below to get your free printable pattern !
INSTRUCTIONS
STEP 1
Print the Icositetrahedron pattern onto the two matching paper sheets of your choice. The back of the paper (with the printed pattern) remains visible on the inside of the finished project.
Read the pattern key included in the General Instructions.
Step 2
Cut out the six pattern pieces by cutting on all black lines including the black lines between the two Flaps 1’s, the two Flap 2’s, the two Flap 3’s, and the two Flap 4’s.

Photo 1. Inside of Part 1 and Part 2 after Step 2

Photo 2. Outside of Part 1 and Part 2 after Step 2
STEP 3
On all six parts, fold the green lines as valley folds and the red lines as mountain folds.
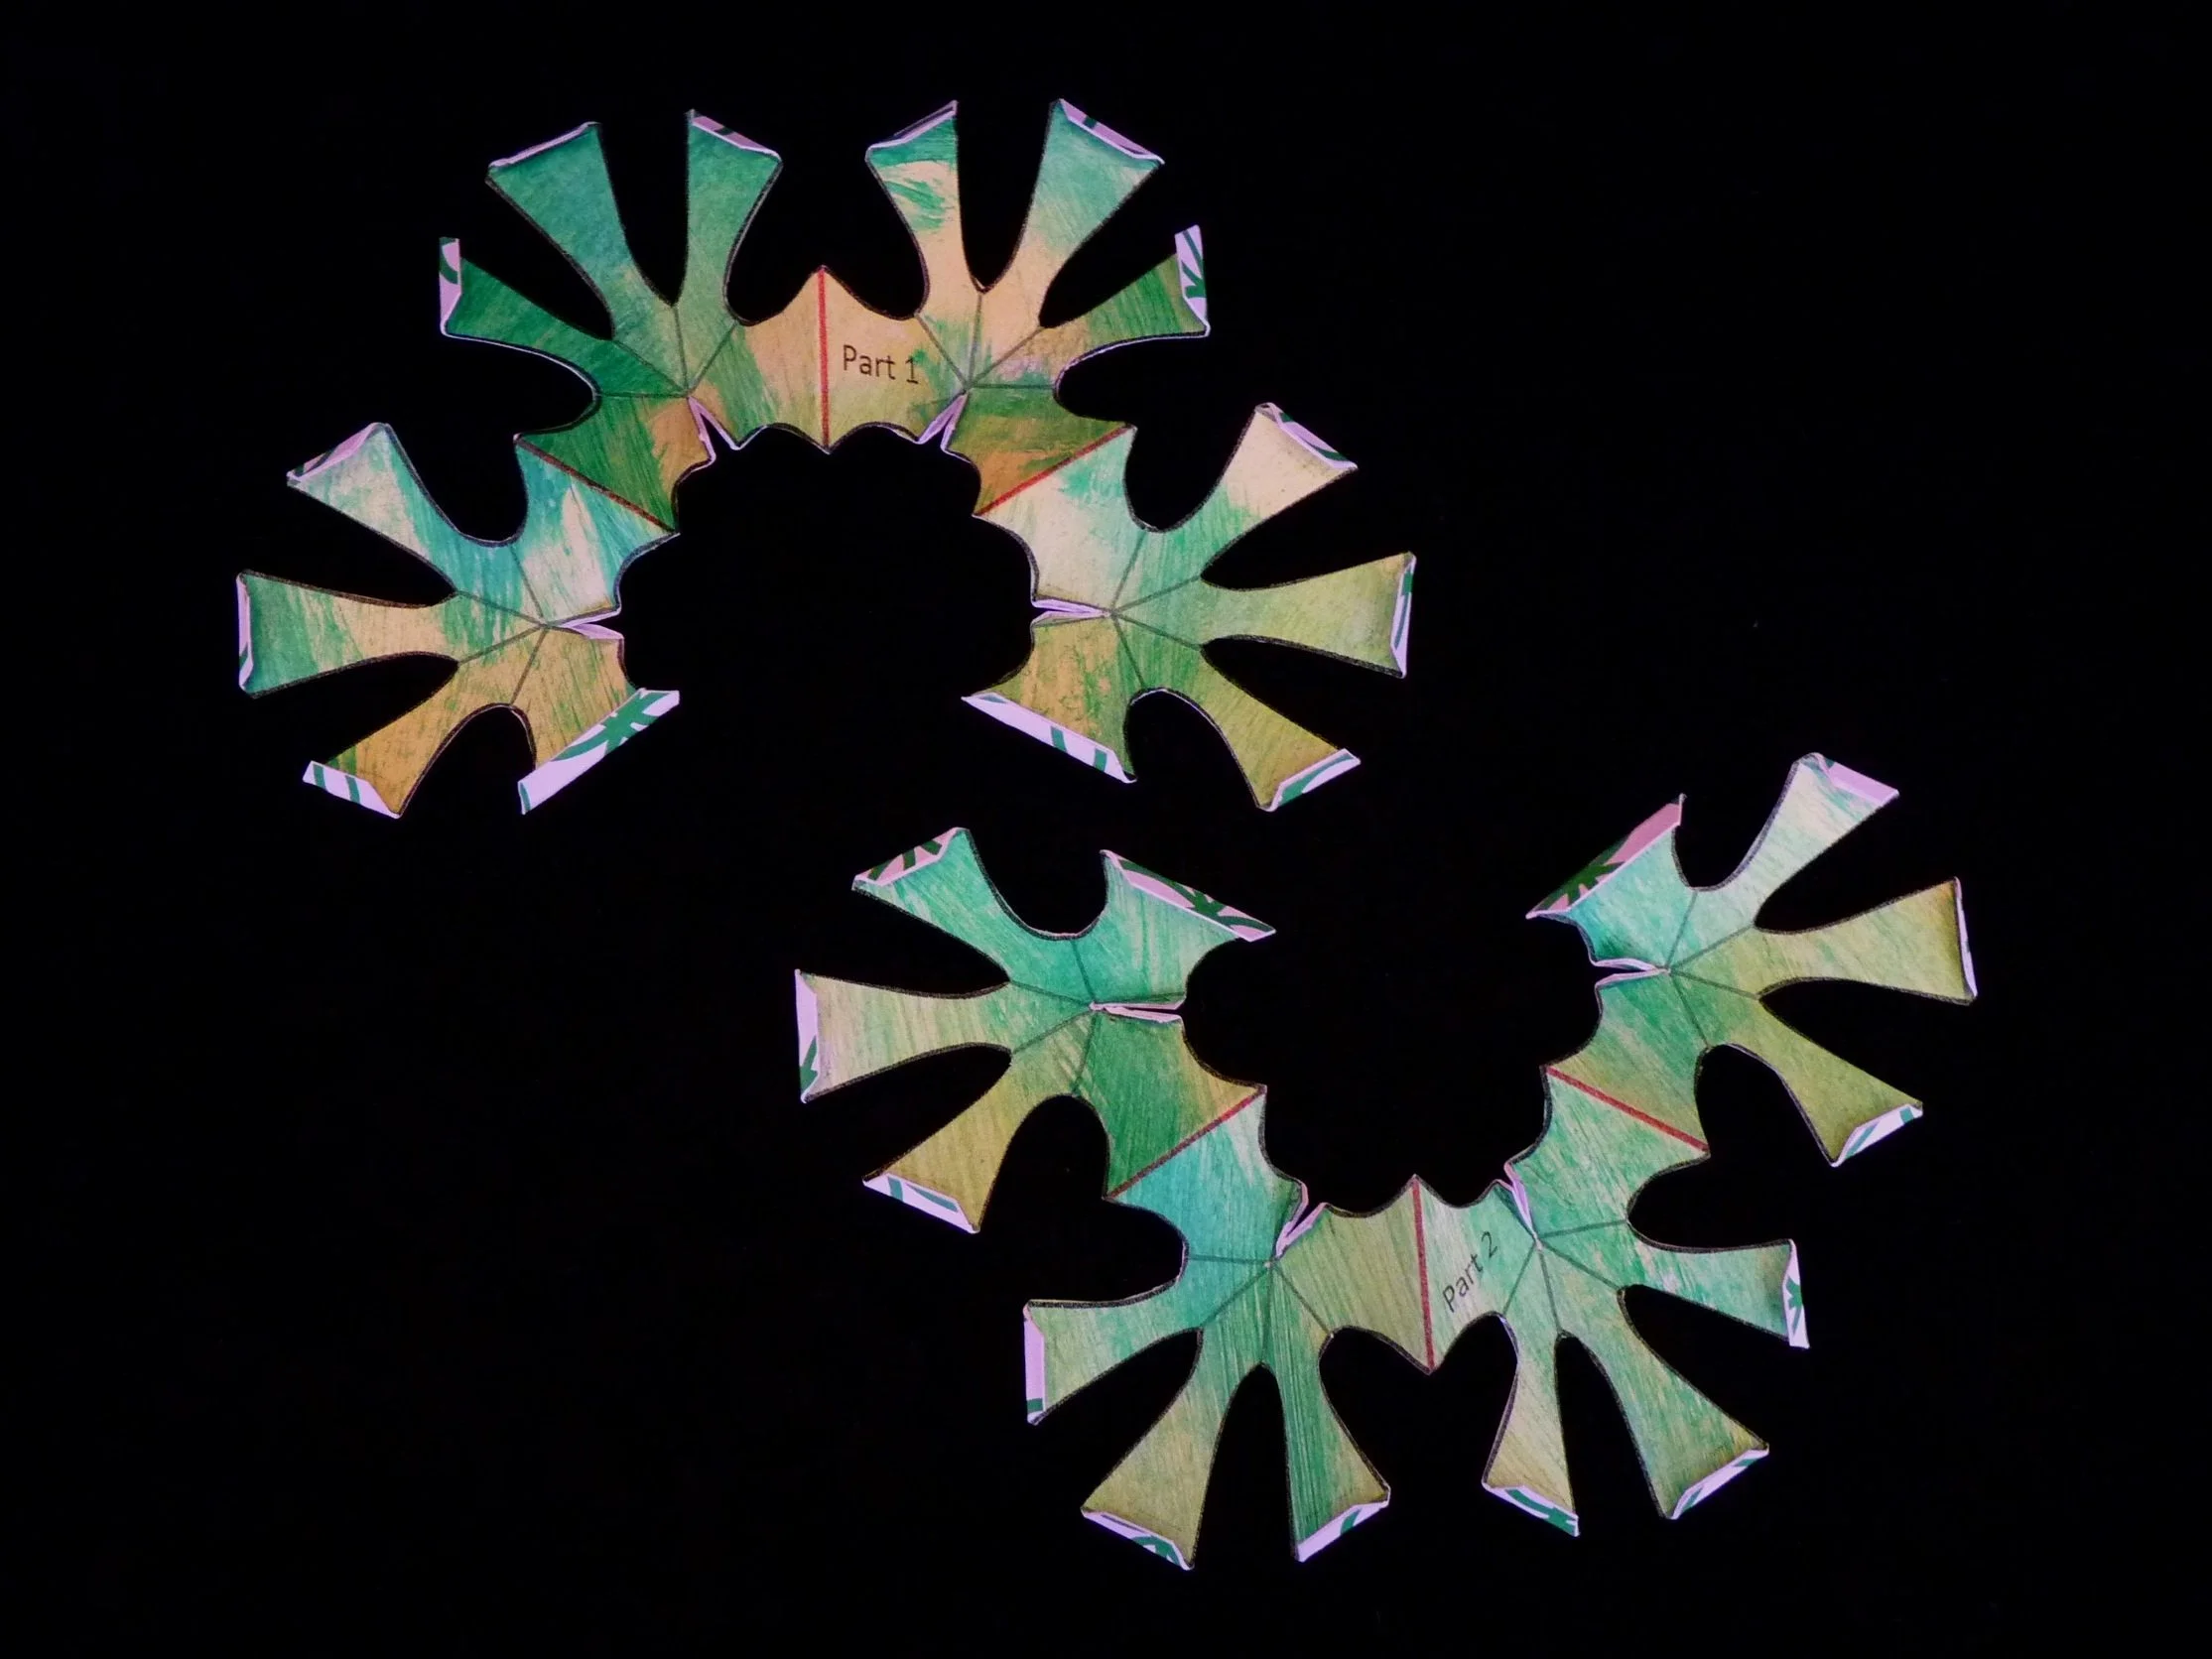
Photo 3. Inside of Part 1 and Part 2 after Step 3

Photo 4. Outside of Part 1 and Part 2 after Step 3
Step 4
On all six parts, glue Flap 1 to the other Flap 1, Flap 2 to the other Flap 2, Flap 3 to the other Flap 3, and Flap 4 to the other Flap 4. When the glue on those flaps has set, then glue Flap 5 to the other Flap 5.
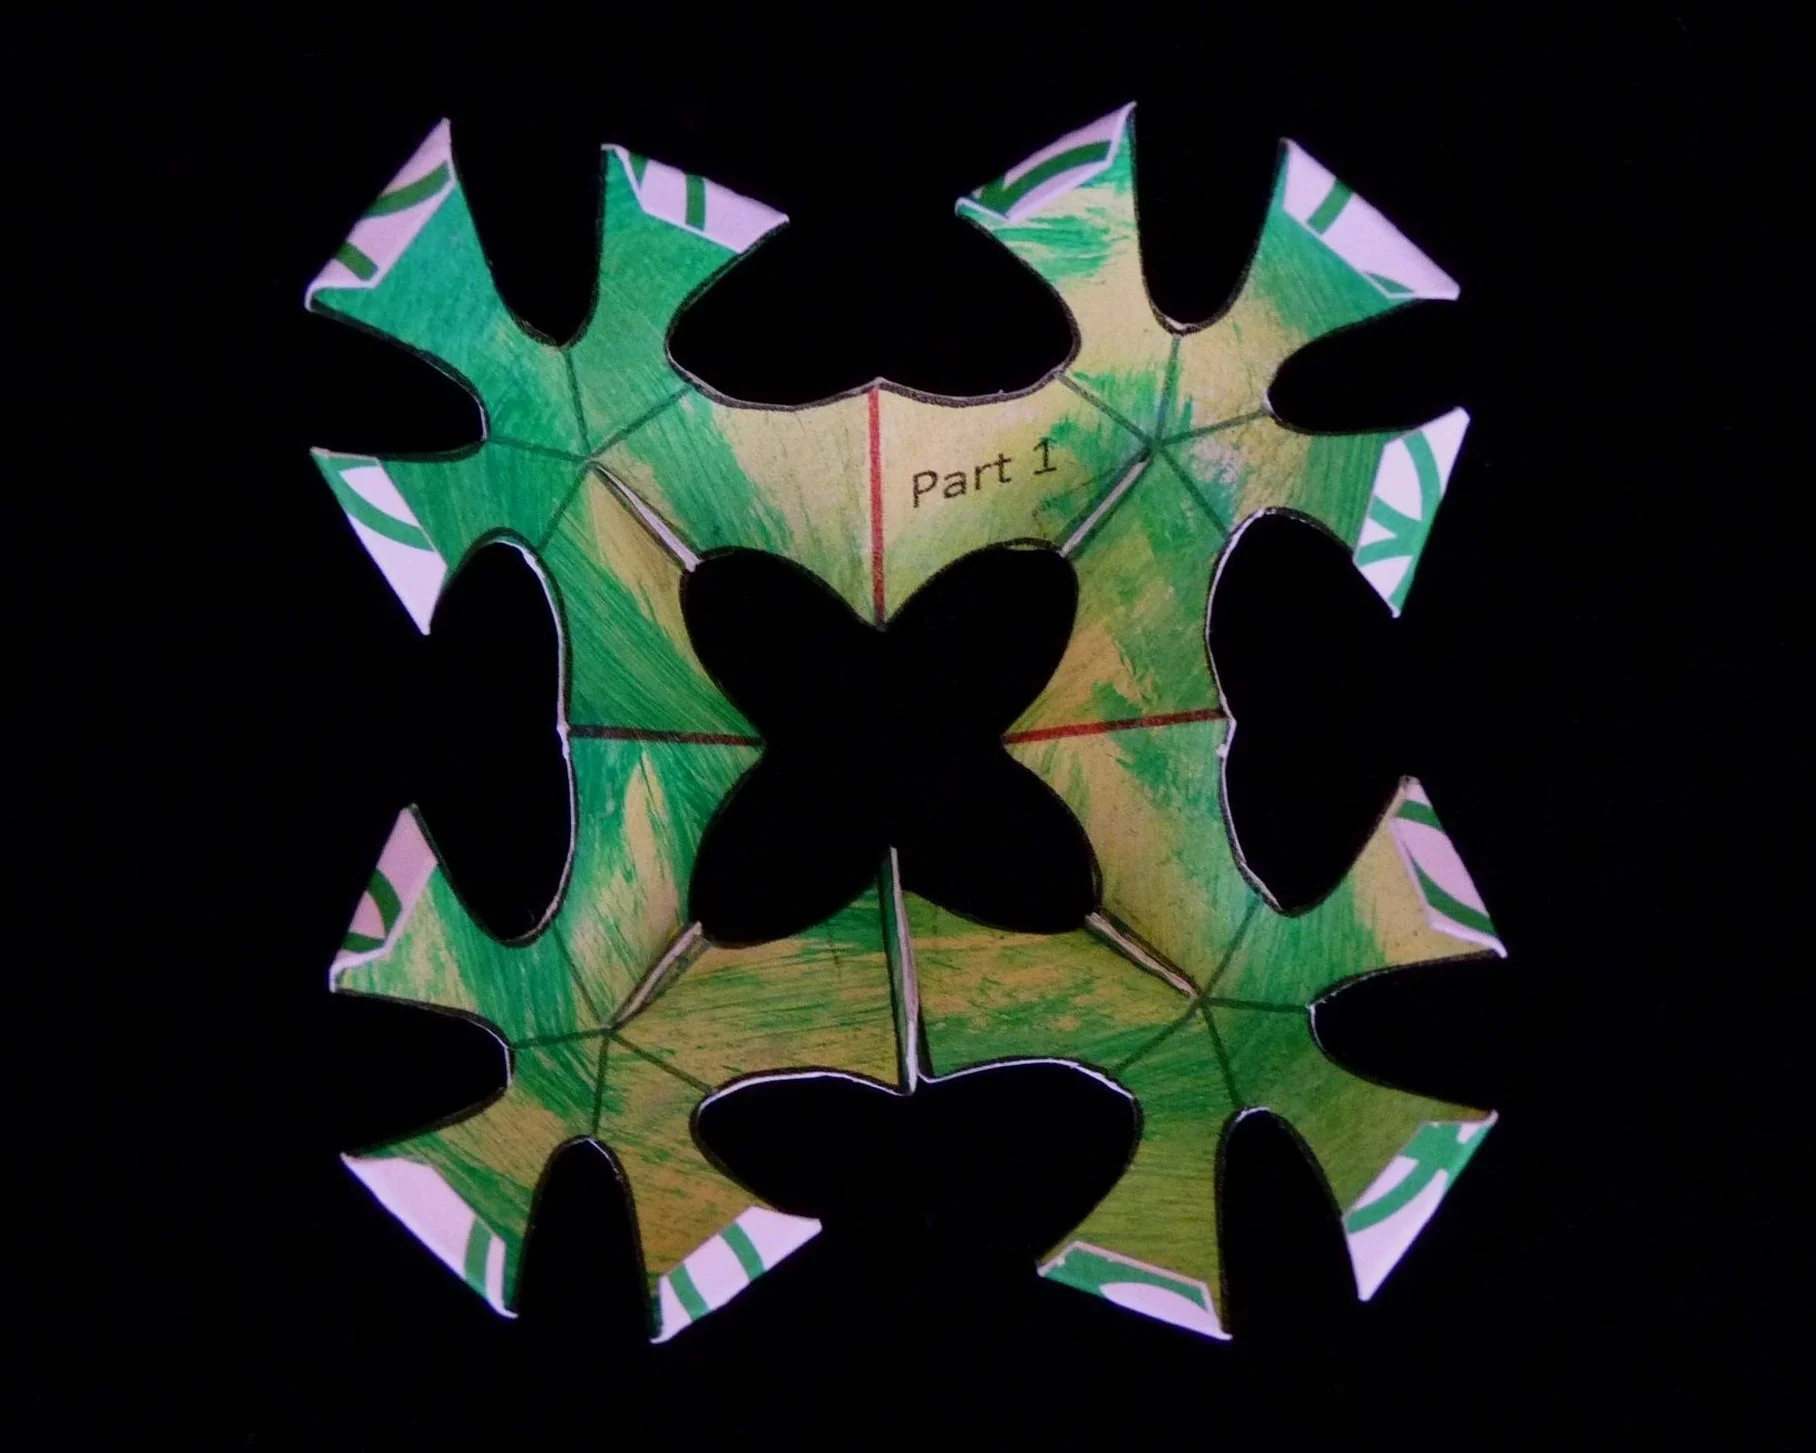
Photo 5. Inside of Part 1 after Step 4

Photo 6. Outside of Part 1 after Step 4
Step 5
Connect Part 1 to Part 2. Glue Flap A on Part 1 to Flap A on Part 2, Flap B on Part 1 to Flap B on Part 2, and Flap C on Part 1 to Flap C on Part 2.

Photo 7. Inside of Project after Step 5

Photo 8. Outside of Project after Step 5
Step 6
Connect Part 3 to the project. Glue Flaps D, E, F, G, H, and J on Part 3 to the similarly labeled flaps on the partly assembled project.

Photo 9. Inside of Project after Step 6
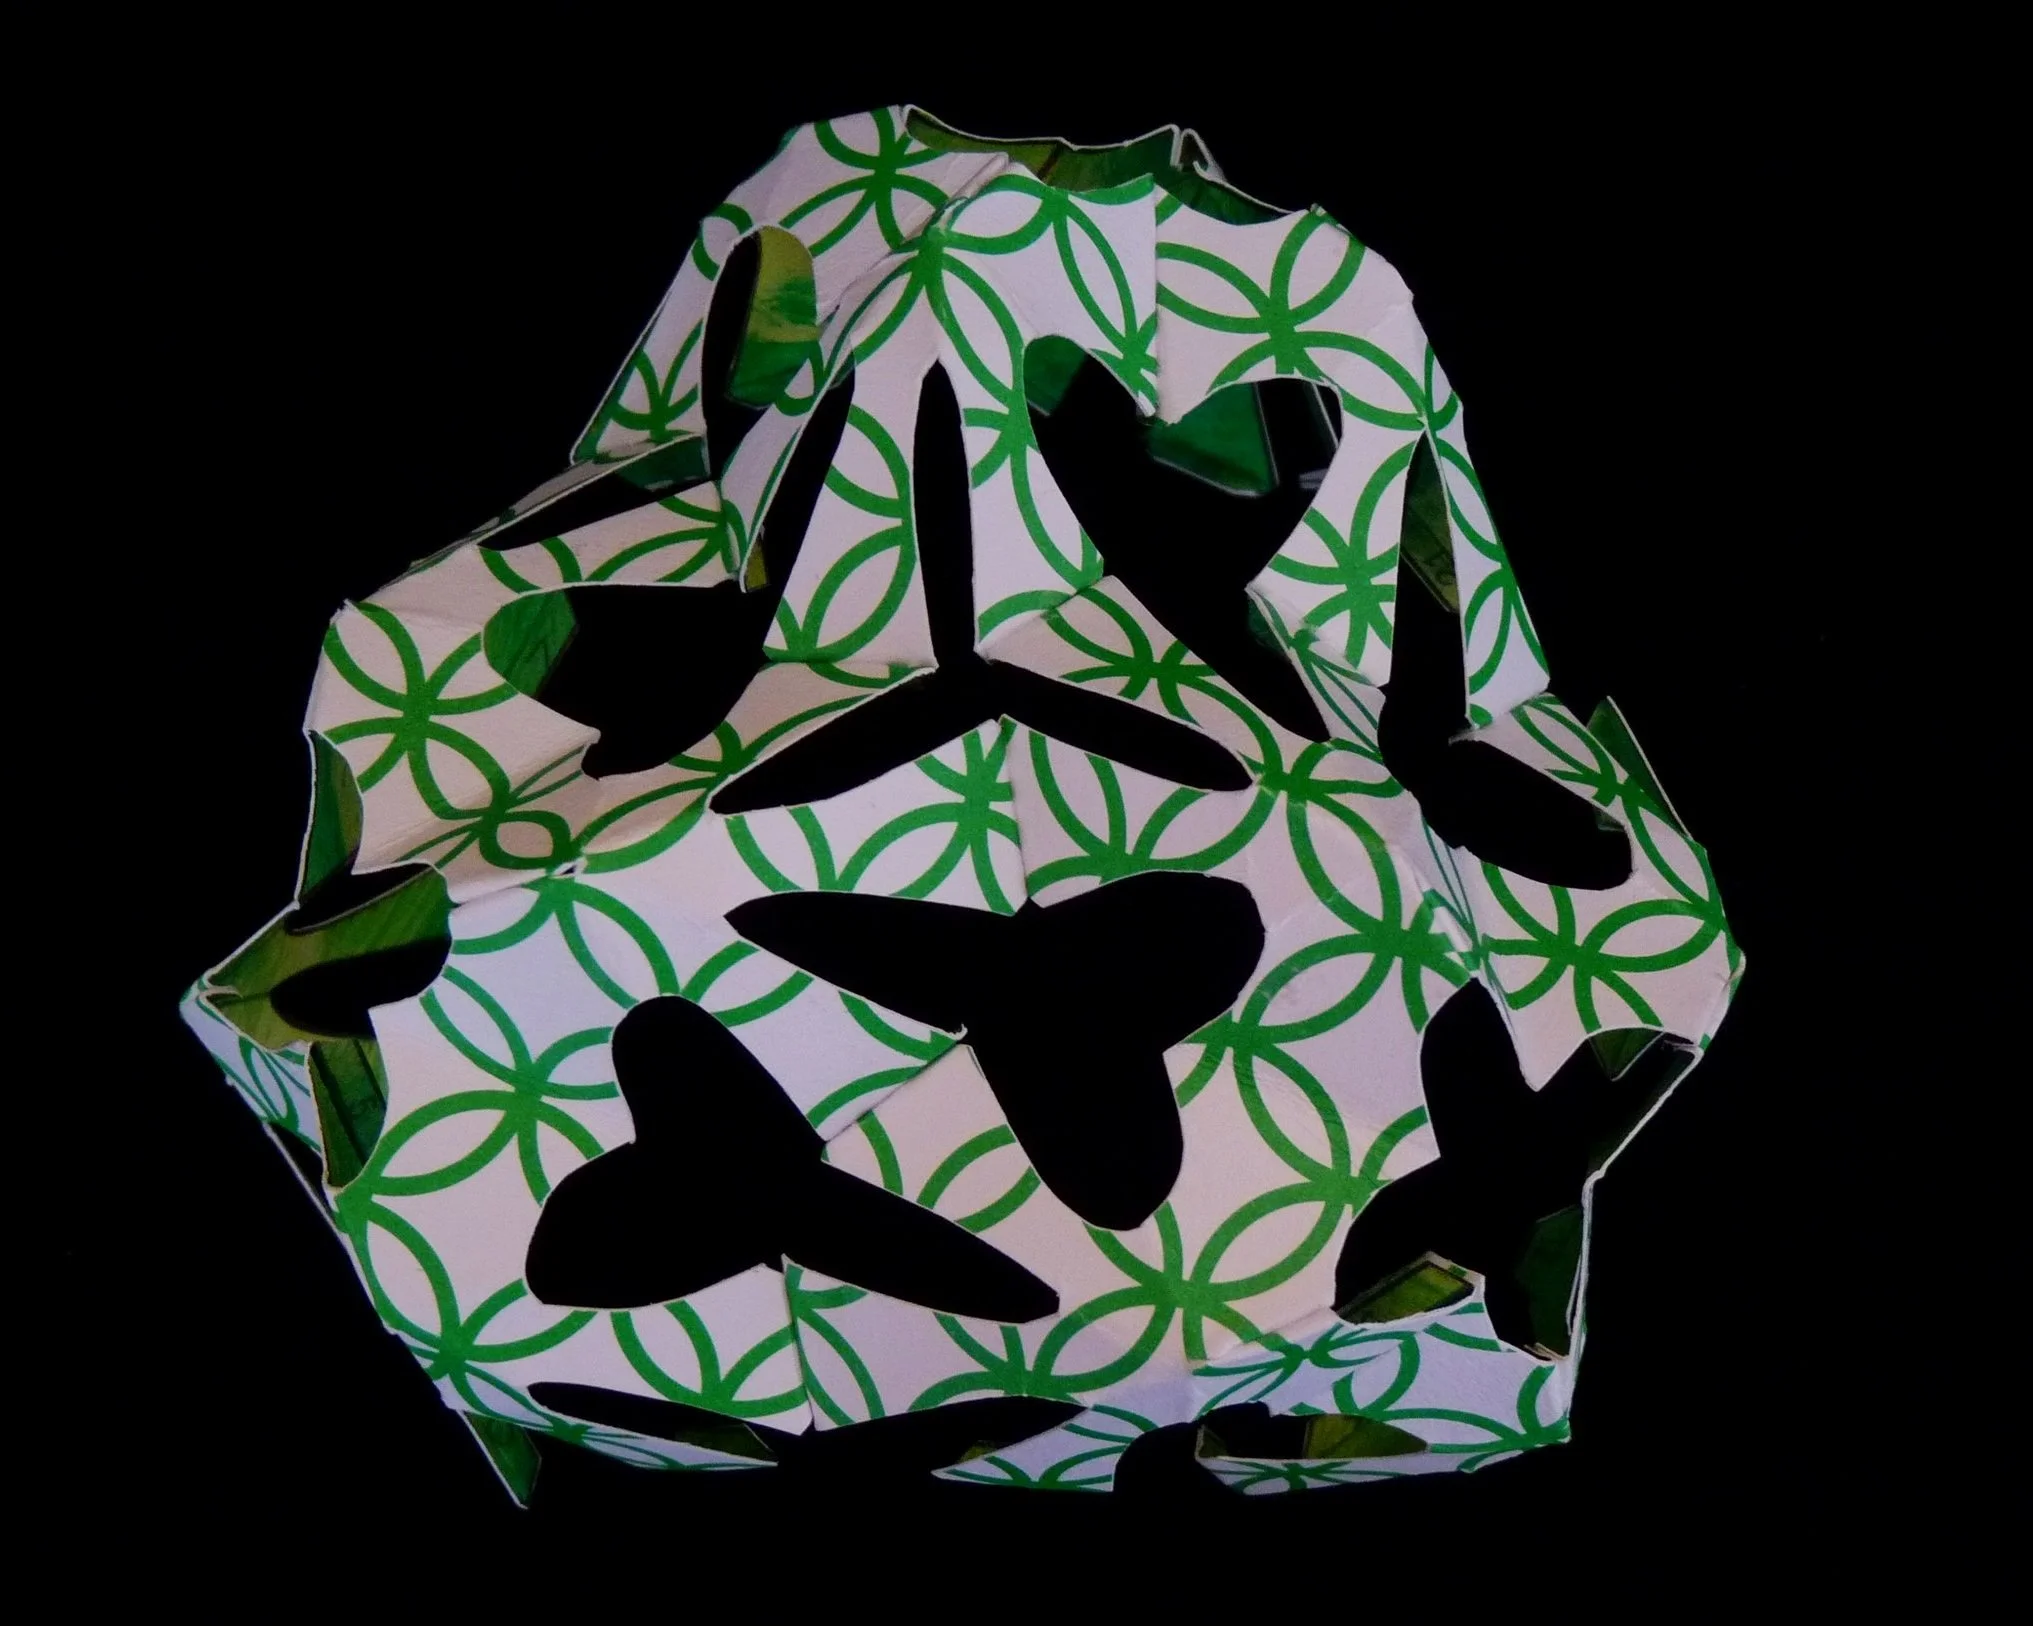
Photo 10. Outside of Project after Step 6
Step 7
Connect Part 4 to the project. Glue Flaps K, L, M, N, O, and P on Part 4 to the similarly labeled flaps on the partly assembled project.

Photo 11. Inside of Project after Step 7
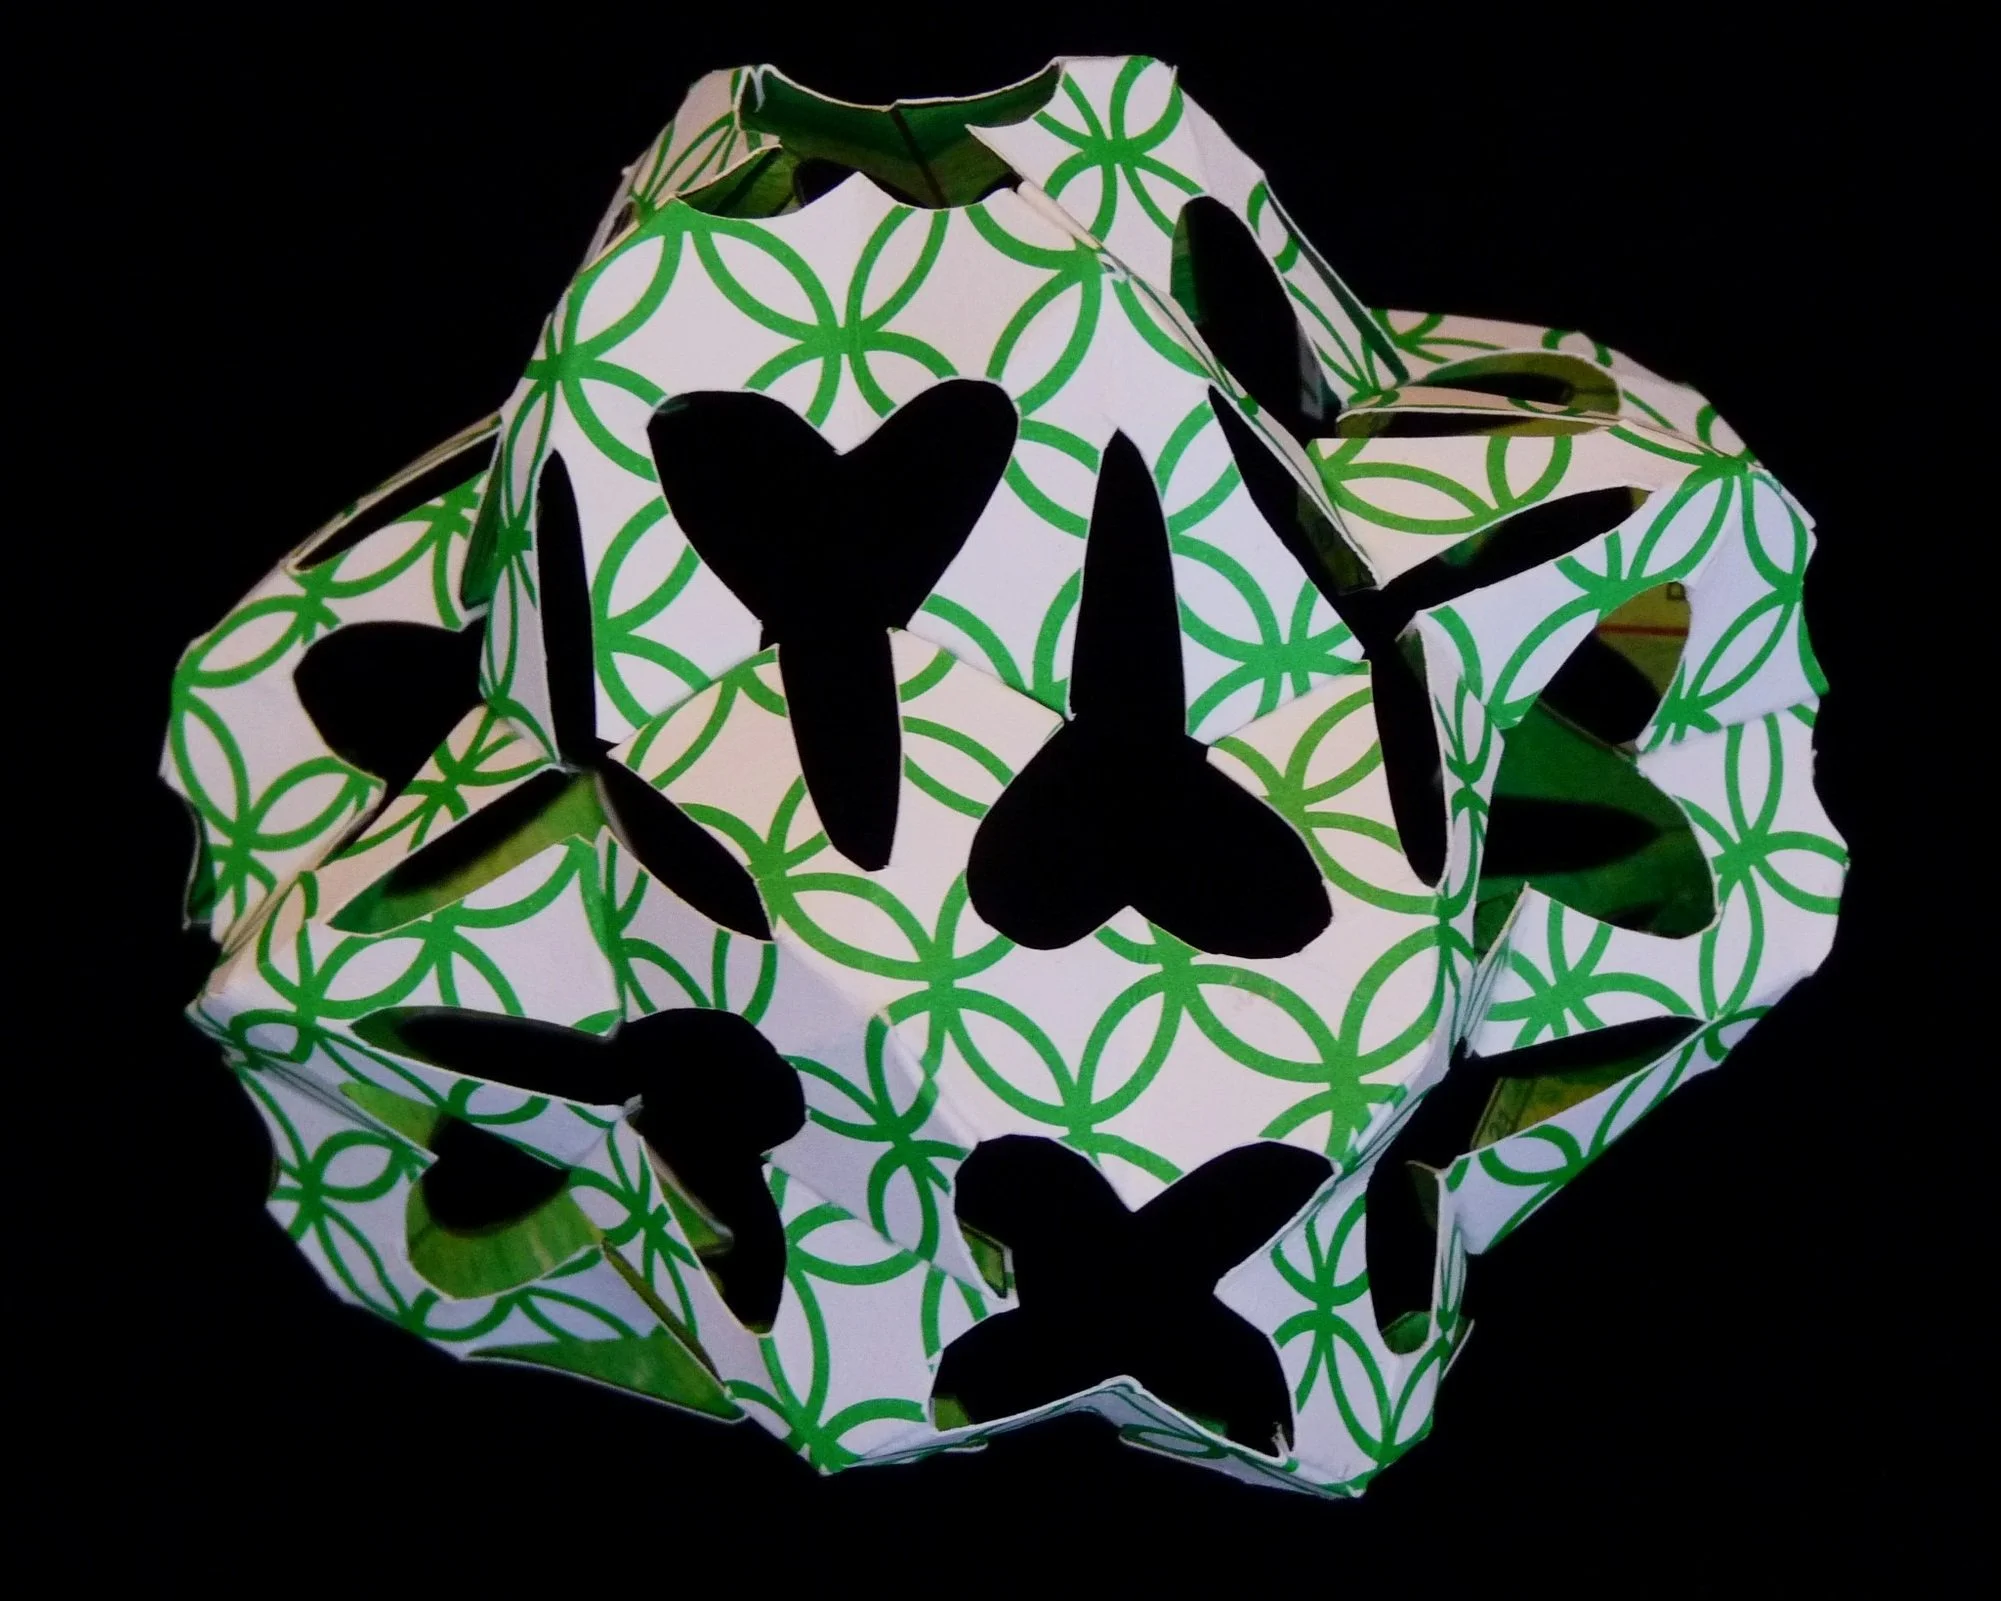
Photo 12. Outside of Project after Step 7
Step 8
Connect Part 5 to the project. Glue Flaps Q, R, S, T, U, V, W, X, and Y on Part 5 to the similarly labeled flaps on the partly assembled project. Complete the project by connecting Part 6. Glue Flaps 11, 12, 13, 14, 15, 16, 17, 18, 19, 20, 21, and 22 on Part 6 to the similarly labeled flaps on the partly assembled project.
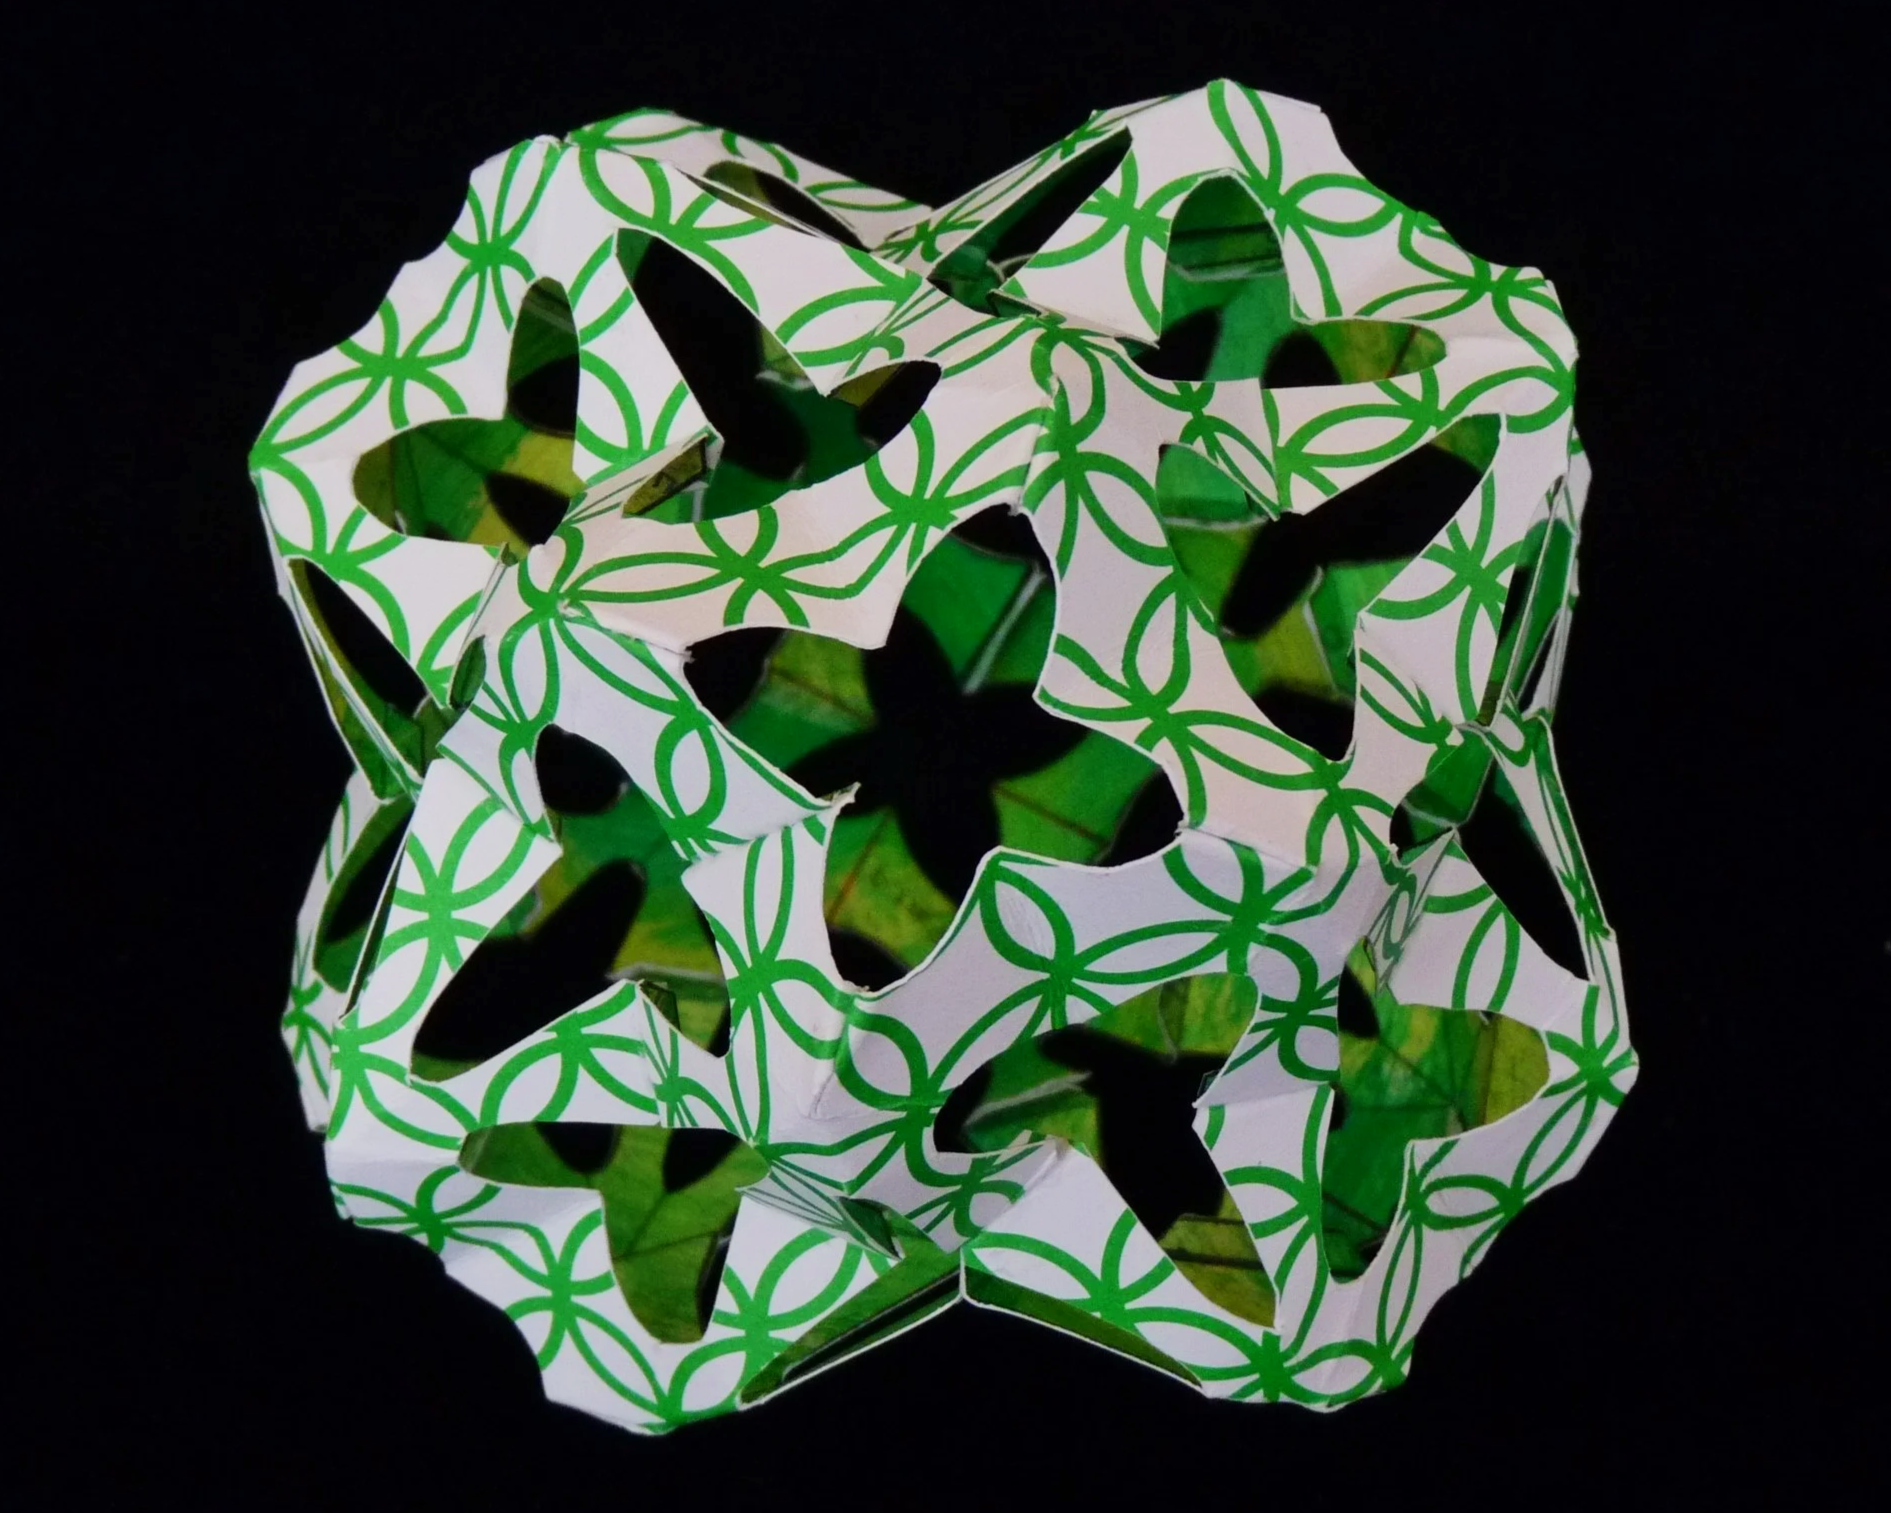
Photo 13 . Completed Icositetrahedron - View 1
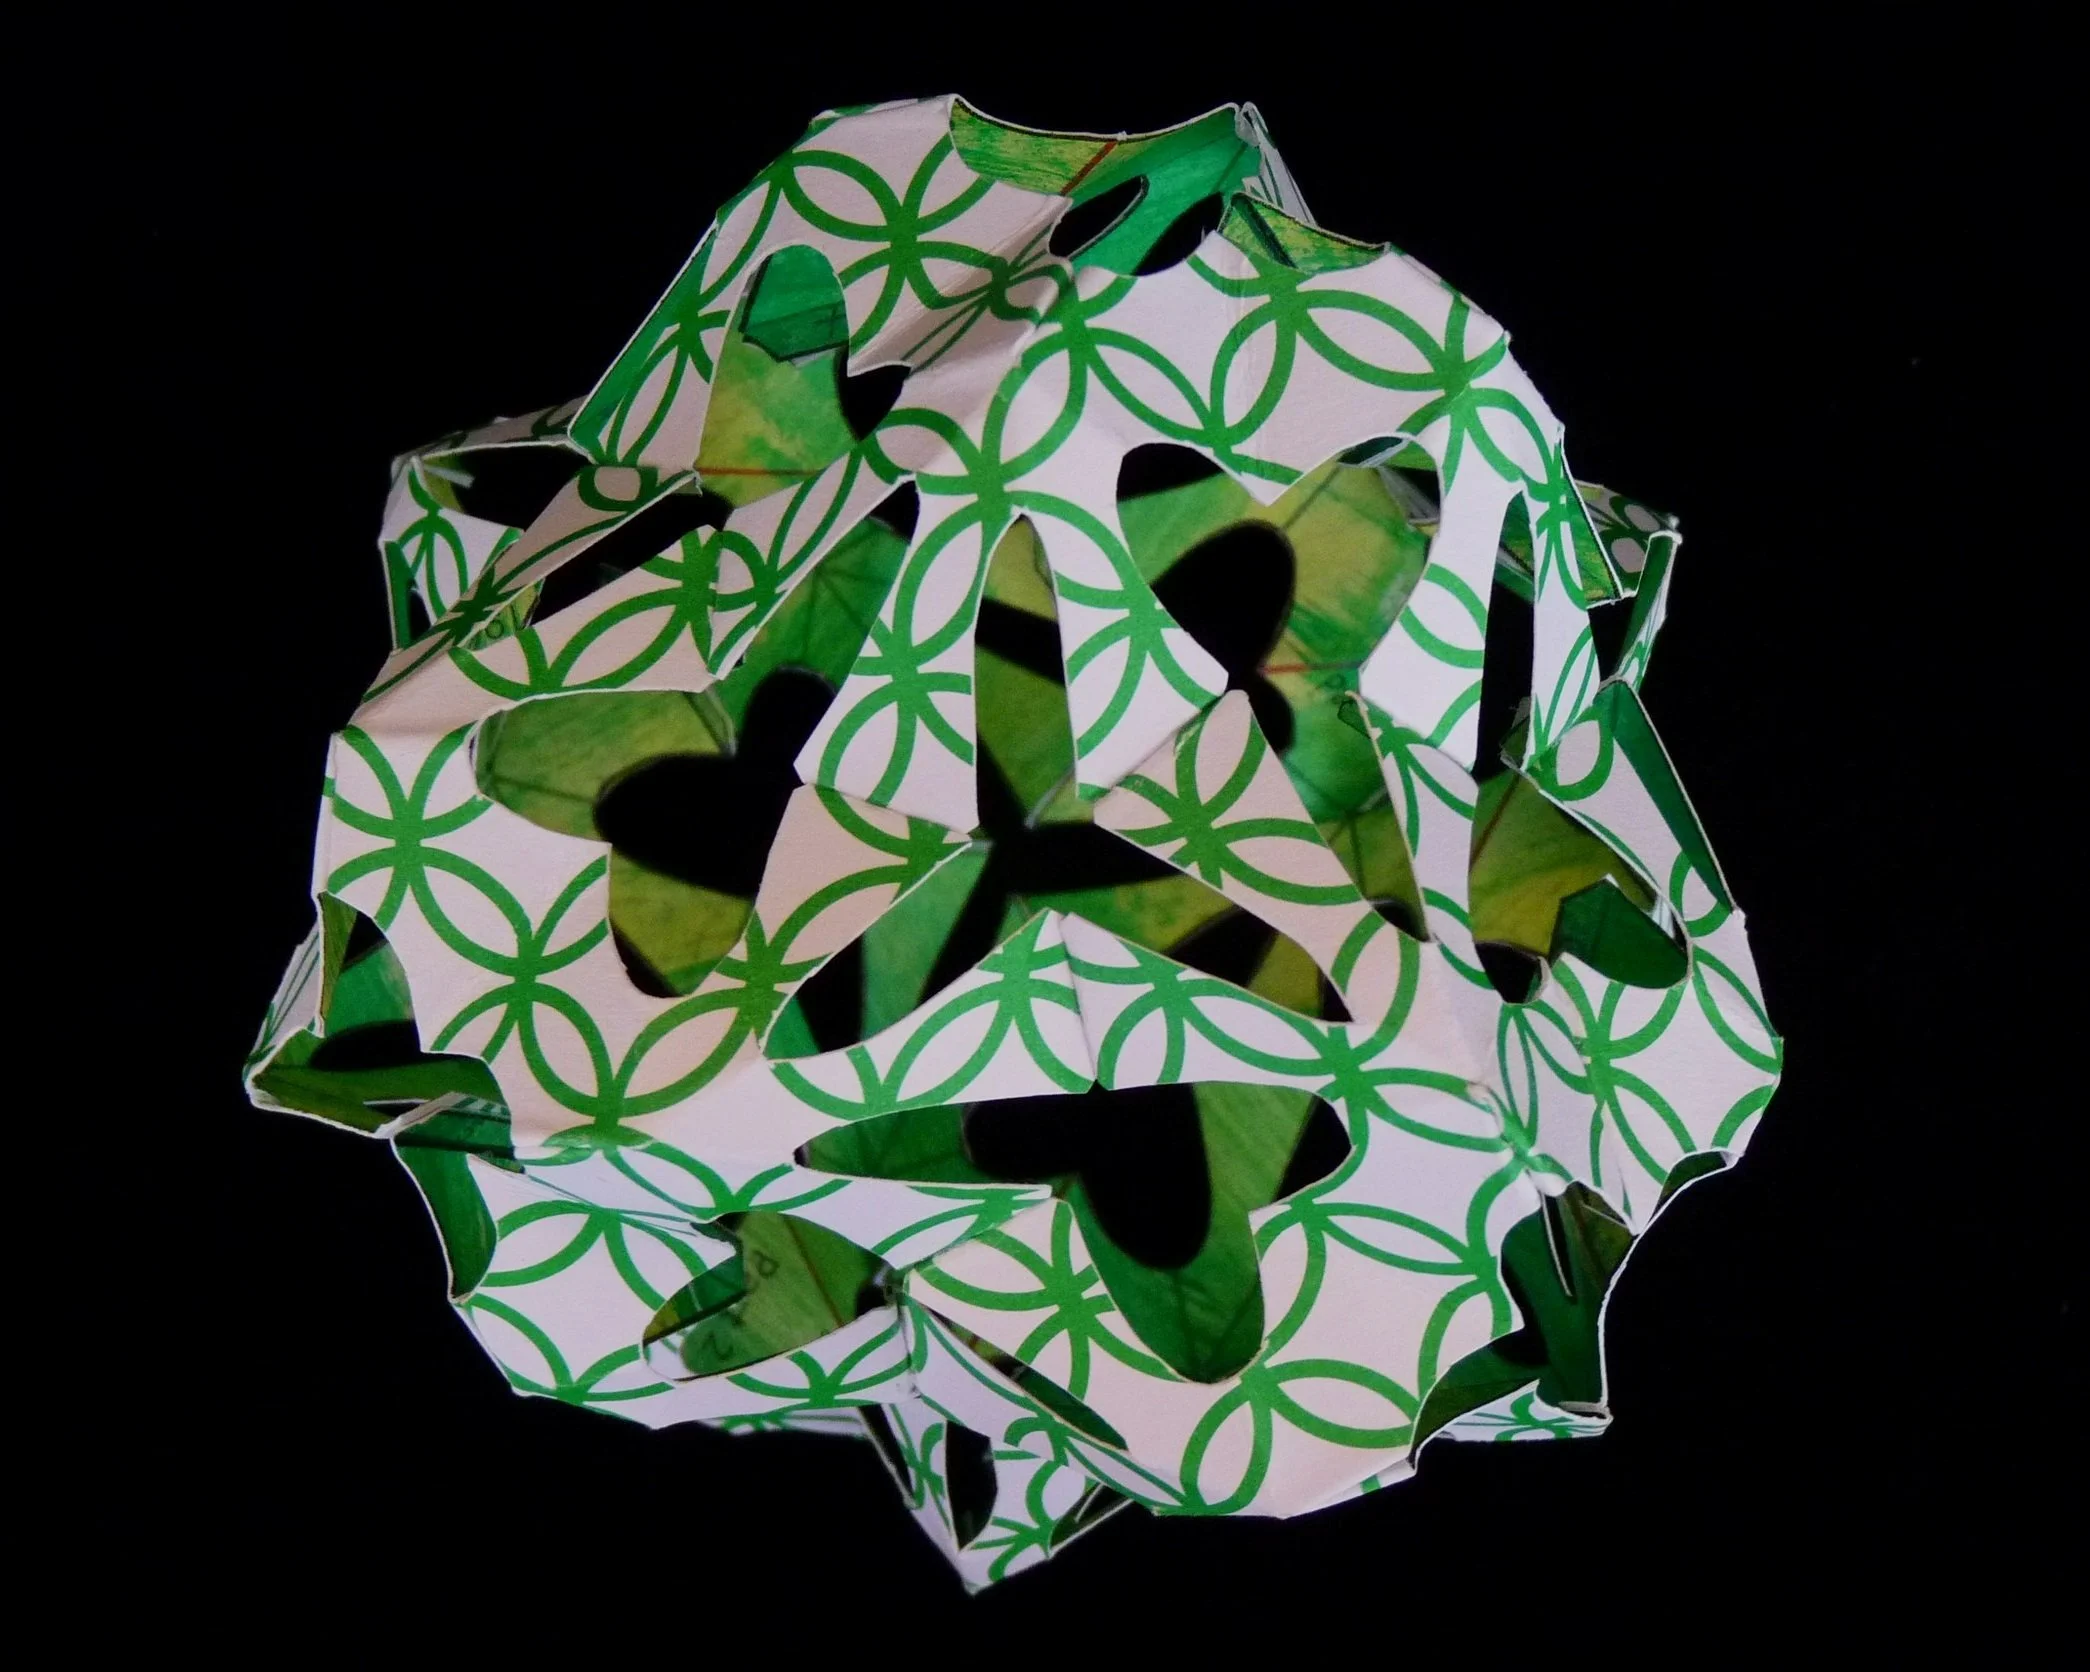
Photo 14. Completed Icositetrahedron - View 2
Additional Examples
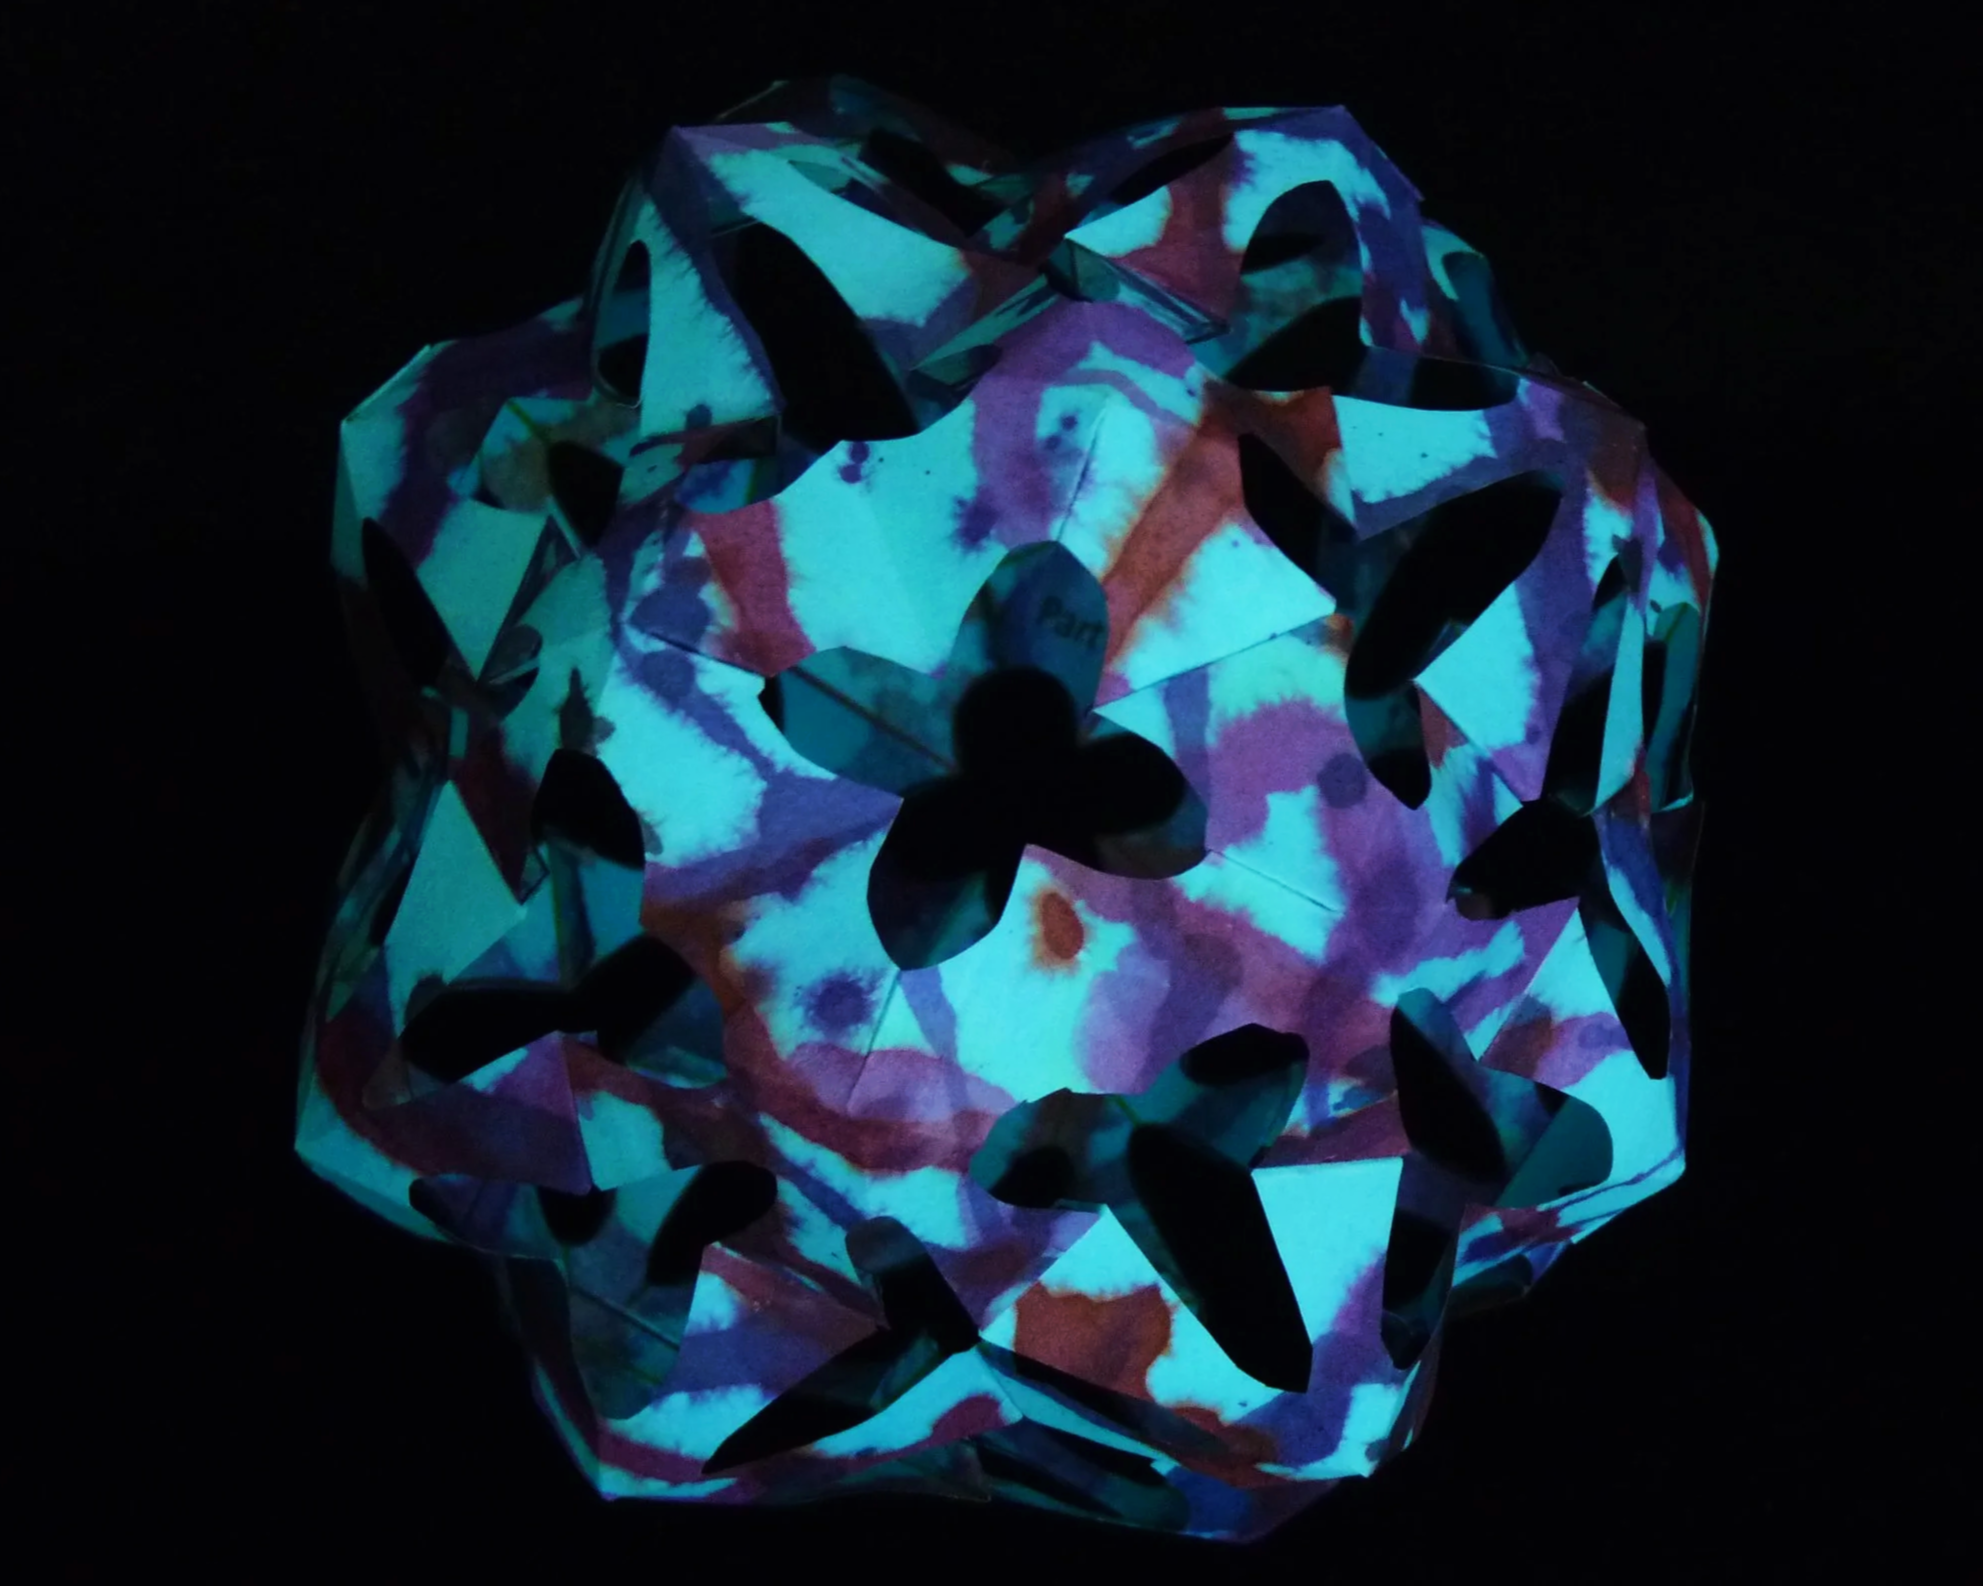
Photo 15. Second Completed Icositetrahedron - View 1

Photo 16. Second Completed Icostetrahedron - View 2

Photo 17. Third Completed Icositetrahedron - View 1

Photo 18. Third Completed Icositetrhedron - View 2